You are using an out of date browser. It may not display this or other websites correctly.
You should upgrade or use an alternative browser.
You should upgrade or use an alternative browser.
What Have You Done To Your Van Today?
- Thread starter Daneeyre
- Start date
-
- Tags
- mod modification mods retrofit
Nice tidy job by the looks of it bud
Thanks, I'm not usually the patient type but pleased with how it came out.
Back on thread...
I fitted an inductive phone charger in the van today. Works a charm! (excuse the radio...)
T6 wireless Phone charge
View attachment 75274
where did you get the charging unit? Can you get different power levels to go through different thicknesses of material?
where did you get the charging unit? Can you get different power levels to go through different thicknesses of material?
It is just a standard USB driven home charging pad. I had a look at a few and the Juice models seemed as slim as any and reasonably cheap at £20. I wanted one for home anyway (after our cats chewed the cable on my last one...) so it would be no loss if it didnt work.
Juice, like many others, offer 5 and 10 watt pads so I opted for the 10 to give it the best chance of working. Out of the van it was capable of fast charging but under the (very thin) plastic of the cubby hole it only registers standard charging. Admittedly I haven't tried with the phone case off which may gain just enough.
I was hoping to find a 12v pad for direct connection to the van but a slim profile was the main consideration. I have a small 12 - 5v transformer connected via piggy back fuse to the ignition live section of the centre fuse box.
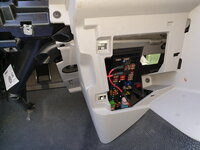
View attachment 75763
Nice one, want to do this with the Center cubby on my comfort dash!
That was my plan but the phone has to go in far enough to be centred on the charging pad. There wasn't enough room on my non comfort dash in any of the other cubby holes and none would have held the pad. Hopefully you'll have the space.
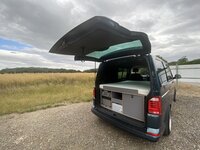
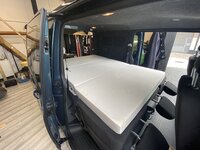
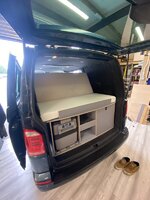
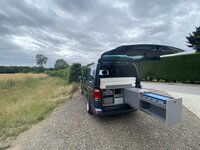
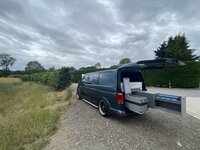
Today was finally install day!!
All went in pretty smoothly, well happy with the final result!!!
Bed mode:
View attachment 75720
View attachment 75716
Seat mode (Faces our the rear door for lunch with a view):
View attachment 75717
View attachment 75719
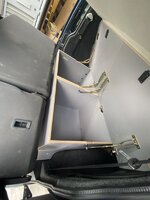
Plenty of storage:
View attachment 75726
Kitchen setup (bit of worktop spaces and double burner
View attachment 75727
That's absolutely bloody brilliant! Really well thought out piece of furniture. All I managed to do today was go to quickfit and get a slow puncture fixed.!lol
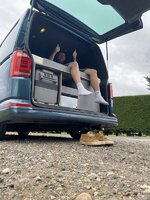
Fridge out:
View attachment 75732
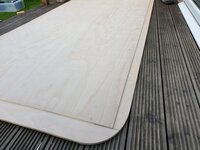
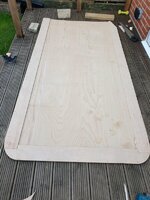
I made the easy part of my Halo roof...
How are you fixing that to the roof? Trying to figure out how I am doing it.
Is that a 10x5 ply cieling or did you get away with an 8x4?
How are you fixing that to the roof? Trying to figure out how I am doing it.
Is that a 10x5 ply cieling or did you get away with an 8x4?
Its 8 x 4 which is 2 inches short each side and about 3 1/2 inches at the back. This is taken up/covered by the rim piece so no need for 10 x 5. If I could get a 10 x 5 locally and fit it in the van I may have gone big but I'm confident that this way will work. The first picture shows the rim "extensions" and together is the same size as both panels in my LWB.
It will be screwed in place then covered in Suedeliner. Led strips around the perimeter then the top "Halo" piece, covered in matching carpet, on top of that. There will be 6 Led spots in the rim.
The plan is no for no visible fasteners but I'll let you know if it works!
All in it should be about £100 for all materials and lights which is a far cry from what they sell the Halo kits for!
Thanks for the detailed reply, I will look forward to seeing how it turns out!
Well, not today but finally replaced the front brake discs and pads on the LHS after doing the RHS in that really hot Thursday last week. Had to pack it in, it was just too hot.
My daughters' partner got me a Ferodo set, so I now have a Brembo set for the back when I decide to do them. The biggest pain, is loosening the caliper bolts, had to use a long breaker bar!!!
My daughters' partner got me a Ferodo set, so I now have a Brembo set for the back when I decide to do them. The biggest pain, is loosening the caliper bolts, had to use a long breaker bar!!!
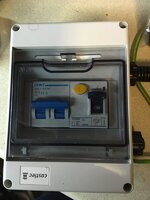
Swapped the single pole mcb in my cu to a double pole mcb, thanks to @The Bear78 for spotting my mistake, ready for fitting this weekend

Will this count as the easiest thing ever done to a van on this thread?
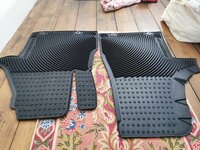
Got new mats, "fitting" them later.
View attachment 75966
Steady on buddy. Take your time, have a break half way through if you need to.
Similar threads
- Replies
- 76
- Views
- 6K
- Replies
- 28
- Views
- 3K
- Replies
- 37
- Views
- 6K

