T6 Midroof LWB Wheelchair Campervan Build

Bryn23

Senior Member
VIP Member
T6 Guru
The Wheelchair Camper Build


Well, I’ve read some great build reports on this site, so its only fair that I add mine as I’ve learn’t a lot from them, as my build is different to almost all as it requires it to be used by me, a Paraplegic, there are a lot of things that I have to do to make it a little easier.


This may help other wheelchair bound people, as there is limited info out there for these types of campervans.


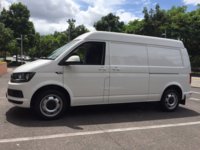
The Vehicle I’ve got is a 3200 KG GVM Mid Roof LWB, 3200kg GVM models are by special order here in Australia, but due to the Side entry Lift weighing in at 140Kg it made sense to up it to 3200kg GVM over the normal 3000kg GVM model here, as it doesn’t take much to overload a camper.


So back to the Vehicle, I ordered the following factory options in July and it arrived in Feb


*Candy White, wanted Pure Grey, but you order a Midroof you are limited to a few colours,… Still white is a better idea for a hot climate.


* Second Battery with Relay Cut-out (cheap option under the seat and frees up space, wasn’t 100% of this when I ordered it, but its there now)

*Reversing Camera (Once you have used these cameras, you can’t go back)

*Composition Media (Not cheap, but has App Connect)

*Interior Comfort Pack (Captain chairs and a heap of extras to make it more than a panel van)

*Appearance Pack (Wanted it look more refined than a panel van, and I hate faded black plastic)

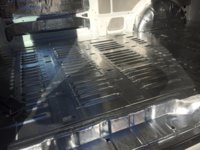
*Wooden Floor and High sided Linings (I will be using them as templates for ply, as I’m not happy with them, I’ll look at sell the factory trims )


The Aftermarket options


*The Braun K90 Lift is mounted under the sliding door with a smaller 70 litre diesel tank as the 80 litre tank won’t work with the lift.


*I’ve decided to get a electric hand break installed, so that will get rid of the issue of lowering the handbrake for a swivel seat and other issues of reaching down to activate it.


Swivel seats for both the drivers and passenger seat, a engineer has installed these, as you are not legally allowed to fit a swivel seat here, unless its done by an engineer and modification plated, Rock n Roll beds are the same, if you want to use them as a seat.


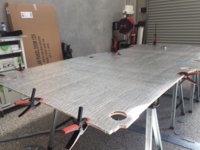
I did my trade as a Cabinetmaker/Shopfitter before my injury and have studied Fine Furniture under a master craftsman for a year and also Residential Drafting at Tech, so I’d like to think I should be able to do a decent quality job, cabinet wise, it won’t be easy, as moving 8x4 sheets of ply is a pain, at least I can break them down with the Festool plunge saw.


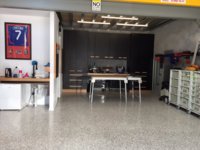
I’ve got a small industrial shed to leave the van and work on it, rain or shine, so that’ll help when things are in pieces and not having to put it back together to drive it home.


So now for the spec’s of the build, I’ve had over a year to design what I want, while I’ve be waiting for it to be built and delivered and what I came up with will work for me and my situation, I tend to analyse everything to much.


The Ply will be a 17mm light weight laminated plywood, it comes in at 8Kg per square meter, although I do plan on doing a full scale normal working model mock up to ensure it works for me. I’d rather be able to change the final design than be stuck with a camper that annoys me and I can use it as a template.


I’ll be starting with a angled cabinet behind the drivers seat to allow easier access to transfer into the drivers seat


The fridge is a Waeco CRX65 and a Smev 8000 series sink with glass lid above the fridge, I’ve decided not to install a cooker inside as we cook outside and its not as rainy here, and I hate the way the food smells stay in the fabric.


I decided to use Votronic for the electrics, I have the Votronic Jupiter 100A 12 volt panel, that has solar monitoring, water tank monitoring, USB ports, battery monitoring, inside and outside temp sensors. and under that will be a Voltronic main switch for fridge on/off, 12 volt socket, 4 switches and a blank plate for another switch later on.


The wardrobe will be to the ceiling, and I’m leaning toward sliding doors over tambour doors, haven’t finalized that decision yet and at the end of the wardrobe, ill have a lower integrated cabinets with a retractable shower hose.


The Bed is a 1200mm RIB with 200mm slider option, so I can move the bed mounting frame closer to the tailgate to allow more space, there are two openings to allow for Drawers, so I’ll have a potta potty on a heavy duty drawer unit for the wife and within the drawer space, a divider for toilet paper and chemicals.


As for the roof, I have a Heki 700mm x 400mm Skylight, sitting in the workshop and I just have to make up a timber support internal and a HPDE external mount as the roof is curved, and I’d like to keep the skylight edge parallel and get a good seal.


I have/Had a 250 watt solar panel, but when I opened it on the weekend it was broken and the glass was smashed L I should have opened the box when it arrived a few months ago.. my mistake there, the box was perfect and I didn’t check it at the time, so its too late to get it replaced, at least it was a cheap panel!!


So I will look at getting some semi flexible panels instead, I’ve got my eye on 3 x 110 watt panels as that will work with the Votronic 350 watt solar reg I have lying around.


As for water tanks I have the CAK drivers door and waster water tanks and John Guest hose and fittings sitting there to be installed.


I have 95% of the gear ready to install sitting in the workshop that I’ve been collecting over the last 12 months.


So I better start building it, hopefully it’ll be done before Xmas.

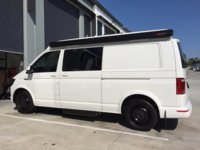
The Van after its trip home from the dealer.
IMG_0528.JPG
 
I have also had the Fiamma F45S awing fitted, had to get it refitted as the first installer used a spirt level to fit it :eek: it was over 20mm out, and i couldn't live with it.

I also primed and painted the Fiamma fibreglass brackets before they were installed.

I had to show the other mob that refitted it to measure of the sill (straight edge) as they were going to measure of the ground :rolleyes:...

They couldn't understand, that suspension moves, if it is parallel with the van, then it will look straight when loaded or unloaded.

Most mobs here don't deal with camper vans, as its mostly caravans here with straight roofs.

Got the Windows installed, they have a steel mesh, so i can leave the windows open, i have had the van tinted and while i was there i had the paint work corrected and paint protection applied (Ceramic "Opti-Coat" coating)

I also got the rims sand blasted and powder coated in Satin Black, I like the way they came out and had the Cargo Vectors 2 put back on.

I plasti dip the lift in matt black, as i wasn't a fan of the aluminium, its only been on for a few days, but its easy to touch up and it kind of disappears in the shadow.

Anyhow here it is.

IMG_1091.JPG
 
The Wheelchair Camper Build


Well, I’ve read some great build reports on this site, so its only fair that I add mine as I’ve learn’t a lot from them, as my build is different to almost all as it requires it to be used by me, a Paraplegic, there are a lot of things that I have to do to make it a little easier.


This may help other wheelchair bound people, as there is limited info out there for these types of campervans.


The Vehicle I’ve got is a 3200 KG GVM Mid Roof LWB, 3200kg GVM models are by special order here in Australia, but due to the Side entry Lift weighing in at 140Kg it made sense to up it to 3200kg GVM over the normal 3000kg GVM model here, as it doesn’t take much to overload a camper.


So back to the Vehicle, I ordered the following factory options in July and it arrived in Feb


*Candy White, wanted Pure Grey, but you order a Midroof you are limited to a few colours,… Still white is a better idea for a hot climate.


* Second Battery with Relay Cut-out (cheap option under the seat and frees up space, wasn’t 100% of this when I ordered it, but its there now)

*Reversing Camera (Once you have used these cameras, you can’t go back)

*Composition Media (Not cheap, but has App Connect)

*Interior Comfort Pack (Captain chairs and a heap of extras to make it more than a panel van)

*Appearance Pack (Wanted it look more refined than a panel van, and I hate faded black plastic)

*Wooden Floor and High sided Linings (I will be using them as templates for ply, as I’m not happy with them, I’ll look at sell the factory trims )


The Aftermarket options


*The Braun K90 Lift is mounted under the sliding door with a smaller 70 litre diesel tank as the 80 litre tank won’t work with the lift.


*I’ve decided to get a electric hand break installed, so that will get rid of the issue of lowering the handbrake for a swivel seat and other issues of reaching down to activate it.


Swivel seats for both the drivers and passenger seat, a engineer has installed these, as you are not legally allowed to fit a swivel seat here, unless its done by an engineer and modification plated, Rock n Roll beds are the same, if you want to use them as a seat.


I did my trade as a Cabinetmaker/Shopfitter before my injury and have studied Fine Furniture under a master craftsman for a year and also Residential Drafting at Tech, so I’d like to think I should be able to do a decent quality job, cabinet wise, it won’t be easy, as moving 8x4 sheets of ply is a pain, at least I can break them down with the Festool plunge saw.


I’ve got a small industrial shed to leave the van and work on it, rain or shine, so that’ll help when things are in pieces and not having to put it back together to drive it home.


So now for the spec’s of the build, I’ve had over a year to design what I want, while I’ve be waiting for it to be built and delivered and what I came up with will work for me and my situation, I tend to analyse everything to much.


The Ply will be a 17mm light weight laminated plywood, it comes in at 8Kg per square meter, although I do plan on doing a full scale normal working model mock up to ensure it works for me. I’d rather be able to change the final design than be stuck with a camper that annoys me and I can use it as a template.


I’ll be starting with a angled cabinet behind the drivers seat to allow easier access to transfer into the drivers seat


The fridge is a Waeco CRX65 and a Smev 8000 series sink with glass lid above the fridge, I’ve decided not to install a cooker inside as we cook outside and its not as rainy here, and I hate the way the food smells stay in the fabric.


I decided to use Votronic for the electrics, I have the Votronic Jupiter 100A 12 volt panel, that has solar monitoring, water tank monitoring, USB ports, battery monitoring, inside and outside temp sensors. and under that will be a Voltronic main switch for fridge on/off, 12 volt socket, 4 switches and a blank plate for another switch later on.


The wardrobe will be to the ceiling, and I’m leaning toward sliding doors over tambour doors, haven’t finalized that decision yet and at the end of the wardrobe, ill have a lower integrated cabinets with a retractable shower hose.


The Bed is a 1200mm RIB with 200mm slider option, so I can move the bed mounting frame closer to the tailgate to allow more space, there are two openings to allow for Drawers, so I’ll have a potta potty on a heavy duty drawer unit for the wife and within the drawer space, a divider for toilet paper and chemicals.


As for the roof, I have a Heki 700mm x 400mm Skylight, sitting in the workshop and I just have to make up a timber support internal and a HPDE external mount as the roof is curved, and I’d like to keep the skylight edge parallel and get a good seal.


I have/Had a 250 watt solar panel, but when I opened it on the weekend it was broken and the glass was smashed L I should have opened the box when it arrived a few months ago.. my mistake there, the box was perfect and I didn’t check it at the time, so its too late to get it replaced, at least it was a cheap panel!!


So I will look at getting some semi flexible panels instead, I’ve got my eye on 3 x 110 watt panels as that will work with the Votronic 350 watt solar reg I have lying around.


As for water tanks I have the CAK drivers door and waster water tanks and John Guest hose and fittings sitting there to be installed.


I have 95% of the gear ready to install sitting in the workshop that I’ve been collecting over the last 12 months.


So I better start building it, hopefully it’ll be done before Xmas.

The Van after its trip home from the dealer.

View attachment 13575

Thanks for the write up I can't wait to see the pictures.
I am currently working on my van I hope to have it ready early next year just too busy at work at the min.
She has her pop top being fitted next week which will enable me to trim out.
So far I have installed a leisure battery,
Eberspacher nite heater, Swivel front seat,
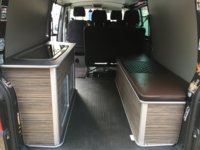
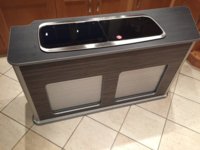
And made my removable kitchen pod and seat bench.
On the tambour doors they do look nice but they do rattle a bit!

IMG_8790.JPG

IMG_8477.JPG
 
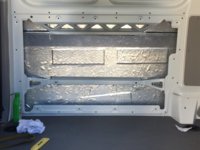
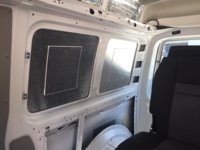
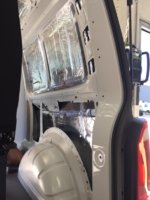
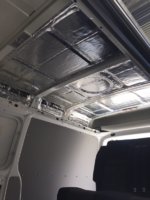
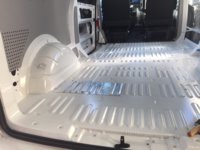
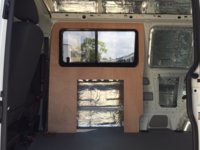
I have also started on the insulation and sound deadening.

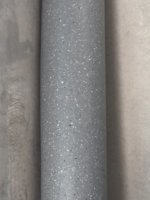
I am using Resomat sound deadening mat and 10mm reflective closed foam onto of the resomat in the walls and roof.

The floor has Resomat and then a 4mm Closed cell reflective Thermalbane insulation on top.

What a pain, it took me 3 days to do the just floor as i had to crawl around to measure and install, not looking forwards to doing the cab area :(

At least with the floor insulation, i just routed it out using the floor ply as a template.

I still have the tailgate to do and the lower sliding door to do, I've already gone through 4 boxes of 3.5 Sqm sound deadening...

But its made a huge difference, and I'm waiting for another box to arrive.

IMG_0684.JPG

IMG_0687.JPG IMG_0703.JPG IMG_0682 fixed.jpg IMG_0839.JPG IMG_0843.JPG IMG_0845.JPG
 
While I'm waiting for the Sound deadener to arrive, I've started on the ply trims to keep myself busy.

The 4mm ply arrived this morning and I've been busy making a 3mm MDF template for the drivers side with a window cutout, did that and now i just have to trace the rest factory panels and cut them out.

I will be using the same 4mm Closed cell insulation that i used on the floor, for the interior panels before i carpet them, as i wanted a little bit of plushness when sleeping against the wall and also it provide another thermal break between the van skin insulation and the interior.

I'll look at recessing the hidden fir clips 1mm into the ply panels before i contact the insulation and the fabric on, this should hide the hidden clips.

I have 17 mtrs of 4mm closed foam insulation, a 25 meter roll of Black Stretch Autex Fabric and 4 litres of Sika Clear contact.

Ill have to take some pics tomorrow...

Oh and this arrived at lunch time..

IMG_1103.JPG

I'll be looking at getting the suspension fitted next week.
 
Hey Stuart,

Its coming along nice, i like the removable kitchen and bed its handy when you can still use it to carry large items when needed.

That pop top will come in handy I'm guessing you will carpet it after the pop top install, once you have time of course.

Your right about the tambours, they can rattle a bit, I'm going to look at maybe possibly making my own with a felt guided track and see if that reduces the noise, as most are in plastic guides, which causes a little noise.

It'll depend on how i finally design the rear wardrobe and how much time i have.
 
Interesting, we don't see many Midtops being done and looks like it's being done to a high standard. Looking forward to watching what you do with it :thumbsup:
 
Hey Stuart,

Its coming along nice, i like the removable kitchen and bed its handy when you can still use it to carry large items when needed.

That pop top will come in handy I'm guessing you will carpet it after the pop top install, once you have time of course.

Your right about the tambours, they can rattle a bit, I'm going to look at maybe possibly making my own with a felt guided track and see if that reduces the noise, as most are in plastic guides, which causes a little noise.

It'll depend on how i finally design the rear wardrobe and how much time i have.

The removable units are so I can fit my motorbike in the back and sleep
In the pop top and have some man time!
And yes new ply boards have been cut just need lining and finish off the electrics.
I have also sound deadened most of the rear but I think I will get a lot of benefit when the van is lined out
 
Interesting, we don't see many Midtops being done and looks like it's being done to a high standard. Looking forward to watching what you do with it :thumbsup:

Thanks Andy,

I had a few issues pulling down a poptop, due to being a little short sitting in a wheelchair, and i couldn't reach the tie down clamps, so i decided to look at at a midroof as i needed a little more height than a standard roof, and at the end of the day, we only use the van to drive and sleep in, cooking and relaxing is done outside over here.

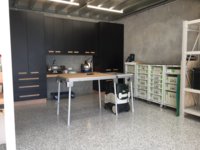
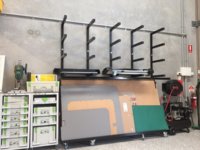
Its taken me a while to start on the van, as i decided to fit out my workshop in my spare time at the start of the year, so i have been busy making workshop cabinets, kitchenette and i just finished welding up the panel and timber racks, painting them in hammertone and installing them.

It just takes longer to do things with a disability, more time working out how I'm going to do it than working, but i get eventually get there and a Duct lifter to move heavy items around makes a huge difference.

The only two things i didn't do is install the mezzanine floor or the expoy flooring.

Just glad i can finally work on the van instead of the workshop.


IMG_0779.JPG IMG_1074.JPG FullSizeRender.jpg
 
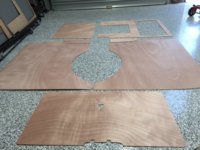
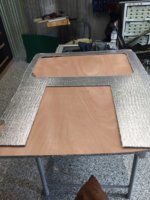
Well i cracked on and cut up the new ply panels today.


IMG_1107.JPG

IMG_1105.JPG
I trimmed the bottom plate a little, a while back before i put the floor back in place.

So i cut a opening in the ply so i can recess the Waeco/Dometic CRX 65 fridge in another 40-50mm.

I need as much room as i can get, so it'll allow me to reduce the width of the cabinets (will look at extra cooling options for the rear of the fridge and i have a few in mind)

I should point out that the panel does sit better when held in place and not leaning against the interior wall.

I had a play around with the fir clips before i headed home, it looks like a 16mm Fostner bit drilled down to the second ply layer and a 8.5mm hole will do the trick for a flush finish and still has a bit of play for the fir clip in case my holes are out a little.

Might look at drilling them tomorrow if i have time.
 
Thanks Andy,

I had a few issues pulling down a poptop, due to being a little short sitting in a wheelchair, and i couldn't reach the tie down clamps, so i decided to look at at a midroof as i needed a little more height than a standard roof, and at the end of the day, we only use the van to drive and sleep in, cooking and relaxing is done outside over here.

Its taken me a while to start on the van, as i decided to fit out my workshop in my spare time at the start of the year, so i have been busy making workshop cabinets, kitchenette and i just finished welding up the panel and timber racks, painting them in hammertone and installing them.

It just takes longer to do things with a disability, more time working out how I'm going to do it than working, but i get eventually get there and a Duct lifter to move heavy items around makes a huge difference.

The only two things i didn't do is install the mezzanine floor or the expoy flooring.

Just glad i can finally work on the van instead of the workshop.


View attachment 13614 View attachment 13615 View attachment 13616

Which country are you in Bryn ?
 
Nice
I have heard the prices for vw's is quite high there?
Not that they are cheep in the uk mind!
 
yeah they aren't cheap here compared to other van options we have here, i can't recall exactly what i paid.

Car prices here are always more here as we are in a small market and as we aren't allow to legally parallel import, we are screwed by the car companies.

having said that, we tend to get more options than the bare bone overseas models on our lower level models, but also saying that, we do get limited accessory options than the UK.
 
Well i decided to change the way i fixed my panels to the van, i was going to use Hidden Fir Clips, but after quite a few broke of after removing a test board, i decided to use a M6 Joint Connecter bolt (17mm flat hex head) and Rivnuts, so 200 Rivnuts and 200 x 25mm long Bolts are on there way from my cabinet consumable supplier, so they should be here tomorrow.

Ill have to etch the bolts and coat them satin/matt black once they arrive to blend into the black carpet.

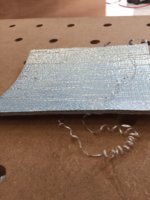
So back to real work, Today i lined the panels with a 4mm closed cell reflective insulation onto the back of the panel, man i hate spraying contact..

So after i attached the insulation and ply panels and rolled them, i grabbed the router and trimmed of the excess material, ill give them a touch up tomorrow by hand, and then they will be ready to carpet.

IMG_1118.JPG

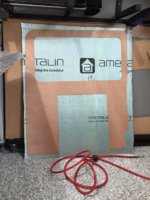
4mm closed cell reflective insulation

IMG_1119.JPG

IMG_1123.JPG

Trimmed panel, still need a final finish to clean it up.

All panels are done, the rest of the sound deadener turned up today, so ill start on the tailgate tomorrow.

Picked up some Commercial vinyl (3000mm x 1800mm) from the flooring shop down the road, it'll do the job, and it was free as it was an offcut from a larger job :)

IMG_1115.JPG

I was after something greyish and lighter in colour as I've got black carpet, and this was the best i had to choose from.

Going to wait a while, until i line the panels with carpet, its around the 30-33 degrees at the moment and Thursday is expected to be 37 degrees, so I'm going to wait until it settles, as the contact dries too quick in the mid 30's and its too bloody hot.

Cheers
 
Great thread with lots of interesting detail - looking forward to seeing pictures of the completed conversion and the travels it enables.
 
Nice threat, it's interesting to see different designs and ideas. I'm also really excited to see this Seikel kit and hear some reviews. Watching this thread to see how your van progresses. :thumbsup:
 
Well i had the Seikel "Maxi" HD lift kit installed today :D

First impressions, it sits a lot higher in the rear, about 50mm and around 35mm in the front, but that is with about 200kg load and Seikel states it should have 500kg at all times for the HD.

So it should settle once the suspension has a few more km on it and the fit out finished.

I'll have to check with my before measurements with the new measurements for a more accurate report.

I didn't measure it properly today as its bloody hot, it hit close to 37 degrees, it was hotter 30 km down the road, where it was 39.7 degrees according to the government weather agency.

Glad i took the day off, nothing worse than working in a steel shed in that heat:eek:

Anyhow back to the suspension, you notice that you sit higher while driving, and it appears to handle a lot better in the corners, so far so good and thats with a light load.

Ill have to takes some after lift photos once i give it a wash and the heat dies down.
 
Back
Top