You are using an out of date browser. It may not display this or other websites correctly.
You should upgrade or use an alternative browser.
You should upgrade or use an alternative browser.
T6 Midroof LWB Wheelchair Campervan Build
- Thread starter Bryn23
- Start date
So i decided to drill out the lining holes to 9mm with the cordless and and also the vacuum to catch the swarf.
Used red oxide primer on the holes and set upon installing over a 100+ of the rivnuts, a time consuming job and when the temperature is 37 degrees outside it was tough.
I've got to drill out a about 5 faulty rivnuts, and redo them as they won't accept a screw all the way through.
I had to order a cheap rivet gun type tool to do the remaining rivnuts, that i can't to with my big rivnut installer, due to space constraints
hopefully that will arrive next week.
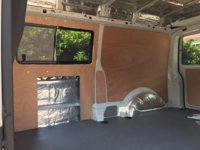
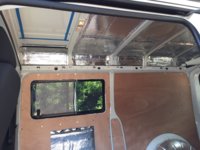
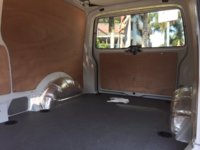
Drilled out the ply panels i insulated during the week and fixed them in with the 25mm long brass coated bolts, it all fits so I'm leaving it over night to curve the rear quarter panels a little before carpeting.
The raw ply looks quite nice with the brass heads, ill have to leave them in oven cleaner to etch them over the weekend so i can remove the brass coating and paint them satin black next week.
hopefully ill crack on tomorrow and carpet the panels.


Looking great! really enjoying watching the progress. Keep the reports & pictures coming 
Nice Festool and Hammer collection BTW. I am partial to a bit of green myself

Nice Festool and Hammer collection BTW. I am partial to a bit of green myself

Looking great! really enjoying watching the progress. Keep the reports & pictures coming
Nice Festool and Hammer collection BTW. I am partial to a bit of green myself
Cheers,
It is nice using tools that work, I've been using the green since it was Festo when i was cabinetmaking and shopfitting.
Most of that green gear is over 10 years old now, and still giving me no issues.
Im hoping to get a Hammer K3 Winner next year once I've got the van out of the shed and i can afford it.
It was 21-23 degrees today, it was a lot nicer to work than mid thirties.
I managed to get my wife in to help with the carpeting, as its a pain to lay large panels by yourself.
Got the tailgate panel, drivers side mid and quarter panel done
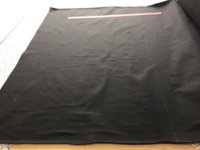
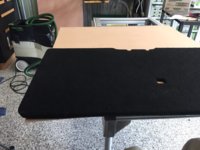
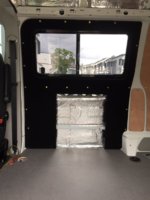
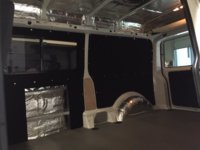
Now i just have to do the sliding door, little panels and passenger quarter panel tomorrow
I'll be doing the chassis lining hopefully in a few weeks, once i finish the sound deadening in the front and run the wiring
I also have to pick up some sodium hydroxide from the hardware to make a liquid solution to etch and remove the brass plating, as the oven cleaner just foams up and is patchy.
Looking forwards to getting the bolts painted satin black, as the brass against the black carpet is not my cup of tea.
Edit: I also remembered to label the carpet direction, so all the panels will look the same hue
I managed to get my wife in to help with the carpeting, as its a pain to lay large panels by yourself.
Got the tailgate panel, drivers side mid and quarter panel done


Now i just have to do the sliding door, little panels and passenger quarter panel tomorrow

I'll be doing the chassis lining hopefully in a few weeks, once i finish the sound deadening in the front and run the wiring
I also have to pick up some sodium hydroxide from the hardware to make a liquid solution to etch and remove the brass plating, as the oven cleaner just foams up and is patchy.
Looking forwards to getting the bolts painted satin black, as the brass against the black carpet is not my cup of tea.
Edit: I also remembered to label the carpet direction, so all the panels will look the same hue

Agreed, love this thread - awesomeStill majorly impressed by this build thread. Very inspiring.

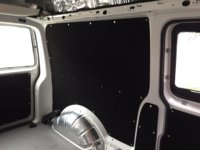
Got around to finishing off the passenger side panels today 
I have to say the New Zealand made "Autex" Flex Carpet is a very good quality liner, its be interesting to see how it lasts, the windows have been tinted with 3M and will protect it from the UV's, so it should be a while until the Black turns Purple
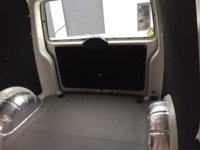
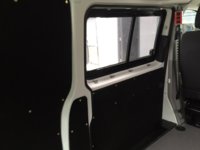
The thickness of the sliding door panel is spot on, any thicker and there would be issues.
I'll look at drilling out the rivets in the sliding door, as i was going to maybe make another panel to hide the curtain rails, as the mountings were already there.
But there isn't a lot of room for the curtain rail and curtain to slide without interference from the panel.
A job for another day
The contact adhesive fumes needs to die out a little in the van, so ill let it air out tonight, while i go and have a few beers

I have to say the New Zealand made "Autex" Flex Carpet is a very good quality liner, its be interesting to see how it lasts, the windows have been tinted with 3M and will protect it from the UV's, so it should be a while until the Black turns Purple


The thickness of the sliding door panel is spot on, any thicker and there would be issues.
I'll look at drilling out the rivets in the sliding door, as i was going to maybe make another panel to hide the curtain rails, as the mountings were already there.
But there isn't a lot of room for the curtain rail and curtain to slide without interference from the panel.
A job for another day
The contact adhesive fumes needs to die out a little in the van, so ill let it air out tonight, while i go and have a few beers
RickT64motion
New Member
Nice van mate.
Well what pain it is removing the seats, swivels, i had to remove the seat first, so i could get my hand in close enough to remove the air bag seat connector before the swivel, not an easy thing when you are crawling around.
Was a little annoyed when i got to the passenger seat, as after i removed the swivel, i noticed my factory 75 ah Varta battery had been replaced by the engineer with a a smaller cheap 63 amp no name battery .
.
They can't find my original battery in their workshop, and said they replaced it as they needed a lower battery.
Not happy about this as, you ring your customer and explain the issue, not replace it with something inferior and hope they don't find out.....
Anyhow, I've got a lift controller wire through the frame that needs to be removed and reinstalled tomorrow before i can take the frame completely out of the cab.
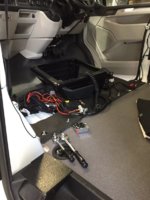
Now i have to try and remove the lower centre gearstick panel, so i can remove the rubber backed flooring, so i can start on the sound deadening and insulation.
I also, got the Karcher out and foam cleaned the van, it need a bit of love before it goes into the shed for a few weeks.
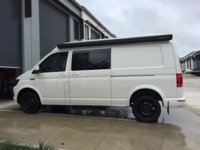
You can reply see the ass end of the van is sitting up without any load, its not causing any issues as its 2WD and there isn't any CV joints back there to damage
I really need to start building the cabinets and getting the lining finished so i can load it up
Was a little annoyed when i got to the passenger seat, as after i removed the swivel, i noticed my factory 75 ah Varta battery had been replaced by the engineer with a a smaller cheap 63 amp no name battery
They can't find my original battery in their workshop, and said they replaced it as they needed a lower battery.
Not happy about this as, you ring your customer and explain the issue, not replace it with something inferior and hope they don't find out.....
Anyhow, I've got a lift controller wire through the frame that needs to be removed and reinstalled tomorrow before i can take the frame completely out of the cab.

Now i have to try and remove the lower centre gearstick panel, so i can remove the rubber backed flooring, so i can start on the sound deadening and insulation.
I also, got the Karcher out and foam cleaned the van, it need a bit of love before it goes into the shed for a few weeks.
You can reply see the ass end of the van is sitting up without any load, its not causing any issues as its 2WD and there isn't any CV joints back there to damage
I really need to start building the cabinets and getting the lining finished so i can load it up


Out of curiosity have you looked at any extra lighting upfront? Grill mounted spots? Roof bar with spots?
I was going to look at a 76mm Nudge Bar powercoated in Satin Black with an LED lightbar on it for out west.
I have upgraded the bulbs, but they are still average, but the are H4's, so what to you expect from old tech.
Having said that i don't do that much night driving and when we are camping, we have normally parked up before sunset having a few beers.
Once i finish my build ill look at it.
A big thanks for Pauly, for the write up about removing the lower trim to get to the centre trim. 
I got the trims out, without breaking anything , although it took me a while.
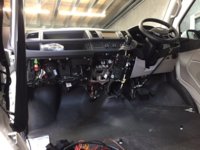
I got the rubber floor out, its quite dense and heavy, i would imagine this reduces quite a bit of noise, its ugly, but i love it.
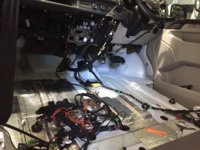
I vacuumed the cab, as there was metal swarf lying around and then cleaned it with IPA and then some Acetone.
Then it was Sound deadening time, i hate installing this crap, bores me to tears, it'll be interesting to see how much difference it makes.
Hopefully tomorrow, ill get the deadening finished and i can start on the installing 4mm closed foam insulation on top.
Im going to run a new power feed through to the main battery while the cab is apart, in case i end up installing a DC-DC charger installed of using the factory relay.
Its easier to do it now than if i decide to do it later

I got the trims out, without breaking anything

I got the rubber floor out, its quite dense and heavy, i would imagine this reduces quite a bit of noise, its ugly, but i love it.

I vacuumed the cab, as there was metal swarf lying around and then cleaned it with IPA and then some Acetone.
Then it was Sound deadening time, i hate installing this crap, bores me to tears, it'll be interesting to see how much difference it makes.
Hopefully tomorrow, ill get the deadening finished and i can start on the installing 4mm closed foam insulation on top.
Im going to run a new power feed through to the main battery while the cab is apart, in case i end up installing a DC-DC charger installed of using the factory relay.
Its easier to do it now than if i decide to do it later

Last time I did this I found it absolute hell to get the carpet back in due to the thickness of the insulation, are you putting the rubber floor back in? You were lucky you didn't need to take that lower panel on the driver's side out too, again I found it really difficult to get back in over the headlight switch frame as the trim is different to the T5 in how it goes round it. I scuffed the panel a fair bit and nearly lost a finger but luckily you can't see the marks when it's on. I don't know if there's a knack to it but I definitely don't have it! I can definitely recommend a dc-dc charger, the difference in how it charges the leisure battery is night and day.
Yeah I'm putting the rubber flooring back in, just from taking it out i can see its going to be a real pain to put back in.
I tried to take out the lower panel, but the disabled handcontrols bar is in the way and i wasn't able to remove it, so i forced the centre panel around it
I've got bandaids on three of my fingers from poor decisions.
A DC-DC booster charger is always going to be better than the relay, i wasn't sure which way i was going when i ordered the van, so i included it at the time.
I see how limited it is now and the voltage charging spikes aren't great either.
Surely if VW are going to offer a aux battery, it should at least be BCM controlled with voltage charging settings for different profiles in the VDCS or MFD.
I'm currently looking at a Votronic Triple Charge that does DC-DC, MPPT solar and also 230 Volt if i do chose to hook up, it works with the rest of my Votronic gear and control panels.
It has Wet Lead, 2 different AGM charging profiles and 4 charging profiles for Lithium, so that works with my future plans of a Lithium house battery.
I tried to take out the lower panel, but the disabled handcontrols bar is in the way and i wasn't able to remove it, so i forced the centre panel around it

I've got bandaids on three of my fingers from poor decisions.
A DC-DC booster charger is always going to be better than the relay, i wasn't sure which way i was going when i ordered the van, so i included it at the time.
I see how limited it is now and the voltage charging spikes aren't great either.
Surely if VW are going to offer a aux battery, it should at least be BCM controlled with voltage charging settings for different profiles in the VDCS or MFD.
I'm currently looking at a Votronic Triple Charge that does DC-DC, MPPT solar and also 230 Volt if i do chose to hook up, it works with the rest of my Votronic gear and control panels.
It has Wet Lead, 2 different AGM charging profiles and 4 charging profiles for Lithium, so that works with my future plans of a Lithium house battery.
Well, i finally have almost all the sound deadening installed in the cab, i just can't reach the driver side corner, (too many sharp clip holders for me to attempt crawling over) so ill get my wife to finish that off before i run the 16mm2 tinned DC-DC cable to the battery bay and a 1.13mm2 tinned cable for the D+ into the fuse/dash area to connect when i find out where to connect it...
Just have to pick up some flex conduit and sheath cover tomorrow on the way to the work shop as I'm short, so i can then run the cables out to the rear up the drivers side trim and along the roofline and back down to the quarter panel.
Im not going to run the 4mm closed cell insulation across the full floor as planned, i think it'll cause too many issues with refitting the rubber floor up near the firewall
With the thickness of that rubber floor and its padding, i would assume its doing the insulation job already and i will just fit the 4mm closed cell between the seats and a little around the feet area once the cabling is run through the centre channels.
Today i ran the 16mm2 cable in conduit thought the the grommet above the battery, couldn't crimp the lugs, as my cable lug clamp is broken , ill have to go and get another one next week.
I also ran a 1.13m2 twin cable, one with the 16mm2 feed and the other at the fuse for the ignition live connection, i then ran the cables through a sheath along the existing cable, up the D Piller and chased through to the back through the roof line.
Ill drop it down once i remove the quarter panel.
I'll also be pulling the 1.13mm2 cable back from the battery area back to the fuse area, as 1.13mm2 is only good for a signal, and not for a main battery feed, for some reason, i had it in my head i was using the thicker twin cable , that i have.
I made a small insulation flooring sheet with the 4mm reflective closed cell foam and fitted it over the sound deadening and taped it down, it personally can't see it doing much, as that rubber flooring is quite dense, but its light and i have half a roll left.
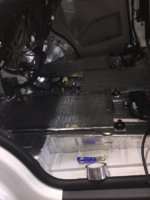
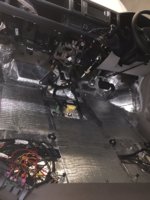
I then refitted the rubber floor, I'm glad i didn't go nuts on insulating the wheel arches, its quite a tight fit with that rubber floor.
I'll attack putting the dash trims back on Monday as well as installing some sound deadener on the entry step before i refit the D Piller trims and entry trims.
If anyone is curious, the rubber caps on the seat mounting bolts are just 10mm rubber feet screwed on for safety while working in the bare cab.
I also ran a 1.13m2 twin cable, one with the 16mm2 feed and the other at the fuse for the ignition live connection, i then ran the cables through a sheath along the existing cable, up the D Piller and chased through to the back through the roof line.
Ill drop it down once i remove the quarter panel.
I'll also be pulling the 1.13mm2 cable back from the battery area back to the fuse area, as 1.13mm2 is only good for a signal, and not for a main battery feed, for some reason, i had it in my head i was using the thicker twin cable
I made a small insulation flooring sheet with the 4mm reflective closed cell foam and fitted it over the sound deadening and taped it down, it personally can't see it doing much, as that rubber flooring is quite dense, but its light and i have half a roll left.


I then refitted the rubber floor, I'm glad i didn't go nuts on insulating the wheel arches, its quite a tight fit with that rubber floor.
I'll attack putting the dash trims back on Monday as well as installing some sound deadener on the entry step before i refit the D Piller trims and entry trims.
If anyone is curious, the rubber caps on the seat mounting bolts are just 10mm rubber feet screwed on for safety while working in the bare cab.
Similar threads
- Replies
- 3
- Views
- 1K
- Replies
- 40
- Views
- 5K

