scotia

Mechanical engineer
VIP Member
T6 Guru
Hello,
Been a while since i've last posted but was wondering if i could ask advice.

Im thinking of doing a heater install DIY, looking at airtop2000..differences between Web/Eber seem minimal..
We have a LHD T6 lwb with slider on the RHS of the vehicule. Awning will therefore be on the RHS..

What do i need to do with regards to the exhaust? I've read that the exhaust pipe needs to be max 0.8m long and ideally facing back from direction of travel, pointing down and on the opp side to the awning..

We have a simple set-up, no kitchen/cabinets so our electrics are under the driver seat and leisure battery/12v side of things under the passenger..

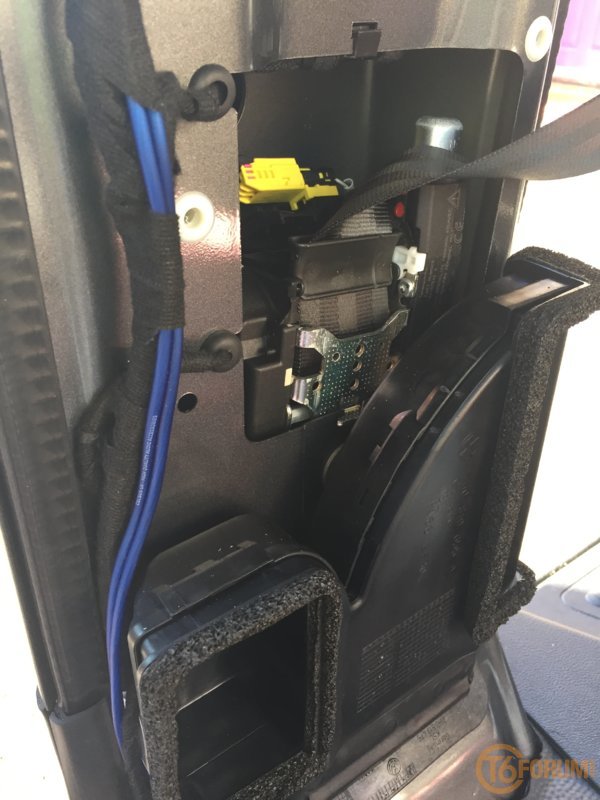
I'd like to do as near to factory setup as possible so was thinking to install on the outside of the van and have inlet in the step, with outlet in the B column.

Has anyone done this?

Any advice? I would have access to a lift, and no probs to lower the tank - done this before so fairly comfy doing it.
 
The California is close to your configuration with slider on the right, vent on the right B pillar so you could order oem trims?
 
I think @Fish has done the step/b pillar vent method so may be able to give you some pointers, not sure about exhaust though ?
 
ah ok thanks for that! I may have to pop by the dealers to have a gander underneath to see if i see anything..

i would get it done but for 3500chf...its a tad expensive..
 
Here is picture of the exhaust under our Cali.
BF6A4C90-5281-46CC-8C19-B8794BEA73BA.jpeg
 
thanks for that Loz. no silencer on the exhaust as standard?

i will see regarding this in a bit - worried about the B-post hole really...
 
There is a great write-up on fitting the OEM ducting on here somewhere, have a search.
The OEM fitting has a silencer and the exhaust exits as shown above.
My preference is an Eberspacher with a 801 controller having the extra wire in the loom for full thermostat control using the temperature sensor in the controller. Some looms seem to have the wire and some don't but it's not too difficult to add if it's missing.

Rod
 
Hello,
thanks - I've tried to search but not found that post.. i have found this one on another forum:
Retro Fitting a webasto parking heater.

but the cut out in the B-pillar isnt detailed :-( and the comment from slidepods does make a little sense. Would be very interesting to see in a cali..
 
Perhaps that was the one that I was thinking about.

The comment in post #34 of the above thread give the best guide that you will get I think. I've not done it but can see more or less what the procedure will be having fitted a heater in that position. I've used a tube out into the seat box for the outlet. On a vehicle with kitchen units down the right side the outlet in the 'B'pillar is best part of useless.

I can totally agree with @slidepods about the cost of parts and the time involved but if it's a DIY job on your own vehicle then the time is your own. The aftermarket method using simpler inlet and outlet along with the bracket that some suppliers offer makes the job a lot quicker and more cost effective but doesn't look quite as 'posh' from the cab area. You will see the 801 controller that I mentioned above in the thread on the Cali Forum althoug I would fit it further from the heater outlet if I were using the built into controller thermo sensor. Mine is in the rear near the bed both for heat distribution and ease of control at night.

Rod
 
Yup, as i mentioned that cut in the B-pillar i dont like. Mechanically its not great. I'd need to see in a cali how the cut-out is made (with an interior lip all around if its done correctly i'd imagine) before i'd do that.

The other doubt that i have i saw on one of the posts (cant remember which one now..!) is the placement - in our transporter we have rear heater/ac and apparently there are a few pipes routed up there which arent on a cali.. so it may not even be possible to have the hot air coming in there.

If not then i'll have to come in via the seat bases...but i have both of them pretty full with 230v on the driver side and 12v/battery on the passanger side. Im going to have a look under the van and see whats what.

Here there are not the companies like slidepods etc.. the demand just doesnt exist in Switzerland.. (there is one who did our roof to an ok standard but not to the standard of SP..)
 
I can agree with your thoughts about the finish of the hole in the base of the 'B' pillar and maybe its effect on strength however from memory that location is constructed similarly on all T5s & T6s so probably only one thickness where the hole is. If your vehicle is fitted with factory rear heating and air-con I believe that the 'plumbing' is fitted so as to avoid any parts of a night heater fitment. The first picture in the Retro Fitting a webasto parking heater. thread shows some of the rear unit tubes.

I am in the same position as you with both seat bases pretty full of other things, leisure battery and RING RSCDC30 under the right front seat and controls and electrical connections under the left seat. Being a pre Euro 6 vehicle without water heater and Addblue tank under the left front floor I have managed to fit my Eberspacher under there with the inlet in the left door step and the outlet in the left front seat box, that completely fills both seat boxes.

I made a mistake in my comments above about the 801 in the pictures, it is in fact on the 'C' pillar which is better that I indicated.

Rod
 
Its not the thickness as much as the treatment of the edge. look on google for a flared or flanged hole. By doing this you frame the hole and maintain the rigidity in the sheet metal. You see on the other holes in the vw that they have flared the edges.. i'd assume the'd do the same here but cant see inside a cali to verify.. i guess a few holes could be drilled and then flared using a die but it'd be tricky spacewise.
 
oh rubbish, looks flared to me... and reactangular so not much chance of me finding a die..!

thanks for the pic! you didnt undo that just for the photo did you? I hope not, but if so thanks alot. v helpful.

Are there two slots/holes, or one big one?
 
Last edited:
question, might be a silly one but still... in that thread there are some pics on the 3rd page of an install using the seat base for the hot air out and the step for the air in.. The user drilled the hot air in hole just next to a huge vw hole with grommet in it. Would it not be easier to make this hole bigger and use this? What is this hole planned for by VW, anyone know?
 
Question: we have a Webasto Thermo top Evo in the van...just figured this out...!
Might make the install of the heating a bit simpler underneath (in the van im going to have to swap alot of stuff around to fit the electrics under the seats and fit the battery in there aswell..) - i believe i can T into the fuel line for this? Is this correct?
 
If you already have a diesel powered heater then yes you can T into the feed for that.

There is an illustration of the fuel lines available at IFInterface . From that page click 'Safe Zone' - 'Free Services' - 'CarProg2' (Ignore the 'sign in' words they are irrelevant) Scroll down to TR Transporter, select your vehicle year in the right pane then the 7H xxxxxx line in the next right pane with a double click and away you go into what ever part of the vehicle you wish to look at. This system will kick you out after ten minutes or forty odd screens then you will have to log back in.

Rod
 
im a bit dubious whether i have one or not actually. Bought from a VW garage, and i have the Webasto Thermo top Evo sticker but we dont have any gizmo to actally operate it? will have to phone the garage to see whats up..

if there is a sticker on the door that means there is one in the vehicule right? its too cold to look underneath now..
 
There are no operating controls, the heater should operate automatically to aid the heat-up of the engine when the ambient temperature is below 5 degrees and the engine is cold.

Have a quick look under the vehicle from the right side looking towards the center of the chassis area where the engine exhaust is you should see the heater exhaust pipe sticking out of the plastic coverings pointing towards the centre of the vehicle and slightly rearwards. No need to remove any covers etc.

Rod
 
Hello, im back again for this install. Going to do it when the weather heats up a little as standing in my mates garage when it -8 isnt fun!

i have been thinking about this over and over. i would like to do the oem install and the only thing holding me back is the pillar B cut-out that i have seen on the net. If i use this however - Hole Punch & Flare Swage Dimple Tool 3'' Sheet Metal - Motorsport-Tools.com in a smaller size, i can make several holes with the flange reinforcing the hole. These holes will have approx the same section necessary for the debit.. i just need to find out the section of the rectangular hole that is in the cali... dont know how to go about this though! any suggestions?
 
Back
Top