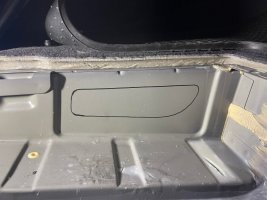
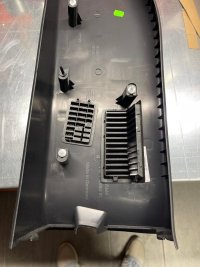
Congratulations!And I picked up my Beach today so tomorrow I’ll investigate the heater area and order the parts.
You are using an out of date browser. It may not display this or other websites correctly.
You should upgrade or use an alternative browser.
You should upgrade or use an alternative browser.
Fitting the OEM Auxillary Heating Ductwork
- Thread starter DaveyB
- Start date
@Gsixty I think I might have found one such bracket (but there might be more):I have had a search around the internet and I cant find anyone selling a NON OEM cradle that fits into the OEM b pillar ducting. I am a but surprised as I think it would sell a lot.

heizungshalter planar 2d für vw t5
Edelstahlhalter für die Unterflurmontage einer 2kW-Luft-Heizung am VW T5. Für Planar 2D, Airtop 2000 oder Airtonic D2.
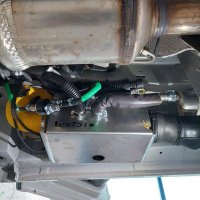
pic from: Technik für Deinen Van! NEU! – Heizung Diebstahlschutz Elektrik
Also aivailable here for almost half the price:

 www.ebay-kleinanzeigen.de
I wish someone could post the webasto/eberspacher part numbers for the reducer parts to make it easy for those who decide to go the 2kw route.

Gebrauchte Autoteile günstig | eBay Kleinanzeigen ist jetzt Kleinanzeigen
Kleinanzeigen: Gebrauchte Autoteile günstig kaufen - Jetzt in Stockelsdorf finden oder inserieren! eBay Kleinanzeigen ist jetzt Kleinanzeigen.
I wish someone could post the webasto/eberspacher part numbers for the reducer parts to make it easy for those who decide to go the 2kw route.
I agree part numbers would be really helpful.Also aivailable here for almost half the price:

Gebrauchte Autoteile günstig | eBay Kleinanzeigen ist jetzt Kleinanzeigen
Kleinanzeigen: Gebrauchte Autoteile günstig kaufen - Jetzt in Stockelsdorf finden oder inserieren! eBay Kleinanzeigen ist jetzt Kleinanzeigen.www.ebay-kleinanzeigen.de
I wish someone could post the webasto/eberspacher part numbers for the reducer parts to make it easy for those who decide to go the 2kw route.
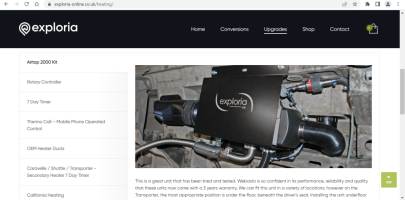
It appears Exploria make a bracket that would do this, but doubt they will sell it separately.
Heating - Exploria
We have a strong working relationship with Webasto UK and as such we have had a custom kit produced at there factory for our installations
 exploria-online.co.uk
Just use the Webasto one! 9014167A. I don't know why you are all having such difficulty over this mount.
The one above looks like a Webasto one with someone else's logo on.
The one above looks like a Webasto one with someone else's logo on.
Hi Oldie. You have probably fitted 100s of these units already so I am sure you're aware that there are standard mounting holes in the chassis that could be re-used if the bracket was custom made for it. The chassis is covered with wax for protection and I'd hate to drill new holes in it (this video of professional work was very painful for me to watch).Just use the Webasto one! 9014167A. I don't know why you are all having such difficulty over this mount.
The one above looks like a Webasto one with someone else's logo on.
I am sure you also know that the chassis surfaces are not parallel to the ground in that place so that is another reason why I personally think that generic webasto bracket won't work if you want to tap into the hot air ducting. If someone wants to go el cheapo de maximo, the generic stainless "webasto" brackets from china are the lowest possible price but if you wanna do it nicely, I think a custom T5/T6 bracket would help a lot.
Here's my copy of the generic holder from China for D2. I think I paid around 15 EUR for it (inc delivery).
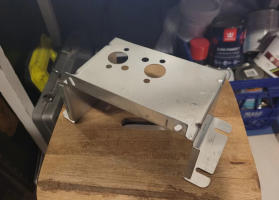
Everything above is imho. I am not a professional heater installer.
Just checked the part number you have listed. It's a custom bracket for T6 (is it stainless?). It could be a great solution if it was matching the OEM hot air ducting.
All that is left is to find the number of the duct adapter and people will have an easy life fitting D2-like heaters.
All that is left is to find the number of the duct adapter and people will have an easy life fitting D2-like heaters.
Last edited:
Read this thread and great info.
Couple of questions for the guys in the know
1) Is the OEM diesel heater from VW a 3.5kw? Where stocks them for public to buy?
2) The BPillar ducting kit for a T6.1 - is there a parts list/supplier to get these from?
Thanks
Couple of questions for the guys in the know
1) Is the OEM diesel heater from VW a 3.5kw? Where stocks them for public to buy?
2) The BPillar ducting kit for a T6.1 - is there a parts list/supplier to get these from?
Thanks
Hello, nice to meet you, Francesco from Italy. I have a T6.1 Beach and I bought all the parts for the installation. I have some questions:
Thanks for your support!
Thanks for your support!
See page 25 onwards.2) The BPillar ducting kit for a T6.1 - is there a parts list/supplier to get these from?
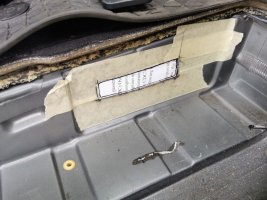
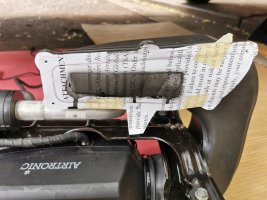
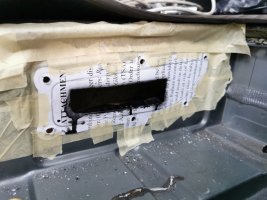
See page 27 (my message)How can I know where tu cut the slots for the grills?
See page 27 - same technique. In detail:How can I check if the template on the door step is well aligned? It seems to be ok?
1. cut a smaller hole.
2. place a piece of paper over the duct flange and make a template.
3. Attach duct to the already mounted heater and you will see a piece of paper under the hole:
4. spray paint a bit and Remove the duct. this is what you will get:
6. place the template over the hole:
7 cut:
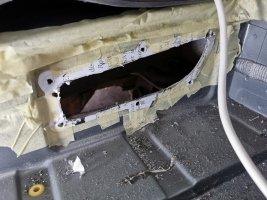
8. voila:
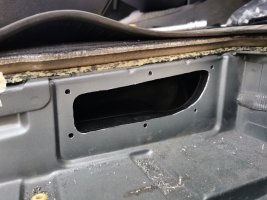
I can see that you have the OEM heater cradle. Are you also using an OEM heater or an aftermarket 4kW one?See page 25 onwards.
See page 27 (my message)
See page 27 - same technique. In detail:
1. cut a smaller hole.
2. place a piece of paper over the duct flange and make a template.
3. Attach duct to the already mounted heater and you will see a piece of paper under the hole:
View attachment 187740
4. spray paint a bit and Remove the duct. this is what you will get:
View attachment 187739
6. place the template over the hole:
View attachment 187738
7 cut:
View attachment 187737
8. voila:
View attachment 187736
I am wondering if anyone has an approx price out of interest. I am a bit surprised that people are saying that the 4kW is too much when the OEM is only 0.5kW less.
In my pics its oem. Non-oem 4kw will look exactly the same. The only way to spot the difference is the sticker and the blue connector.
New oem setup will cost a couple of grand at least. There are MANY parts required. But if you are patient enough, you can get a used oem on ebay for cheaper than the non-oem because most people don't have the skills to connect it properly (and it needs an original remote).
@oldiebut goodie will probably tell us that oem 3.5kw is just a "suffocated" 4kw version (i.e. Hw is same). And I know he will insist that 4kw is an overkill
I am not qualified to comment on both of these matters.
It also depends upon the low heat output:I can see that you have the OEM heater cradle. Are you also using an OEM heater or an aftermarket 4kW one?
I am wondering if anyone has an approx price out of interest. I am a bit surprised that people are saying that the 4kW is too much when the OEM is only 0.5kW less.
2Kw Webasto will run at 0.9Kw
3.5Kw will run at 1.5Kw
3.9Kw will run at 1.5Kw
4Kw will run at 1.7Kw
at their lowest settings.
The 3.5ST is a totally different beast to an Evo 3900 or Evo 40 , different operation, different burners, different glow pins. Evo40 has an exhaust temperature sensor which earlier heaters did not have. Evo 40 has totally different ecu and operating system. The only common point of the range between the 3.5 to 5.5 Kw heaters is the physical size and form.
As I keep saying what you fit depends upon the envisaged use - overnight background heating use a 2Kw, quick blast to warm up without overnight heating use a 4Kw. A 4Kw will be running at virtually double the heat output of a 2Kw on its lowest heat output.
Here's another interesting item, I don't know if this was already covered in this thread. Looks like it's an aftermarket additional Cali ducting?
One thing I know for sure is that the output warm air parts can not be abs or pla - they melt at some higher fan levels.
Images taken from here:
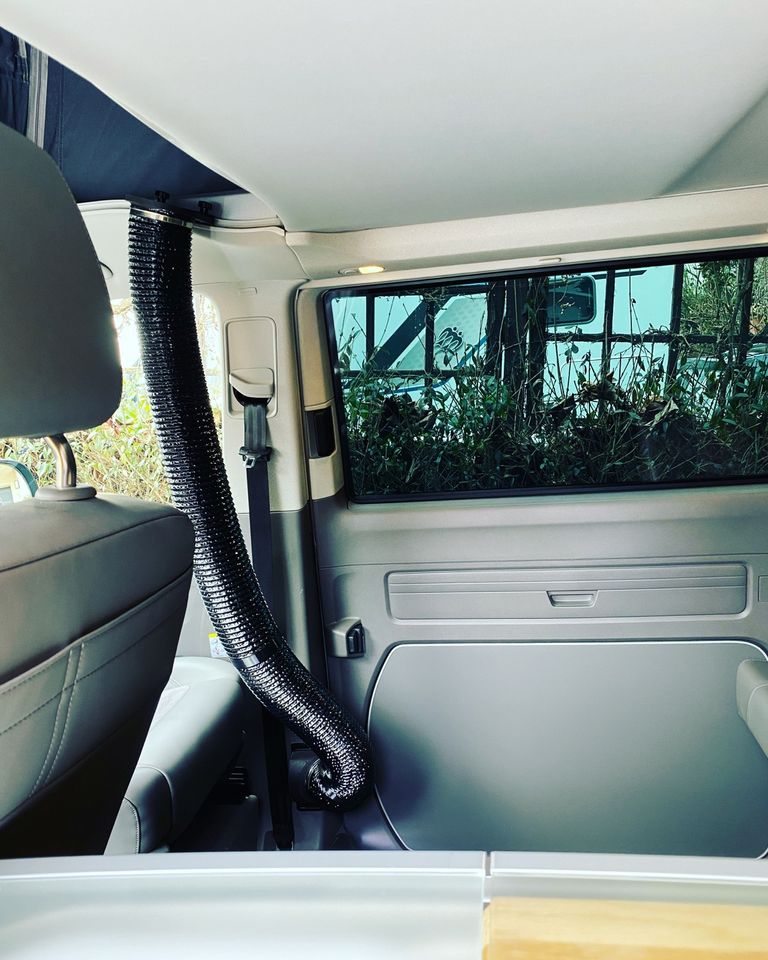
 www.ebay-kleinanzeigen.de
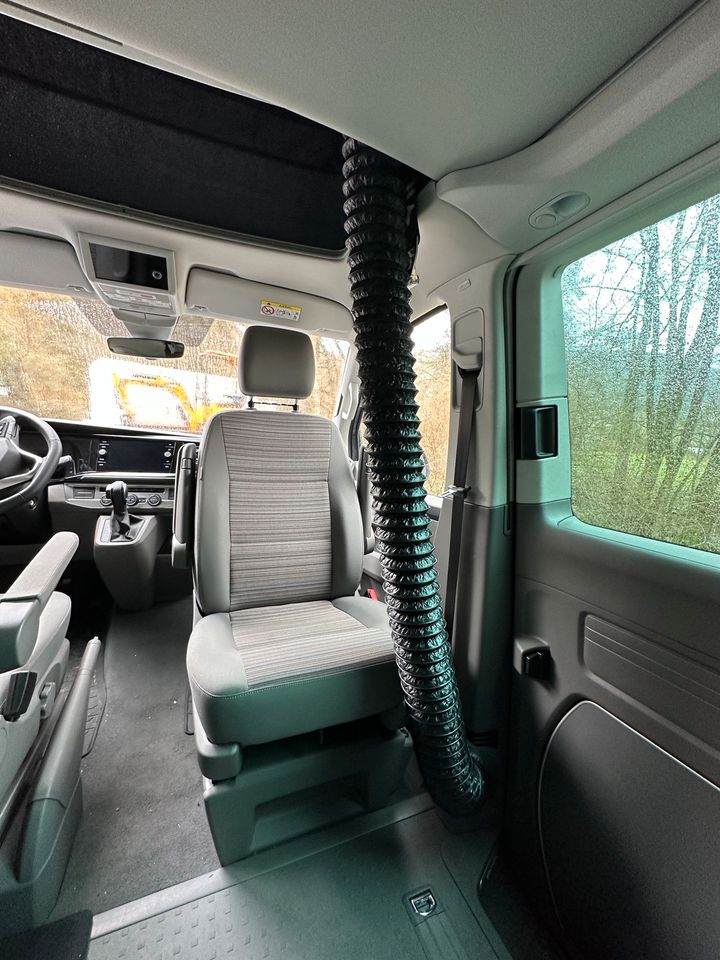
 www.ebay-kleinanzeigen.de
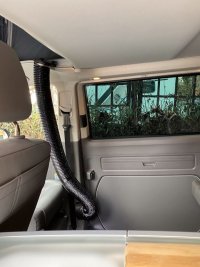
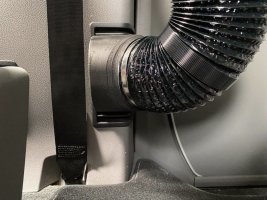
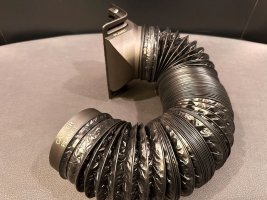
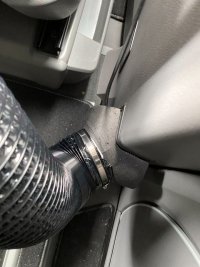
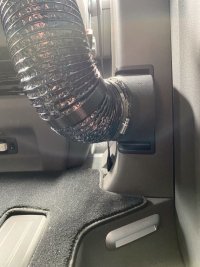
One thing I know for sure is that the output warm air parts can not be abs or pla - they melt at some higher fan levels.
Images taken from here:
Cali-Gadgets Zelt Dachheizung VW Bus Bulli T5 T6 T6.1 California
www.Cali-gadgets.de Besuchen sie unseren Shop für eine Direktbestellung. Die Konstruktion ist so...,Cali-Gadgets Zelt Dachheizung VW Bus Bulli T5 T6 T6.1 California in Bayern - Donauwörth
Standheizungs-Adapter für VW T5 T6 California Bus Camping Bulli
Beschreibung Ausführung : Individuelle Befestigung mit Karabiner Wir bieten hier unsere in...,Standheizungs-Adapter für VW T5 T6 California Bus Camping Bulli in Bayern - Amorbach


The OEM kit is almost complete. Took some time to catch the parts at good prices (from at least 8 different sellers).
Only a few screws, a blue connector and a small b-pillar grille are missing.
Waiting for the warm days to be able to fit it.
Second remote is for experiments, it was sold as failed unit.
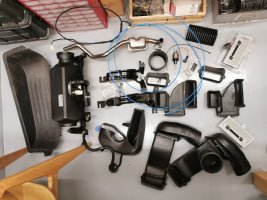
Only a few screws, a blue connector and a small b-pillar grille are missing.
Waiting for the warm days to be able to fit it.
Second remote is for experiments, it was sold as failed unit.

@oldiebut goodie can I kindly ask for your recommendation?
Can I use the following pump without the consequences of damaging the heater?
It's the one I had in spares and I'd prefer not to buy the 22451901 if I can use this one just as well.
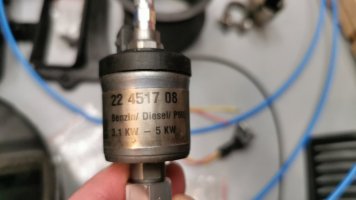
Can I use the following pump without the consequences of damaging the heater?
It's the one I had in spares and I'd prefer not to buy the 22451901 if I can use this one just as well.

Not really - whilst it will work it is designed for a totally different heater, the Hydronic water heater. There will be a difference in pumping rates between them.
It would be like using a Webasto DP42 pump on a heater designed for a DP30 - this gives about 1/2 of the volume required.
It would be like using a Webasto DP42 pump on a heater designed for a DP30 - this gives about 1/2 of the volume required.
Thanks. I tried it on a previous T6 install but replaced shortlyafter as I thought it wouldn't be right.Not really - whilst it will work it is designed for a totally different heater, the Hydronic water heater. There will be a difference in pumping rates between them.
It would be like using a Webasto DP42 pump on a heater designed for a DP30 - this gives about 1/2 of the volume required.
I guess DP30 would be equivalent to what I need? (7E0963303A / 224519010000 / A9068350102). Just trying to broaden my options so that I can find a decent price.
Webasto pumps like a DP30 cannot be used on Eberspachers, totally different pumping rates.
So that's all the necessary parts on order from TPS. Will have to wait a week or two for some to come into stock from the factory.
I spent some time over the weekend looking for them from a variety of sources - mainly recycling. I could find a few bits in the UK same as the new price and a few from Europe which would have tax and shipping added so be more expensive. More importantly because a few of them are California specific I had to order them from TPS. To be honest I will be more than happy to know I have a box of bits that will work when I come to do the job.
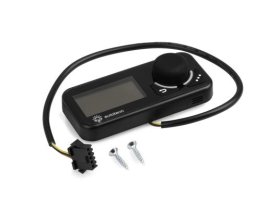
All that is left for me to do now is contemplate the installation and the quandary with that is where to fit the Autoterm controller that isn't too low, doesn't foul seat belts, air bags and blinds and that I can easily get the trim off to access. One way or another I will have to extend the cables to it.

Similar threads
- Locked
- Replies
- 5
- Views
- 3K
- Replies
- 51
- Views
- 12K

