DaveyB

Living it up on the West Sussex coast.
VIP Member
T6 Legend
So, here goes; having received all of the necessary parts from @Pauly, today I have set about cutting the van paneling in order to install this ductwork so that when I go down to Propex Leisure at the end of March, they can connect their LPG heater to the OEM ductwork, rather than using an ugly old vent that comes up through the floor or out of the back of the drivers seat base.

This is going to take some time to write up and install all of the images, so please bear with me.

PARTS
This is a list of my parts, your's may be slightly different because of trim colour/ vehicle derivative etc, so check carefully with Pauly before hand.
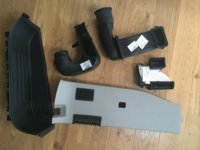
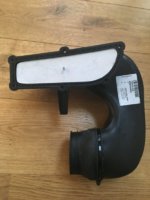
  • Intake Duct - Step = 7E0 819 219
  • Air Guide Channel = 7E0 819 381C
  • Frame Air Guide = 7H0 819 475
  • Air Guide B-Pillar = 7H0 819 655A
  • B-Pillar Trim Cover = 7E0 867 292L 92W
  • Warm Air Vent B-Pillar - Front = 7H0 819 209A
  • Warm Air Vent B-Pillar - Rear = 7H0 819 383B
  • Screws for front step duct = N90879402 (you'll require 6)
  • Screws for B-pillar duct = N90739703 (you'll require 2)
  • Cable ties = N0209022 (you'll need 2)
  • Front Step with Vent Hole = 7H0 863 735F (No courtesy light) - @Pauly edit, i think this should be 7H0 863 736G 9B9 ?
Updated T6.1 list can be found here in post 491

4FBFD7D3-6BE7-48A8-A448-E3D2952B45EF.jpeg

Having installed it all, I believe I need to find a reducer coupling to drop the fittings down to the 60mm size required by Propex, but that will be an ebay search for an Eberspacher reducer.
 
Last edited by a moderator:
Front Step Vent
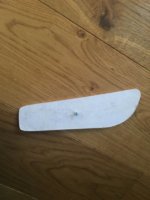
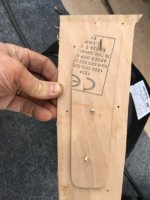
So to ensure that I made the cut in the panel the right shape and size, I rubbed a piece of paper over the top of the duct hole, cut out the shape, then glued it to a piece of plywood and cut it all out.

6C30BDAE-A1AE-4203-9D59-C6C8EC82903A.jpeg

A2D4DFEE-FB2A-4685-A03A-6A73FA9CED03.jpeg

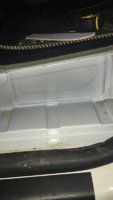
Next step is to transfer this shape to the van panel. With the original step removed, you’ll find a thinner bit of panelling at the leading edge.

0078E73C-E5BD-4457-8BEF-0D555BE6BC73.jpeg

The measurements I used, was draw a parallel line 23mm down from the top edge of the panel, and another mark 15mm in from the back of the panel. This then gives you the location to place your template and draw around it.

With your van in the air a tad, remove the underside muck guard, this then gives the access needed to the back of this panel.

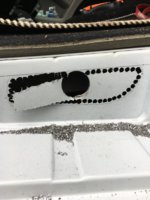
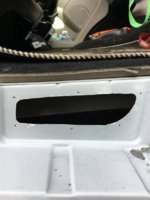
Now the scary part. I used a holesaw to make the first central hole, so that with the ductwork placed up behind the panel I could feel and check that everything was going to line up. I then cut out the hole and filed all of the metal work to get the exact shape required.

618A3639-9A54-4055-AA91-1D18D60585A8.jpeg

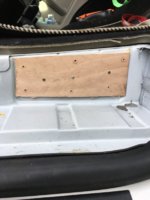
With the perfect shaped aperture, I then had to figure out where the screw holes were going to be located. I got another piece of plywood and screwed my template to it. Slotted that into the duct and then drilled a pilot hole through the back of each hole into the ply.

B5398B9B-3F48-413C-8711-6FE3EBA98CDE.jpeg

Transfer to van so guide slots into hole, and drill through pilot holes.

3B079F9B-908F-47F5-8E68-F350EE4B915A.jpeg

43DB8944-B9BF-46CA-BDBD-B9CA42707C8B.jpeg

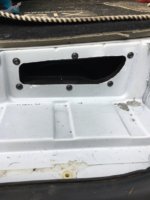
Screw everything together.

3D243912-46BE-4B4F-A54C-FD2115C4E0E7.jpeg

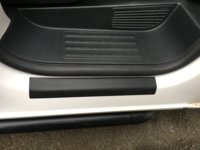
Put new step on.

611195BF-FC8A-4A26-B2F4-B960D924D56A.jpeg

Don’t forget to pop on a bit of paint to the edges of the cut metalwork to prime them.
 
B-Pillar Vent
I have to admit, this was the more scary of the cuts to make. I removed the drivers seat to give me a bit more room; if you can I’d also recommend removing the seat base - i couldn’t due to all of my leisure electric bits.
I also removed the seatbelt top and bottom mounts as well as the inertia reel. It just gives more room and makes sure you don’t snag it when cutting.
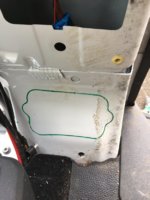
In order to figure out where the vent piece goes I used some putty to stick it to the metal work, then installed the b-piller trim over the top, and fished through the holes in order to line it up. Removed the trim, drew round the base of the duct.

751B6CBA-43B7-4403-8C6A-B5AED8275347.jpeg

(Please ignore the spray glue deposits I had to rip off the carpet trimming to do this job)

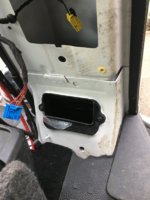
Start cutting. Again I used a holesaw to cut out the corners, then a multi tool with metal blade, and a file.

Once all cut and shaped, poke the main duct up through the bottom of the van.

Pop some paint on the cut edges.

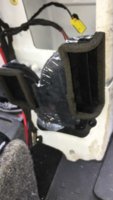
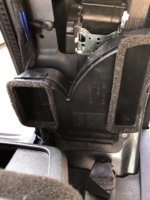
Screw the top frame guide piece on, then clip on the b-pillar vent guide.

BEEBBC79-1C7D-44FF-A8F5-53E47E67A507.jpeg

26029CEE-8634-4BF1-B0E2-905E4DA4E4D2.jpeg

My top tip is to remember to refit the seatbelt inertia reel before you put this vent guide on, because otherwise, like me, you’ll have to take it back off to get to the bolt.

F62E6A2F-13F2-4BE4-A647-1EAB06BFF532.jpeg

View attachment 18318

View attachment 18319

All that is then left to do is to fit the new b-pillar trim.

26E2B4CF-6322-4582-AB34-39322BD652F4.jpeg

Then refit the seat, and seatbelt mounts.

Last job to do is bolt the undertray back in place.

That’s it. It was quite daunting, but I took my time, and about 5-6 hours later, all was done.

@Andrew @ZipcodeUK @scotia, tagged as you’d said you were interested.

Parts were just under £300 and you’ll save quite a bit by doing this yourself, if you feel confident enough.
 
WOW. been a busy day then @DaveyB. You’re certainly braver than me. Great write up. Thank you.
Not Brave; TIGHT!!!! Don’t like paying people to do things that I reckon I can do. Especially when I know i’ll take care. Have previously spent £1000’s with a conversion company who lined my van and installed the electrics, only to find out later on how crap a job they’d done.
As ‘The Who’ once sang, “won’t get fooled again!”
 
@DaveyB whats that button you have on the B-pillar trim?

having seen that hole in the b-pillar and the part - i dont see how it could be possible that VW do it any differently? ie with regards to the b-pillar cut out?
 
@DaveyB whats that button you have on the B-pillar trim?

having seen that hole in the b-pillar and the part - i dont see how it could be possible that VW do it any differently? ie with regards to the b-pillar cut out?

A genuine aux heat from VW have a lip on the lower edge of the B pillar cut out to help locate the 'Y' branch.
 
@DaveyB whats that button you have on the B-pillar trim?

having seen that hole in the b-pillar and the part - i dont see how it could be possible that VW do it any differently? ie with regards to the b-pillar cut out?
The button is the interior ultrasonic deactivation switch for the intruder alarm.
VW do all manner of different configurations for the pillar trim.
 
A genuine aux heat from VW have a lip on the lower edge of the B pillar cut out to help locate the 'Y' branch.
Hello Fish - do you have any pictures of this lip?

Here in Switzerland they are much more strict with what happens to your car/van etc and im worried that doing the b-pillar cut is outwith their realms of acceptance. unless i copy it exactly..?! I've thought of doing flanged holes instead of the big cut but i didnt realise until now that the two plastic parts screw together..

Courtisy(sp @DaveyB ) of @Deaky

IMG-20180216-WA0008.jpg
 
They look the same mate.
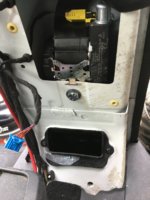
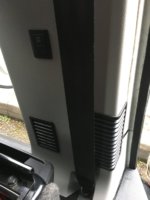
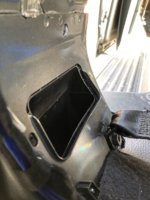
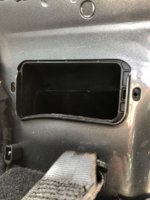
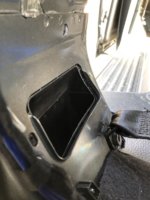
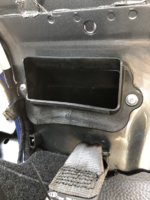
This is the hole with everything removed.
4B5C250E-5432-4642-9B83-4EBCD7982179.jpeg
B5E65E2C-9D5A-46B8-8655-C4088F666E21.jpeg

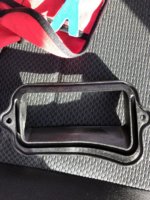
There is a cover that screws over the hole that has a groove in the back that locates over the flange.

AB33EA8E-B646-419E-9F0F-A1C4AD913693.jpeg

B57EA398-41DF-450B-ACE1-977D762ECD94.jpeg

AD668436-66D3-46EB-A8D2-1ED68C83C6F5.jpeg
 
thanks very much @DaveyB, @Fish, @Deaky for all your help with pics etc.. im going to have to do it half this way and the other half coming out from the back of the seat.. VW switzerland has refused to accept the modifcation to the B-pillar like that. They basically discharge any responsibility and nothing would be covered - they would then make it impossible to insure/drive on the roads so its a no-go for me..

thanks anyways, i'll certainly do the step and use the vw bracketery..
 
Back
Top