First time builder- Orange Camper (ex RAC conversion)

Rockerverb

Member
VIP Member
T6 Pro
A wee build diary from a first time van converter. zero build experience, and little knowledge of cars really. I am an engineer though so maybe that might help?! I’ve used this forum and YouTube tonnes so this is as much an attempt of paying forward with lessons learned as a build diary.

in terms of the goal we want to build something we can use as a van occasionally, still be able to get a few sheets of plywood in it, and…. It needs to be comfortable to drive from the South West to the Outer Hebrides, campin off grid for a couple of days for two adults and a little one.

Episode 1- Pick up

We picked up the van in May 2022 as an ex RAC van. It was alongside around 30 others so it was simply a case of picking one with the dents we liked

It‘s a 150hp, 6 speed T32. In terms of options they seemingly all had tow bars, air con and electric folding mirrors, as well as an Aux battery under the passenger (2+1) seat. They also have an Anderson connector wired up to the front which has been super useful whilst it sat on the drive doing little during conversions.

IMG_3407.jpeg

So… first impressions were how much NVH it had; loads of noise, but quite a nice ride compared to my (very low) expectations. The other shock was how great it is on fuel though; we get 40 mpg+ on longer motorway runs at the moment which I think is amazing really!
 
Episode 2 - “What have we done?!?”

It’s the evening after pick up. I’m feeling pretty smug with myself and Looking forward to spending a few days converting. (Clearly I hugely over estimate my own skills and experience…)

The sun starts to set, and I head outside to take a look and bask in that smug feeling, which is rapidly eroded by the clear RAC writing that’s now showing:

B70875FF-7A6C-477F-BC4F-EE83A4D92F5F.jpeg
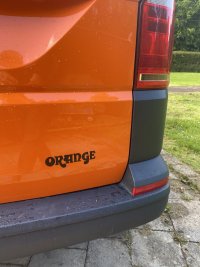
after a very mild panic I decide that I’m sure a bit of autonomy paint restorer will do the job and spend the evening buffing. Easy least with a Ryobi battery powered buffer and before you know it it’s just a REALLY ORANGE van.

Difficulty level = 0 (easy peasy lemon squeezy)
Time taken = 2 hours
Made me feel = quite smug.
 
congratulations! love a good build thread look forward to seeing your progress. good luck!
 
Episode 3 - Ripping out the workshop

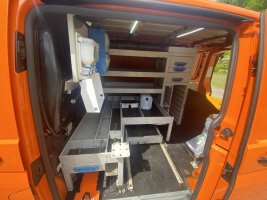
I ‘totally’ failed to persuade my wife that I could convert the workshop interior into a functioning kitchen… so all of this had to go:

1657830980329.jpeg

no big deal… or so I thought. Lots of rivnuts which were over torqued and spun in their holes, and in someplace a mixture of rivets and bolts to spice up the removal process…

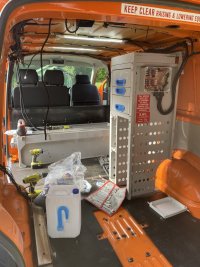
after a few choice swear words and 3 or so days on and off with a set of screwdrivers and an impact driver and we had…

1657831136933.jpeg
yep… half a bulkhead and a set of drawers! At this point we got a little distracted

Difficulty level = 2 ( patience needed and a few star drivers)
How it made me feel = mixed frustrations with occasional smug glee
cost = about £25 in tools plus a few existing bits
 
Episode 4 - the first of many distractions…

so…
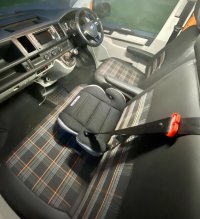
we discovered transporterHQ. And then this happened:

1657831894047.jpeg
we were only looking for floor mats (heavy duty rubber ones as this will live a hard off grid life sometimes.)

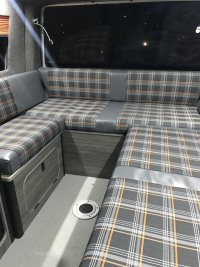
but ever since seeing the tartan golf gti fabric I have been keen on this… so we ripped out the gear gator, put on some seat covers and fitted the seat mats we actually wante in the first place.

How much it cost = around £250
Time taken = maybe 90 minutes, swearing at the zips and how to create enough tension on the drivers seat
lessons learnEd = wish I had known at this point how easy seat removal is!
 
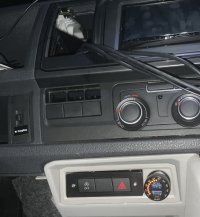
This is interesting. They’ve moved the buttons? Could you post a photo, please?
1657832858974.jpeg
Sure… they also removed the left hand vent and had a tablet on a bracket. There foam stuffed in the hvac system to block the air flow.

im guessing it was so the hazard switch was still visible as that’s an mot requirement I think?
 
Sure… they also removed the left hand vent and had a tablet on a bracket. There foam stuffed in the hvac system to block the air flow.

im guessing it was so the hazard switch was still visible as that’s an mot requirement I think?
View attachment 165010
Yes mate, makes sense. I was curious if they’d reused the existing buttons or not, turns out they did. I’m surprised the loom went that far down.
Fair bit of work ahead of you then!
 
005AD4CD-397A-4BE6-910D-3C1604ACCCD5.jpeg
Episode 4 - the first of many distractions…

so…
we discovered transporterHQ. And then this happened:

View attachment 165007
we were only looking for floor mats (heavy duty rubber ones as this will live a hard off grid life sometimes.)

but ever since seeing the tartan golf gti fabric I have been keen on this… so we ripped out the gear gator, put on some seat covers and fitted the seat mats we actually wante in the first place.

How much it cost = around £250
Time taken = maybe 90 minutes, swearing at the zips and how to create enough tension on the drivers seat
lessons learnEd = wish I had known at this point how easy seat removal is!
Transporter HQ also sell the fabric by the metre so you can have the rear matching. More expense.
 
Yes mate, makes sense. I was curious if they’d reused the existing buttons or not, turns out they did. I’m surprised the loom went that far down.
Fair bit of work ahead of you then!

The little panel looks pretty amateurishly installed although it is amazing the amount of work that goes into fitting out fleet vans for people like the AA/RAC/Ambulance service - usually with miles of extra wiring.

I wonder if they have a little pre-made loom that enables them to relocate those buttons?
 
Interesting that they don’t seem to decommission these vehicles, just take the signage off and sell on. All that racking must be worth a fortune and definitely worth selling on. Also these seems to be a lot of wiring left in there could that be used or useful to wire up the vans leisure batteries?

Good luck with your transformation!
 
Episode 5 - more distractions
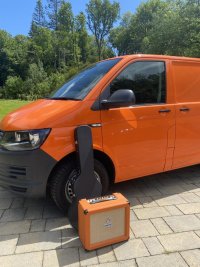
so after fitting out a bit more if the visual side of thing and trying to embrace my inner colour or something like that I got quite into Orange:
1657889920242.jpeg
£3.50 well spent
1657889999180.jpeg

And a matching practice amp :) which cost a bit more than £3.50.

How it made me feel= best mod yet.
How much it cost= don’t tell the wife!
Amount of time= 5 minutes

At this point I kinda got back on track, moving On to a rather large quantity of Insulation and sound deadening…
 
Episode 6 - Shhhhhhhh….

with previous camping experience being hit and miss, I really want the van to be as comfortable place as possible. The outer Hebrides (where I grew up) is a long way from the South West, and the weather up there can make for some days where we might end up spending the day curled up in the back.

with that in mind I set about starting to insulate and sound proof. With so many products an so little science, I ended up buying a mix from:

1. Kiravans closed cell foam and Dodo foam - Kira vans seemed to have better adhesive and was thicker and a similar price per sq m.
2. Silent coat, dynamat, and Dodo - the silent coat seems best value here by a long way and was noticeably thicker than the dodo product, if a little more expensive.
3. Kira vans recycled bottle insulation
4. Metallised bubble wrap from tool station (as a vapour barrier really)- I’m not at all convinced of the product claims as an engineer.

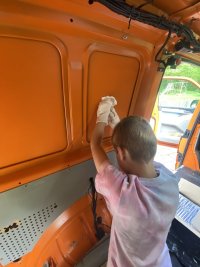
I brought in a consultant for adhesion and cleaning:
1657890725852.jpeg
total cost £2 pocket money and some sweets. IPA from my 3D printer used To remove grease.

A few hours later…
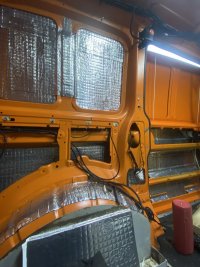
1657890827613.jpeg

Total cost for silent coat used £80
How it made it feel - notable improvement but not life changing noise level.
difficulty level = 1 (just peel and stick, but some sharp edges and awkward fitting)

most of the cost for insulating a van is labour - I think it’s definitely worth doing yourself.

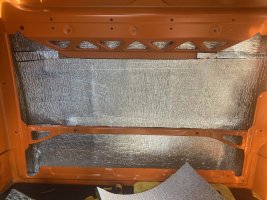
we then moved on to applying closed cell foam:

1657890972439.jpeg
cost = £110 I think? PERFECT

BIG DIFFERENCE at this point In noise level. Can recommend. Notable heat insulating properties too, but high level of coverage required.
 
Episode 7- make a hole!
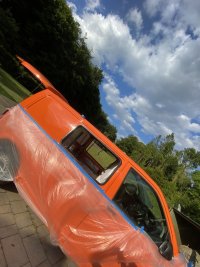
After so many glazer sand conversion companies having quoted long wait times and high prices… I managed to brave some diy windows!

1659129156028.jpeg
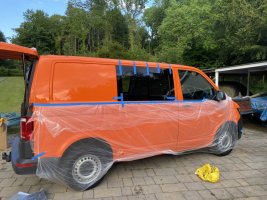
how did it go? Well one window has a slight leak… but they look great!

one day spent, for two windows. We used transporter HQ, who have very fast delivery and the window seems to fit pretty good.
1659129316798.jpeg
 
Love these build threads. Seriously thinking about going down the same route with the an ex-RAC van - there's quite a bit of wiring to sort out, which I'm okay with (e.g. the one that I've seen looks like it's got a reversing camera which presumably just went into the tablet that they had.

Just wonder though how easy you're finding fettling the dashboard and cab to remove the RAC tweaks?
 
I've recently bought a ex RAC T6, had been waiting for some to come back on the market for ages - seems to be a lot more available again now. The body work definitely needs some love, but the service history is impressive and like the fact it's got the decent Euro 6 engine, T32 load, air con, folding mirrors, tailgate etc.

The camera was actually hooked up to a rear view mirror screen (was removed in mine, but saw in a few others) but I'm replacing the head unit instead to reconnect it and to get CarPlay.

Wiring is definitely not my area of expertise so have someone checking it out as it's a very complex spaghetti set up and I need a new battery - the one the RAC fitted appears to be smaller than expected!!
Thanks also missing the mirror on the one that's taken my eye but good to know that can be connected to a new head unit
 
Thanks also missing the mirror on the one that's taken my eye but good to know that can be connected to a new head unit
Will let you know if it still works, it's a generic camera and the wiring still terminates above the windscreen, so going to try re-routing and testing it on my Pioneer head unit. In theory it should work..... but as I have found with the wiring in this van who knows, there are certainly some anomalies!! Rest of the van is great though, it drives well (that 150bhp engine really pulls), everything is mechanical straight and the colour is brilliant!
 
Back
Top