You are using an out of date browser. It may not display this or other websites correctly.
You should upgrade or use an alternative browser.
You should upgrade or use an alternative browser.
What Have You Done To Your Van Today?
- Thread starter Daneeyre
- Start date
-
- Tags
- mod modification mods retrofit

I like that look! I've often found that on various vehicles I've owned, including my 3 daughters older cars, that black plastic trim soon looks a bit dull and greyish. I've used various products from Halfrauds, but never really been happy with the results, but I recently saw a professional bodyshop / detailer using this stuff:
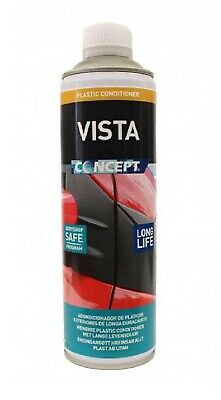
VISTA CONCEPT - EXTERIOR PLASTIC CONDITIONER - 500ml | eBay UK
We will always help you to have a 100% positive happy buying experience. In et tortor diam. Aliquam commodo fringilla euismod. Donec sodales laoreet augue ac ornare. In rutrum felis ut erat auctor, eu pulvinar risus fringilla.
www.ebay.co.uk
I've tried it and I'm very impressed with it, it's easy to apply and leaves a great black satin finish. Black trim looks great when it's black!
@andys Thanks for that, I'll be on a smaller 160w panel with a Victron 100/20 charger so on a similar day I'll expect to see 2/3 of a wattThe panel is a 250W semi flexible Photonics Universe, it’s been on 2yrs now and I’ve been very happy with its performance. It runs through a Victron 100/20 solar charger and my rationale for making my own monitor is here What Have You Done To Your Van Today?.
The big discrepancy is because I’d been driving up all the previous day and didn’t arrive on site til after 5pm in the pouring rain so it’s a wonder it had time to harvest anything.
I get that yield to be about 50Ah too, though happy to be corrected if anyone knows better.
Weather here is savage and at 8am it’s currently producing 1 solitary Watt
")
Does your (assumed) DC charger override the solar when driving or is there some logic in the system that takes the (again assumed) larger charge from the DC charger over the solar while driving? @Dellmassive has previously said he'd be interested in the charging split if somehow someone managed DC/solar/EHU at the same time.
Quick question on the panel itself is yours bonded directly onto the roof, or is there any airflow beneath it? I ask because of some things I've read about heat buildup and my panel is going directly onto the roof.
Enjoy your trip - I'm due in the Lochaber area soon for the hills but looking at the weather I'll leave it until Tuesday, the last two trips have been wet'n'windy, October has come early!
Caravelle door trim that was damaged.. carpeted to match interior and eventually fitted.. what a ballache... unsure after it all if im keen tbh...
ps seat will be dark leather to match fronts, using a naff one until interior done


ps seat will be dark leather to match fronts, using a naff one until interior done
")


Managed to get some of the panels cut and temporarily in place. All pretty straightforward and because I did it myself all the holes line up .. only thing that was a bit of pain was the tailgate switch!! Ended up shaving out the back of the panel so the clips would sit in flush


Made a start on the sound deadening, as I set off I soon decided ‘if a jobs worth doing’ I’m covering every single skin panel 100%. . . ran out of material pretty quick after making that decision
View attachment 84908
been here done this its a craaaap job.. I've gone through 4 boxes ofdod sound deadening so far... do the inner wheel arch in the rear quarters


Not all today but....
Fitted THQ rear lights
Fitted Recaro Wingbacks
Fitted an Alpine Halo
Fitted some CamperGlass Kombi style windows and fake rears
Fitted THQ limited edition V3’s
Sound deadened and insulated
Fitted THQ cab carpet
Ordered VanShades and Project77 furniture!
These vans get very expensive very quickly.


Fitted THQ rear lights
Fitted Recaro Wingbacks
Fitted an Alpine Halo
Fitted some CamperGlass Kombi style windows and fake rears
Fitted THQ limited edition V3’s
Sound deadened and insulated
Fitted THQ cab carpet
Ordered VanShades and Project77 furniture!
These vans get very expensive very quickly.
Quite a lot of the above is on YouTube also
Managed to get some of the panels cut and temporarily in place. All pretty straightforward and because I did it myself all the holes line up .. only thing that was a bit of pain was the tailgate switch!! Ended up shaving out the back of the panel so the clips would sit in flush
View attachment 84934View attachment 84936View attachment 84937
View attachment 84935
What is the black box on the tailgate. Photos 2 and 4.Managed to get some of the panels cut and temporarily in place. All pretty straightforward and because I did it myself all the holes line up .. only thing that was a bit of pain was the tailgate switch!! Ended up shaving out the back of the panel so the clips would sit in flush
View attachment 84934View attachment 84936View attachment 84937
View attachment 84935
It's the electric tailgate releaseWhat is the black box on the tailgate. Photos 2 and 4.
DO you mean the big black thing at the edge of the window. If so that the wiper motor.Ah OK. I don't have electric tailgate release, just a hole in that location. I guess I need to see if I can buy a cover separately, to cover the hole and tidy up up the tailgate with carpeting.
What about a retro fit? Not sure if that’s something that’s easily doneAh OK. I don't have electric tailgate release, just a hole in that location. I guess I need to see if I can buy a cover separately, to cover the hole and tidy up up the tailgate with carpeting.
Ah ok thought you meant the switchYeah that's the one.
Similar threads
- Replies
- 10
- Views
- 2K
- Replies
- 10
- Views
- 653
- Replies
- 4
- Views
- 1K