Luke's Caravelle

Now waiting on lots of goodies in the post. Watch this space.

On order:

2 x Comfort Adjustable Alcantara Captains Chairs
1 x Full Caravelle Curtain Set
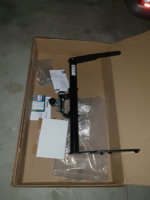
1 x Towbar & T6 Specific Wiring Kit
1 x CTEK 250SE & Split Charge Wiring Kit
1 x VW Puddle Light Kit
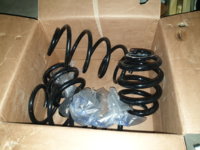
1 x T32 springs
1 x full set of California Camping Window Bags

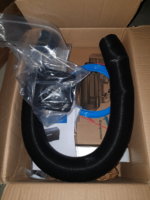
Edit: 1 x Erberspacher S2 D2L kit.

I have a few of the parcels now. Can't wait for the weekend to start fitting it all!
 
Last edited:
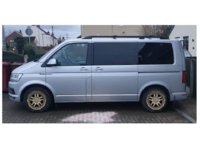
A very crude attempt on power point to see what my favourite Black Rhino wheels might look like. I was ready to be disappointed but I think they look good. They won't be that bright in reality as the van shot was taken on a dull day and the wheel shot is straight off the website, so, perfect lighting conditions.

BR_Barstow_Bronze.jpg
 
Last edited:
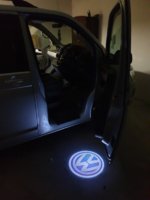
Last night I fitted @saxoboy's puddle light kit, looks cool I think. Came with all the kit and great instructions. Its deffo one for the good modifications under £100.

20200124_195053.jpg

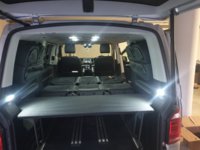
And I also fitted the California Camping windows bags. It's a neat storage solution that will double up as black out curtains, if a little expensive.

20200124_170114.jpg
 
Good to see its getting used. I take it your not based in UK? I think Amarok steels wouls suit it more than the smaller one.
 
Good to see its getting used. I take it your not based in UK? I think Amarok steels wouls suit it more than the smaller one.

I'm based in Southern Italy, Naples at present - back to UK some point this summer though which will be bitter sweet. I've got quite a lot of things to fit and change before wheels become a priority but they are on the list!
 
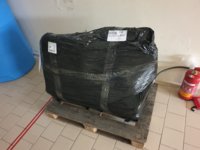
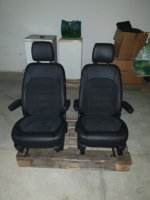
Got a lovely pallet from Kernow Transporters today! Top notch service.

20200128_145114.jpg
 
Last edited:
Lovely looking Vel, have I missed something? did you not already have the alcantara captains chairs?
 
Lovely looking Vel, have I missed something? did you not already have the alcantara captains chairs?

Why thank you. I do but they are swivel seats and as a consequence come without any height adjustment; being 6'7" this has proved difficult to live with. We've only swivelled them once so figured we could live without them. And I'll be flogging them when I'm back in the UK so hopefully it'll end up being a no cost upgrade!

ha yeah, unworldly aren't they.
- ha let me know if you find anywhere!! :D

Will do. My Mum n Dad found a place in Brighton run by a guy from pozzouli (potswoli) which is just down the road from us. It's a small world but then again Brighton is not really local at 250 miles from home!
 
Last edited:
Why thank you. I do but they are swivel seats and as a consequence come without any height adjustment; being 6'7" this has proved difficult to live with. We've only swivelled them once so figured we could live without them. And I'll be flogging them when I'm back in the UK so hopefully it'll end being a no cost upgrade!
Makes sense now, I hadn’t realised they weren’t all height adjustable, how do you find the seat comfort? They are on my list of options to replace my high line seats.
 
Makes sense now, I hadn’t realised they weren’t all height adjustable, how do you find the seat comfort? They are on my list of options to replace my high line seats.

Yeah, it's a shame because it would be nice to have both. There are aftermarket seat bases that are lower and aftermarket swivels bases which can be fitted. I fitted both in my T5, however I was never convinced that the swivel would hold up in a crash. As a result, I want to keep OEM where possible. I also looked at the electrically adjustable seats, there is a Kufatec loom that makes them plug and play, but they aren't as adjustable height-wise as the manual ones apparently, come from LHD vehicles, plus no matching colour ones so I didn't bother in the end.

Comfort wise I like them, recently did a 1500 mile trip in 27 hrs with the swivels and was not bad at the end, even with my glass back, if a little tired! The height adjustment will just make them perfect I reckon - I do rub my head on the ceiling and stoop to see clearly sometimes. All just midly annoying but if I can fix it, why not eh!? That said, I've not sat in a highline so can't compare directly; I'd be pleasantly surprised if their is much difference apart from the upholstery covers to be honest!

I do like the looks of the SEAT Leon FR seat upgrades for the front one day.:cool:
 
Last edited:
Will do. My Mum n Dad found a place in Brighton run by a guy from pozzouli (potswoli) which is just down the road from us. It's a small world but then again Brighton is not really local at 250 miles from home!

Deliveroo?!

:D:laugh:
 
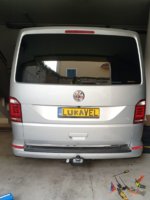
One box down - Tow bar fitted in a couple of hrs this evening. No reverse sensor alarm problems, which is nice.

I found the video here very helpful for removing the bumper once all the fixings have been removed so big thank you to @ChrisKites. I still managed to break a couple of plaggy clips but the bumper has gone back on solid.

I dug out my Thule tow ball cap which I found a few years ago at the side of the road to replace the very similar Brink one. No doubt some scallywag will knick it at some point! Wiring still to do...


Van Rear Showing Towbar.jpg
 
Last edited:
Front OEM swivel seats out this afternoon after an early dart. As well as swapping them, I need them out the way for the tow bar electrics, split charge and Erberspacher install. I'll be flogging them when I'm back in the UK but there will be a different ad thread for that.

Two nuts at the front, oo'err, and two bolts at the back gets the seats out - a quick win there!

There are loads of fuses under the passenger seat so I need to figure out what to do with them. I'd like to keep the leisure battery and CTEK that side so it is closer to the starter battery. I'll give it a fettle tomorrow and see what I can do.
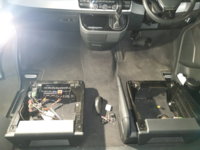
20200131_161644.jpg

I also started to run the cable from for the towbar. I was worried about this having never done it before but, so far so easy!

The first step was to wire the plug up, easy following the instructions. The second step was to remove all the plastic covers down the passenger side as well as the engine undertray. It was mostly held on by bolts which I removed using an 8mm socket. I used my new trolley jack and axle stands for the first time which made working underneath the van much easier.
The cable goes through the middle of the suspension arms front and back to avoid moving parts and getting crushed. It goes along the passenger side inbetween them, although I might change that tomorrow. It is only loosely tie wrapped on at a couple of spots at present as I wasn't 100% sure, I'll sleep on it.
One point to note was that I can't really see why you need to run the black and white cable under the passenger seat as it doesn't attach to anything!? They just get crimped in a loop - a bit odd but I'm not an electrician so I'm sure theres good reason.
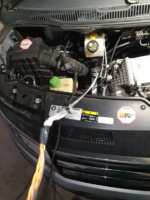
I then taped the battery end of the cable to a gardening cane to navigate through the engine bay and tidied it up at the top behind some quick disconnect fuel lines. I got as far as attaching the positive and earth to the battery. The battery cover needed a little cutting at the bottom to allow the cable to sit neatly underneath it. I'm quite chuffed with a tidy job here.
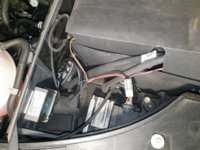
15805033382887619266364015382862.jpg

I couldn't identify where the grommet through to the dash was. It didn't help that it was pitch black outside so no ambient light available. Time to call it a day.

Next step, find the grommet...
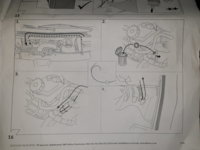
20200131_200031.jpg
20200131_200039.jpg
 
Last edited:
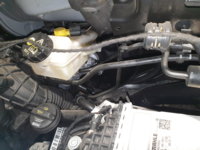
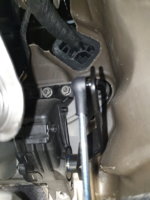
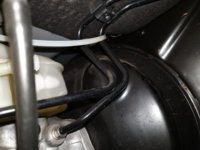
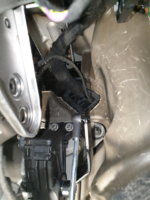
A bit of progress this morning. I saw this rectangular grommet, the instructions showed a round one, after buggering around under the steering wheel and engine compartment for a couple of minutes. It's just north of the accelerator pedal linkage.

20200201_104913.jpg

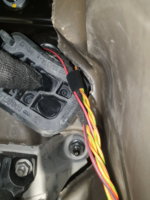
After pulling it out I fed three joined tie wraps through, wasn't sure how long they need to be. It came out here, behind and to the right of the power steering fluid reservoir...

20200201_110413.jpg

I'd have never seen it from the engine bay. After stashing the cable away behind the engine cover mounts I taped and tied the end of the cable to a piece of string and pulled it through using the cable ties.

20200201_110609.jpg

20200201_110725.jpg

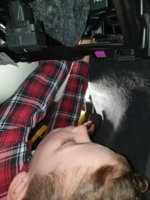
The next bit was tricky with my big hands and I had to enlist the help of my son. After engineering a solution to hold the grommet back for access he clipped the end of the top right nipple on the grommet and then fed the cable through. Not bad for a 10 yr old!

20200201_114625.jpg

20200201_120112.jpg

Just the last bit of wiring to do this afternoon they find someone I trust to code it!
 
Back
Top