Eleanor the Kombi (Day Van Build)

NorthernJoy

Member
VIP Member
T6 Pro

The Decision!

Welcome to my build diary as I progress from factory Kombi to day van and beyond. I want to document our progress and hopefully provide some useful information as I have a few cool little projects in mind further down the road as well as some how-to's along the way.


The story so far...
Having driven a small Ford Courier van for the last couple of years as my daily driver / toy hauler, it was becoming obvious that I wanted something a bit bigger and more versatile. A few factors played into the decision to buy a bigger van:
  • The wife only drives DSG equipped vehicles, Ford Courier was manual
  • I have two kids and a dog, Ford Courier has two seats and not much load area
  • It will be our second vehicle

I proceeded to consume vast amounts of YouTube content on all types of medium to large size vans from OEM to DIY and coach built. We then hired a VW camper and motor home (too big for a second vehicle) and decided for our family we didn’t want the cabinets down the side of a camper van and after some more intense research it was identified that a Kombi day van would be best suited to accomplish the following conditions:
  • 70% daily driving - work and school runs
  • 20% Camping
  • 10% supply and dump runs

I also like the idea of completing as much of the project as I can as not only would it be fun, but it would allow me to spend time with my oldest son and have a van better suited to our lifestyle. After lots of research, we settled on the VW transporter, we chose this vehicle for a number of reasons:
  • I have always wanted one!
  • Better than a Ford:slow rofl:
  • It’s a very capable base vehicle for our use case
  • Tons of product, knowledge and support
  • Looks fantastic with a few stubble modifications

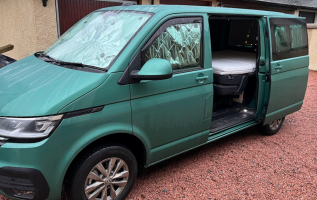
In April 2021 we decided it was time to visit the VW commercial dealer, promised delivery in July 2021 (Don’t giggle in the back!) and left my van as a deposit. Well July came and went… Found this thread T6.1 new order delays | VW T6 Transporter Forum (t6forum.com) and waited like everyone else. I received an email from VW commercial saying our transporter was being built and mid-November took delivery of our lovely new virgin van ready to be molested into a family hauler, skip and holiday home. Also, I now don't have to ride my motorbike (Suzuki V-Strom 650 for those interested) in sub 5 DegC temperatures each morning to work in summer riding gear..!


The Plan!

...is initially to do a fairly standard fit out with sound deadening, insulation and building a Kombi bed system as I have the equipment / skill (he says...) required to fabricate. This will provide the basics for our first year of trips, to get us out camping as soon as possible and to understand what we like / don't like for our future upgrade path. I have waffled on long enough now, so on to the build, but first things first, the obligatory initial image from collection day and current / future specs. I hope you enjoy the account of our journey.
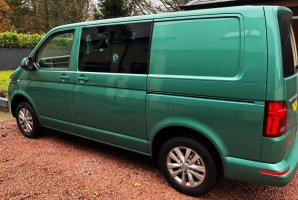
IMG_1876_01.jpg

Current / Future Spec:
Key: (** Future/Planned) (* Bought/Not fitted yet) (£ Close to purchasing)

::: Base Vehicle :::
#T6.1 Kombi Highline SWB 2.0TDI 150PS 7-speed DSG
#Bay Leaf Green metallic paint
#Swivel seat in cab, driver and passenger - non-height adjustable
#2+1 passenger seats in second row
#LED headlights
#Rear-view camera
#Tow bar, preparation
#80 litres fuel tank
#Power latching sliding door passenger side

::: Interior :::
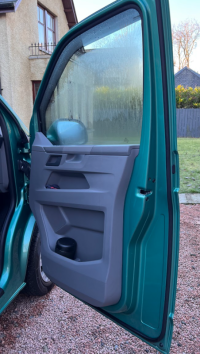
#T6.1 California extra door rubber
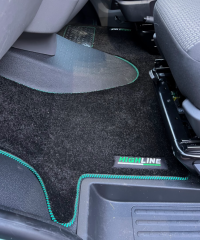
#Rugs for Bugs - T6.1 Mat set for 1+1 seat cab
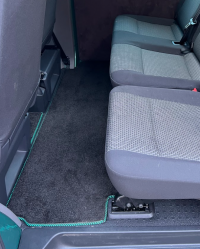
#Rugs for Bugs - T6.1 Kombi rear mat for a 2+1 seat with single slider door
#Rugs for Bugs - T6.1 Side steps (£)
#Rugs for Bugs - T6.1 Dash pocket liners (£)
#Custom Kombi bed system
#Jerba Campers pop-top roof - painted Bay Leaf Green (*) FITTING BOOKED JULY 2022
#Jerba Campers roof bed (*)
#Jerba Campers child safety net (*)
#Jerba Campers roof rails (*)
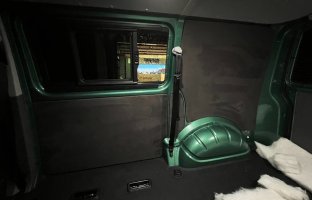
#Panels covered in Harrison Trim Supplies Dark Grey Suedeliner van lining

::: Auxiliary Electrical System :::
#External electrical hook up with RCD
#1200W oil filled radiator
#100Ah Leisure battery LiFePO4 (**)
#Victron Energy Orion-Tr Smart 12/12-30A (360W) non-Isolated DC-DC Charger (**)
#Victron Energy Phoenix Inverter 12/500 VE.Direct (**)
#Victron Energy SmartSolar MPPT 75/15 (**)
#175W Solar panel (**)
#Webasto Airtop 2000 STC diesel heater + California OEM heat ducting (**)

::: Exterior :::
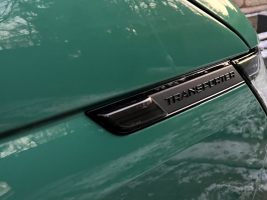
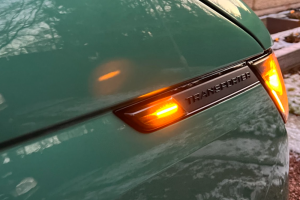
#Transporter HQ T6.1 Sequential LED Side Repeaters – SMOKED
#Camper essentials 6mm C-channel awning rail

::: Wheels & Tyres :::
#Standard R16 Highline Alloys /w Summer tyres
#17” Bronze OZ Rally Raids (**)
#235/65/R17 Pirelli Scorpion AT+ (**)

::: Suspension :::
#Standard

::: Engine :::
#Standard

::: Misc Equipment :::
#Stitches + Steels Awning tarp + 4 aluminium poles
#Dometic Waeco CoolFreeze CFX35 portable compressor fridge freezer cool box
 
Last edited:
Wow, that's a nicely laid out and comprehensive write up @NorthernJoy! I will follow you on this thread now and not the 'T6.1 Delay' thread, with envy whilst I still wait for mine!! ;)
 
Nice project. Not sure what your suspension plans are but I would suggest upgrading if you are driving often. You will have a much more enjoyable drive wthout the wallowing you get with the standard set up.
All the best :thumbsup:
 
Wow, that's a nicely laid out and comprehensive write up @NorthernJoy! I will follow you on this thread now and not the 'T6.1 Delay' thread, with envy whilst I still wait for mine!! ;)
Thanks, I love a good build thread that is organised and easy to read . I have done a bit more work so will write those up in the next few days.

Nice project. Not sure what your suspension plans are but I would suggest upgrading if you are driving often. You will have a much more enjoyable drive wthout the wallowing you get with the standard set up.
All the best :thumbsup:
I do plan on upgrading in the future definitely, as we are in Scotland I am going down the AT route for muddy fields, Scottish highlands, European alpine etc. I want to get those on in the new year and then decide if I want to go for a lift kit or coilovers.
 
look forward to seeing this come on. Excellent write up so far, keep it coming and all the best with it
 
Sound Deadening, Insulation and Panels!
After receiving the van I drove it for a few hundred miles just to make sure everything was ok and I was happy with the van. Why did I not do this years ago!!!! I bought a few things before the van came and a lot of that was the sound deadening, insulation and carpet lining, so that's the first job of the build. I watched all the videos from Combe Valley Campers to get an idea of what materials and skills are required to complete the job, I have listed the materials I used below:

::: Materials used :::
Harrison Trim Supplies
-----------------------------------------------------
  1. Trimfix Adhesive x 4
  2. Hidden Trim panel fixing clips x 100
  3. Suedeliner van lining - Dark Grey x 5mtr

Deadening.co.uk
-----------------------------------------------------
  1. Dodo Mat Pro Metal Roller x 1
  2. Dodo Campervan Pro Kit x 1
  3. Dodo Thermo Fleece x 2

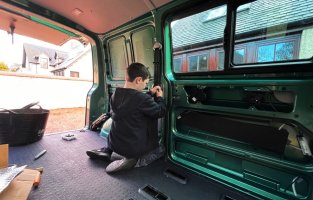
After I gathered all my materials me and my son stripped the back of the Kombi ready to crack on fresh faced and excited at having a new project to work on.

Insulation_01.jpg


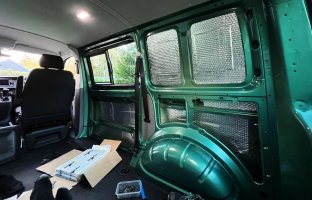
Installed the first layer of sound deadening, which I have learned you should wear gloves as the edges are very sharp and now have cuts all over them...

Insulation_02.jpg


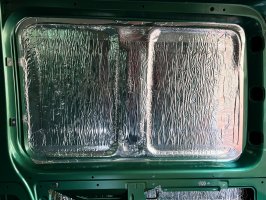
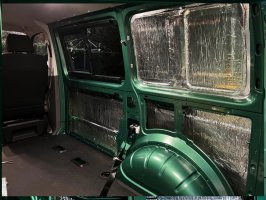
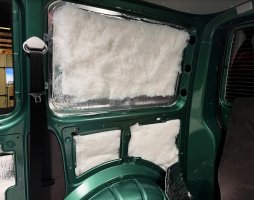
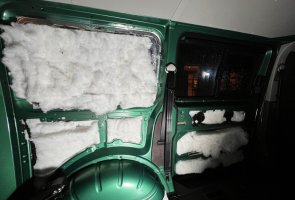
After that was complete, we then used 10mm foam insulation everywhere we could fit it. After a few attempts we got the knack for installing it in the nooks and crannies without sticking it over itself and causing a mess. We sealed the edges and joins with some aluminium tape to form a rudimentary vapour barrier, at least that's what I tell myself and NOTHING to do with my OCD.

Insulation_03.jpgInsulation_04.jpg


Once that was done, stuffed as much Thermo Fleece without compacting it too much in to every crevice we could. I have to own up here that I only bought one roll of Thermo fleece so I had to wait a day to go to B&Q to purchase a roll of Diall Insulation roll, at £17 a roll, as of this post, it is nearly half price of the deadening Thermo Fleece and exactly the same stuff so I would recommend this instead. Also buy 4 tins of trimfix as I didn't have enough to cover the tailgate panel.

Insulation_06.jpgInsulation_07.jpg


Once that was complete I had a tough decision to make about the panelling, did I use the OEM hardboard or replace with Ply. Some of you will know this but, the ply I would use is marine grade or WBP plywood: much of the plywood sold in builders merchant is made to an exterior grade referred to as 'WBP' (weather and boil-proof). This means that the glue line will not break down when subjected to adverse weather conditions, and can also withstand immersion in boiling water so it can get wet with the condensation of being used as a camper as the OEM hardboard over time will swell with the moisture and crumble.

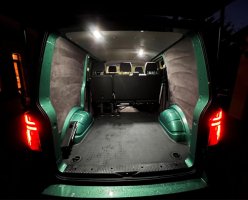
As I am getting a pop-top fitted by Jerba in July 2022 and I have never covered panels before I decided to cover the OEM hardboard as a practise run. Once the pop-top has been fitted I will stretch carpet the metal work and redo the panels in plywood for final installation (I.E. I'm too impatient to order pre-cut panels or make my own ha ha!). Didn't get any pictures covering the panels but the final product is below until the pop-top is fitted next year so I am going to leave the roof for now.

Insulation_08.jpg

Stage1_Complete.jpg

I still have the front doors to complete but they will get done with the sound system upgrade.
 
Last edited:
V1 Kombi Bed and basic equipment!
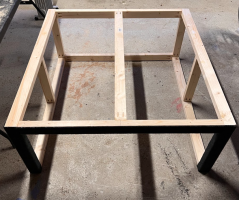
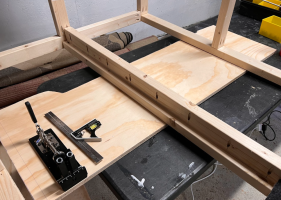
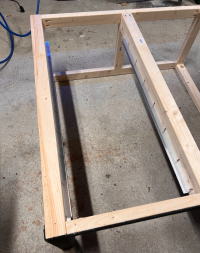
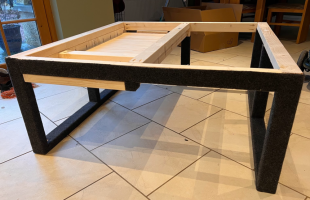
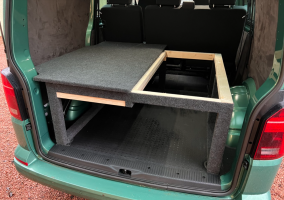
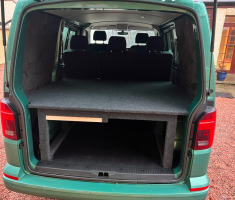
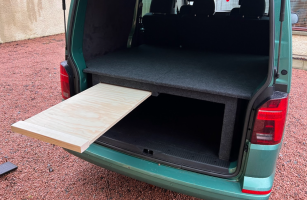
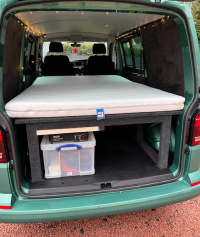
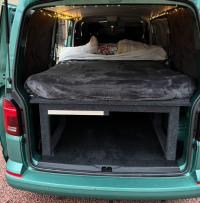
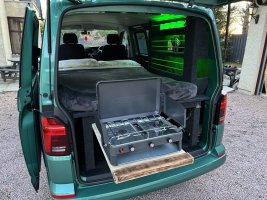
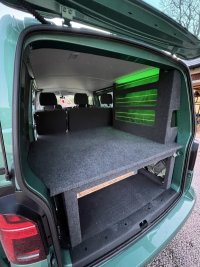
After looking at all the available bed platforms and the prices for what they are I decided I want to build my own with some wood left in the garage from other projects. As the van is a second vehicle we wanted to keep it as a kombi layout for the time being and this would also allow me to make modifications after each trip to refine the design to how we use it. So keep in mind this is a prototype.

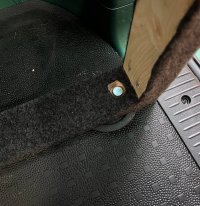
The plan was to build a simple frame in line with the folding second row seats, pretty standard. I also added a very crude pull out shelf to put a camping stove on for when we can't setup the awning and kitchenette as I wanted the space underneath for now as we have loads of baby paraphyllia to contend with this year. I used spare carpet so only covered what you could see when the tailgate is open.

Image spam commence...

Screenshot 2022-01-20 133303.png

Screenshot 2022-01-20 133340.png

Screenshot 2022-01-20 133411.png


Screenshot 2022-01-20 133452.png

Screenshot 2022-01-20 133441.png


Screenshot 2022-01-20 133504.png

Screenshot 2022-01-20 133520.png

Screenshot 2022-01-20 133534.png

Screenshot 2022-01-20 133548.png
*Infamous Ikea mattress, the fold is spot on for traveling mode.

Screenshot 2022-01-20 133628.png


Screenshot 2022-01-20 133607.png


::: Additional Equipment Installed :::
-----------------------------------------------------
  1. Thermal screens
  2. 12V battery powered fairy lights
  3. THQ sequential indicators
  4. Climair wind deflectors
  5. Extra door seals
  6. Rugs for Bugs carpets - I wanted OEM rubber floors for muddy days and adding these carpets as these give 90% of the upmarket look as the VW carpet upgrade (IMO) but has more flexibility and easier to clean.
  7. CO alarm
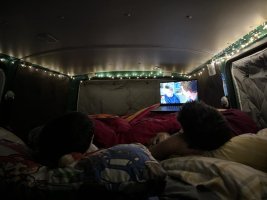
After I installed the additional equipment above we went camping for 2 nights with an 8 year old and 5 month old baby over new years eve in Braemar Scotland, without a pop top, awning room etc... We did add an EHU with RCD reel that we popped through the open window (wind deflectors paid for themselves) for 240VDC powering an oil filled 800w radiator but we turned it off through the night. The first night it was interesting waking up at 4am to heat a feed out the back of the van whilst the 8 year moaning its cold. The next day we went to Argos (3.5 hour round trip) and bought a bottle warmer, SOOOOO much better switching it on from bed not getting out hooking up gas to our twin burner camping stove and then waiting for it to heat in cold wind in my undercrackers. We used all our camping equipment but a con of this setup is I can't be arsed getting out to search for morning coffee stuff etc and using a cool box with ice packs is a pain, can't wait to upgrade to a compressor fridge.

Screenshot 2022-01-20 133802.png

Screenshot 2022-01-20 133749.png


Screenshot 2022-01-20 133819.png

Screenshot 2022-01-20 133835.png

Screenshot 2022-01-20 134432.png

Screenshot 2022-01-20 134443.png


93c4dbe8-5741-4f88-a58d-485de20509d6.JPG

Just going to use the van as is until July 2022, when the Jerba pop top is fitted then I'll be able to go a bit more gun'ho on the interior rest of the build. But need to sort electrics out next in the mean time.
 
Last edited:
I am in two minds about the electrics, I want to put a lithium system under the front seats but possibly for now a mobile battery box (like a goal zero, Jackery, home brew etc). We are just going power USB's for phones, ipads etc, 240vdc <300W for laptop charger and bottle warmer, compressor fridge, Auto term heater and some LED puck/strip lights in the future but not sure what to do this year, so some thinking to be done.
 
I think that is what I'll do but not sure if I'll go for a full electrical setup yet. Been looking at the seat base build thread. as we won't be sitting on the campsite for a week I might just install 80-100Ah lithium with Victron DC/DC and 500w inverter for now. can always add solar / EHU later on if needed.
 
Rear Upper Cabinets
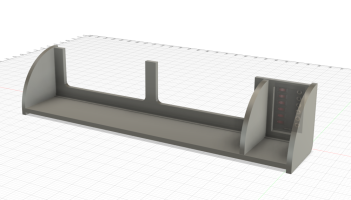
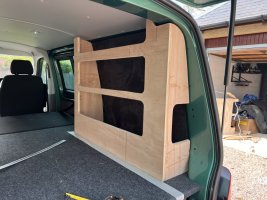
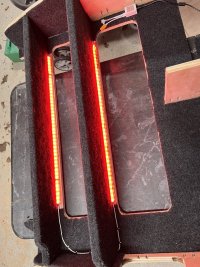
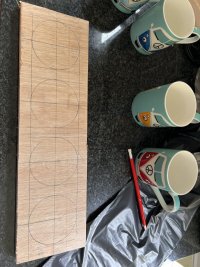
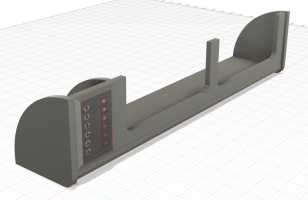
I have been looking at some upper storage lockers for the back of the Kombi so started designing in CAD, I'm still working on it and just 'roughing/mocking' out the design for now. I want to get them ready for after the pop top is fitted in July. The plan will be get two lockers CNC'd out of 15mm ply and fixed to the rear upper sides to create storage for tea/coffee, and little bits and bobs, mainly because I'm board and can't really progress until the pop top is installed.

::: List of Requirements :::
-----------------------------------------------------
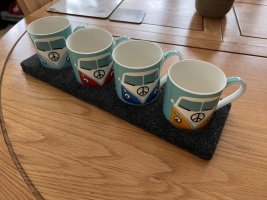
  1. Storage for mugs, tea/coffee, cans, small items, toiletries, charging phones etc
    1. custom foam inserts for mugs etc
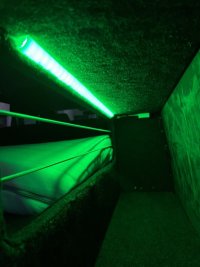
  2. LED strip lighting underneath (hidden and defused)
  3. Camper controls
    1. Drivers side - 12Vdc switch panel / distribution, 12Vdc out
    2. Passenger side - Aux Heater control unit (Once fitted), 12Vdc out and possibly 240Vac
  4. Carpet lined inside
  5. 15mm furniture boards construction
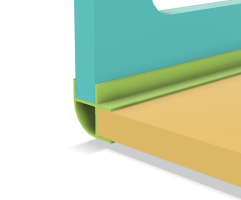
  6. 17mm radius aluminium extrusion on bottom corner to reduce the pain slightly when I hit my head on it in the morning (also provides a good strong joint)

Screenshot 2022-01-21 162350.pngScreenshot 2022-01-21 162426.png


Front bottom profile:
1642783775079.png


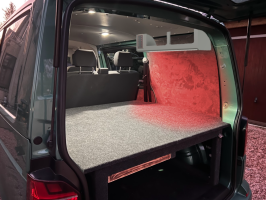
A quick rough and dirty photoshop to give myself an idea of how it will fit, also with some RED LED downlight (Yes I still need to sound deadening the arches ha ha):

Screenshot 2022-01-21 170708.png

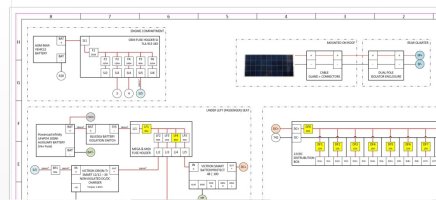
Also started first pass of the electrical system which is still WIP and once I have it all figured out I'll draft a proper wiring diagram to keep in the van, but I'll do a proper in depth post or two on the electrical system in the future.
Annotation 2022-01-21 171657.jpg


Well lots to be getting on with, until next time.
 
Last edited:
V1 Kombi Bed and basic equipment!
After looking at all the available bed platforms and the prices for what they are I decided I want to build my own with some wood left in the garage from other projects. As the van is a second vehicle we wanted to keep it as a kombi layout for the time being and this would also allow me to make modifications after each trip to refine the design to how we use it. So keep in mind this is a prototype.

The plan was to build a simple frame in line with the folding second row seats, pretty standard. I also added a very crude pull out shelf to put a camping stove on for when we can't setup the awning and kitchenette as I wanted the space underneath for now as we have loads of baby paraphyllia to contend with this year. I used spare carpet so only covered what you could see when the tailgate is open.

Image spam commence...

View attachment 142483

View attachment 142484

View attachment 142485


View attachment 142487

View attachment 142488


View attachment 142490

View attachment 142491

View attachment 142492

View attachment 142493
*Infamous Ikea mattress, the fold is spot on for traveling mode.

View attachment 142494


View attachment 142495


::: Additional Equipment Installed :::
-----------------------------------------------------
  1. Thermal screens
  2. 12V battery powered fairy lights
  3. THQ sequential indicators
  4. Climair wind deflectors
  5. Extra door seals
  6. Rugs for Bugs carpets - I wanted OEM rubber floors for muddy days and adding these carpets as these give 90% of the upmarket look as the VW carpet upgrade (IMO) but has more flexibility and easier to clean.
  7. CO alarm
After I installed the additional equipment above we went camping for 2 nights with an 8 year old and 5 month old baby over new years eve in Braemar Scotland, without a pop top, awning room etc... We did add an EHU with RCD reel that we popped through the open window (wind deflectors paid for themselves) for 240VDC powering an oil filled 800w radiator but we turned it off through the night. The first night it was interesting waking up at 4am to heat a feed out the back of the van whilst the 8 year moaning its cold. The next day we went to Argos (3.5 hour round trip) and bought a bottle warmer, SOOOOO much better switching it on from bed not getting out hooking up gas to our twin burner camping stove and then waiting for it to heat in cold wind in my undercrackers. We used all our camping equipment but a con of this setup is I can't be arsed getting out to search for morning coffee stuff etc and using a cool box with ice packs is a pain, can't wait to upgrade to a compressor fridge.

View attachment 142496

View attachment 142497


View attachment 142498

View attachment 142499

View attachment 142500

View attachment 142501


View attachment 142502

Just going to use the van as is until July 2022, when the Jerba pop top is fitted then I'll be able to go a bit more gun'ho on the interior rest of the build. But need to sort electrics out next in the mean time.
Love the side repeaters, I’ve had a look on THQ and can’t see them with the Transporter but on
 
Nice build thread We have no regrets on the Jerba pop top, recommended. We decided to also let Jerba do the carpeting on the interior when the pop top was fitted. They were more than happy to work with my WPB panels and hidden clips. And they have all industrial style adhesive systems and tools to do a good job of it.
Your drawings look a step upon my pencil and paper electrical diagrams
Thanks for the recommendation, makes me feel better as its over £6k fitted (paint, roof rails, bed, safety net). I looked at all the other ones and the Jerba stood out in terms of quality and the way the canvass removes sealed the deal. I use drafting packages at work but these drawings are just rough drafts at the moment just blocking out the systems. I guess being an engineer I like to have everything documented for future reference when stuff breaks ha ha.
 
Thanks for bringing us on this journey with you…following with interest!
Not a problem, The build is currently on hold until July when the pop top is being fitted, afterwards I will fit the rest of camper systems which I'll then update this thread. In the mean time I have been going away for the odd night / weekend just to get used to the van and figure out what systems I want onboard.
 
Rear Cabinets (Updated design and prototype build)
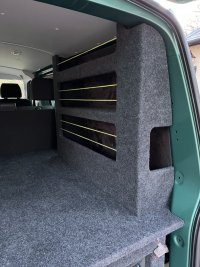
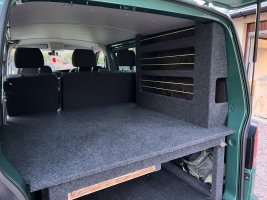
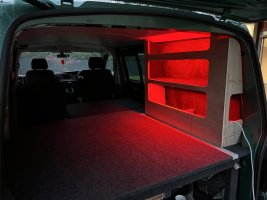
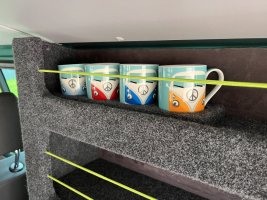
I built a quick prototype of some rear cabinets for some simple storage. The top shelf I used for mugs, tea, coffee, sugar, powdered milk. Middle shelf is for the jet boil Flash 2.0, snacks, books etc. Bottom shelf for everyday clothes and the rear hole I use to grab toiletry bags for super easy access, so far been its been a brilliant addition. I am still debating within the myself to build a pull out kitchen and / or draw system.

I'll let the images do the talking:

71E30F25-8DFE-4C7A-AC4A-5EAB683CC1B5.jpeg

9C11F6D6-EF6E-4430-93ED-2394AE2177EF.jpeg

C9F9C31F-CD91-4F02-95BC-166E1337CFC9.jpeg

9502DEDD-B151-4B7B-ADE5-BA171B1405C5.jpeg

59248CEB-6CC3-4756-8CED-ECBADBA8F77D.jpeg

39331A35-2E77-46C4-8658-7B38439958FC.jpeg

E418C55E-4354-4C95-93C3-0CA944562479.jpeg

E0E91A09-967C-4483-A870-0113E22E1DDB.jpeg

5E28C980-8B61-470F-83DA-B51CB5169023.jpeg

DB75CA22-8984-47C4-B55A-B345B578529A.jpeg

08E99833-4618-416D-B167-3C3496F139D6.jpeg
 
Back
Top