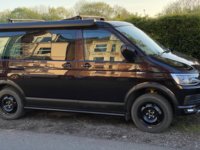
Just to help avoiding any leaks. Was going to fit some fibre washers but in the current circs had to use what I had at homeThe same as my original plan before needing the pipe carrier.
It looks like it fits well @Westy78. Washers to make it sit nicer or to help waterproof?
You are using an out of date browser. It may not display this or other websites correctly.
You should upgrade or use an alternative browser.
You should upgrade or use an alternative browser.
What Have You Done To Your Van Today?
- Thread starter Daneeyre
- Start date
-
- Tags
- mod modification mods retrofit
160 w ON MINE BUDDY
haha... i wasnt the only one. except i left my entire rear tailgate wise open all night in the rain...Came out this morning and realised I'd left the sliding door wide open all night...
which leads me to say I've been drying my Velle out the past two days - thank goodness its great weather today
Funny. I locked it and made sure the wingmirrors were folded in - i locked the thing from behind so i had a good view of the tailgate being up. Doi moment.

Oh, and my easter egg box bodge is holding up. The second hand bit came today. (prracticlly new though looking at it)
Was thinking about doing an oil change and that but... if i cock anything up (unlikley, but i have a habit of doing weird things at the worst moment... ) cant do squat to fix it fully until the world is a bit more normal.
Funny. I locked it and made sure the wingmirrors were folded in - i locked the thing from behind so i had a good view of the tailgate being up. Doi moment.

Oh, and my easter egg box bodge is holding up. The second hand bit came today. (prracticlly new though looking at it)
Was thinking about doing an oil change and that but... if i cock anything up (unlikley, but i have a habit of doing weird things at the worst moment...
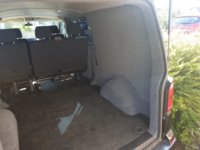
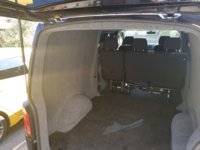
I finished my carpeting. I went for 6mm plywood but struggled to get the hidden fasteners to hold the curve of the rear panels. Luckily I had enough carpet left over (3m....) to cover the original hardboard panels just for the time being.
@Brennanpj , I like the look of that drawer! Is there a how to somewhere that I haven't seen or is it a one off?
Thanks , but not my idea . I copied this design below and fully carpeted it . There are a few variations . Try searching ‘under seat storage’View attachment 66514
View attachment 66515
I finished my carpeting. I went for 6mm plywood but struggled to get the hidden fasteners to hold the curve of the rear panels. Luckily I had enough carpet left over (3m....) to cover the original hardboard panels just for the time being.
@Brennanpj , I like the look of that drawer! Is there a how to somewhere that I haven't seen or is it a one off?
Made an underseat storage box for the new T6 for our trip to France, but, the new Van is 4 weeks late and VW vans didn’t tell me ☹
Hire van sorted instead, T6 4motion Kombi View attachment 43599 View attachment 43600
Continued my journey towards team Tango with some go faster stripes. There’s gotta be 20BHP here right?
Never fitted decals before (other than teeny tiny ones) so I was pretty pleased with how these went, except, I’m not sure about the one on the back, the curve in the tailgate meant it wouldn’t sit parallel with the bottom of the door. Might have to re-do this one. Anyone who has done this before got any tips on this? Would affixing the decal without the fixing tape allow it to stretch a bit so I could get it round the slight curve? Or did i just not do it right?
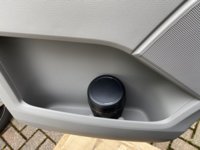
Oh and I also painstakingly fitted the door bin I picked up on EBay to the passenger door.
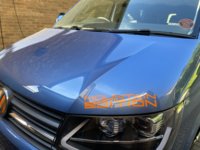


Continued my journey towards team Tango with some go faster stripes. There’s gotta be 20BHP here right?
Im no expert...but looks good..colour combo is very nice
Inspired by @Spaghettiboy78, back on page 53 of this thread, I dismantled the driver's door panel knob escutcheon (for want of a better description), and replaced the flush dull red LED for a superbright blue LED, and drilled the trim out slightly so that it stands proud a couple of mm, I can now see from some distance if the van is indeed locked.
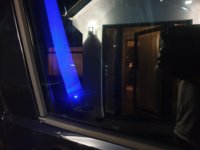
It's an hour's work, pull off door card, extract escutcheon, cut off leads, drill out existing LED which is held in by silicon. New 3mm blue LED, 610 ohm resistor for about 15mA across the LED, solder to the existing loom, a bit of heat shrink as I have handed in my badge for the Low Quality Squad, drill a bit more out of the back of the escutcheon so the LED sits proud a couple of mm, slide in new LED and resistor assembly and fill the back with silicone again to hold in place. It makes such a difference, in that I can see if the van is locked and alarmed, without having to go right up to it.

It's an hour's work, pull off door card, extract escutcheon, cut off leads, drill out existing LED which is held in by silicon. New 3mm blue LED, 610 ohm resistor for about 15mA across the LED, solder to the existing loom, a bit of heat shrink as I have handed in my badge for the Low Quality Squad, drill a bit more out of the back of the escutcheon so the LED sits proud a couple of mm, slide in new LED and resistor assembly and fill the back with silicone again to hold in place. It makes such a difference, in that I can see if the van is locked and alarmed, without having to go right up to it.
Hi have you got a link for such blue brightness?.
Hi mate. Sorry, I’ve just noticed this message, only taken me a year! Someone liked the post, and I noticed yours. Sorry!
The LED is merely a superbright blue 3mm LED with a resistor in series. I drilled out the old one carefully and picked out all the silicone, and then hot glued the new one in after heat shrinking it. Then just cut and soldered the wiring.
I bought a spare bezel from a beetle rather than mess about with mine.
if you want the resistor value, I can find it out as I have a few spare.
Inspired by @Spaghettiboy78, back on page 53 of this thread, I dismantled the driver's door panel knob escutcheon (for want of a better description), and replaced the flush dull red LED for a superbright blue LED, and drilled the trim out slightly so that it stands proud a couple of mm, I can now see from some distance if the van is indeed locked.
View attachment 66550
It's an hour's work, pull off door card, extract escutcheon, cut off leads, drill out existing LED which is held in by silicon. New 3mm blue LED, 610 ohm resistor for about 15mA across the LED, solder to the existing loom, a bit of heat shrink as I have handed in my badge for the Low Quality Squad, drill a bit more out of the back of the escutcheon so the LED sits proud a couple of mm, slide in new LED and resistor assembly and fill the back with silicone again to hold in place. It makes such a difference, in that I can see if the van is locked and alarmed, without having to go right up to it.
nice work! My next job is to take a positive from the driver’s side over to the passenger’s side and fit another that’ll be synchronised with the driver’s side.
@JasonW , are they the twin tube Konis from @CRS Performance ?H&R springs with Koni's. A drop of 40mm.
View attachment 66450
View attachment 66451
View attachment 66452
If so, do they make much difference to standard dampers & the H&R springs?
I understand, that it's a very subjective matter, but my summer wheels are 19" Cantara alloys, like yours, with the same -40mm H&R springs, on standard Vw dampers.
The HR's being fitted by Andy @ AJC when he completed the conversion.
It's the next big thing on the T6 list of spending money, that I don't have much of!!
When will it all stop...
When is it Christmas??
@Big.mac - could you also say if it's the same to fit another bin in the opposite door, or does this need another thread of its own?Will you create a thread with some details instructions on how you installed the bin?
@cgtmiles - its a mod i've wanted to do, but just wanted another forum member to point me in the right direction, glad i'm not on my own!!!
I would strongly recommend doing the passenger door only and leaving it at that!
I'll try to see what I can do & post accordingly.I would strongly recommend doing the passenger door only and leaving it at that!
Its good to help others...
Similar threads
- Replies
- 0
- Views
- 700


