Panadonkia - A Shuttle Conversion

Dieseldonkey

150 DSG Shuttle Conversion
VIP Member
T6 Legend
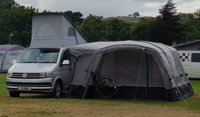
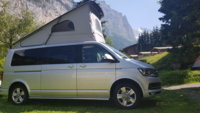
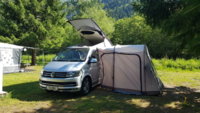
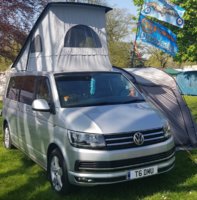
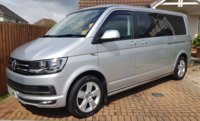
Got my new V5 back from the DVLA having past the post with respect to their requirements. So I'm now officially the owner of a motor caravan. It's been 18 months since I got a dose of campervan envy at a campsite in Norfolk. Happened to see an indium grey outfit and thought, mmmhm, that's a bit stylish. Thats when my T6 story kicked off. So sold my caravan and the car that towed it to said site and found a 16 plate, 150bhp, LWB, DSG, 9 seat T32 Shuttle with 7000 miles on the clock. In August 2017 the journey begain with what was essentially a vehicle best suited to being an airport taxi. Although I think there's a good chance my Shuttle was bought in to work the 2016 Commonwealth Games in Glasgow.
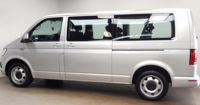
20181102_205826.png
Theres been a lot of ups and downs along the way but pleased with the camper I've ended up with. Still a few things left to finish off but it's now fully usable for the friends and family holidays, cycle tours and day trips. Its properly flexible too. The bed on rails means I can get three bikes in the back. 2 of the original Shuttle seats can drop back onto the brackets in front of the rails. This gives me the option to have 6 seats. Alternatively, I can put the two extra seats in and have a large flat load area load with the bed down.
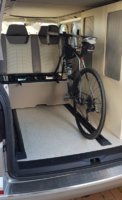
20181102_220210.jpg

So the build list...
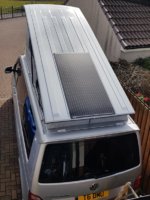
Carbon fibre, colour coded low profile roof with panoramic tent.
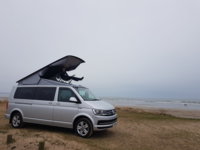
20180407_161033.jpg
Devonports for the summer and repainted Design steels with winter tyres.
Vanstyle stainless side / safety bars.
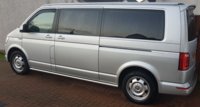
20181101_080143.jpg
RDX tailgate spoiler. Dubflecta wind deflectors. Mudflaps. Stainless rear bumper protector. Auto Vox reversing camera mounted in the spoiler. Window tints. B pillar vinyls. Chrome lower grille trim. Chrome mirror trims. Awning rail. Westfalia detachable towbar and electrics. Smart bed Evolution R with custom length rails. Evo Design 5.4 furniture kit in cream and stone grey with lacquered bamboo worktop and table.
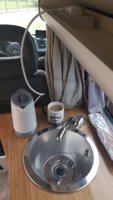
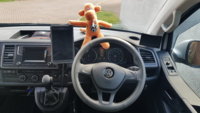
20181015_154636.jpg Webasto diesel hob. Webasto dual top loading fridge/freezer. Webasto Airtop 2000 STC diesel heater with Thermocall. Sink, tap and pump. Ablemail DC-DC charger. 110ah leisure battery. Swivel front seats. 8 LED interior spotlights. 240v mains hook up kit, distribution board and self switching supply relay. Sterling 1000w inverter. Van X matte black glove box. Hertz ECX 6 x 9 speakers in the rear overhead locker. Carpeted and insulated side panels. Leather steering wheel cover. Ply flooring with Altro covering. H&R anti roll bars. Private plate (Thanks to Mrs Donkey). Atera strada DL3+1 bike rack. Vango Galli awning. And a monkey.
20180928_084729.jpg

20181009_121745.jpg
20180731_192439.jpg
Still to do.
Solar panel.
MFSW with paddle shift.
Front fog lights.
Panamerica style (hopefully, when it turns up) front bumper underrun protector.
Dash trim bits and bobs.
Front seats upholstered to match the rear.
Alpine MRX amp
Front speaker upgrade.
Sound deaden front doors.

Then, I'd like to say I'm never doing this again!!! But somehow I know this project will go on and on and on and........

And its all your fault. Yes....you lot. For being so sodding helpful when advice was sought. And suggestive with ideas. And posting temptation inducing pictures.

So a big genuine thank you to all the members who helped me out with advice along the way. Also thank you to the folk that run and administer the forum, for doing such a great job.:thumbsup:

20181012_152436.jpg
 
Last edited:
I'd also like to recommend the following businesses that I've used.

Elle and Sam at East Coast Interiors in Leven for the curtains and upholstery.

Barry at Autotints in Kirkcaldy.

Cameron at Oor Wee Spray Shop in Oakley for spraying the wheels, tailgate spoiler and laquering my worktop. He properly strived to get perfection in his finish.

Martin at Smart beds. Went above and beyond with sorting out the custom length rails. Great customer service.

Martyn @travelvolts for his words of wisdom and the supply of various parts.

Likewise, Jason @Absolut5 and Simon at Wudworx.

@superchargedpolo. Kylesku Campers. Craig fitted my diesel heater. Meticulous attention to detail, photograph updates during the installation and a level of care for your van that can't be faulted. Highly recommended.
 
Last edited:
I think a lot of people can echo those sentiments about the forum, well said
Now you can sit back and think of all the fun you have had building it :) and how much easier it will be when you build your next one and you add on all the things you missed the first time round:rolleyes:
 
Awesome work sir. We are ex-caravanners too who saw an awesome looking camper and thought it was the future. I can echo the thoughts about this forum although it has cost small fortune in additional 'extras' members keep highlighting.
 
First cup of coffee brewed on the leisure battery and newly installed inverter. Hidden socket up on the shelf for the kettle and a wee tele. 2 sockets on the pop top floor for heating and entertaining Donkey Junior. One at the back door for a fan heater and wiring up burglars. 2 more in the rear locker enclosure. Can never have too many sockets.
20181201_113407.jpg

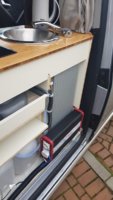
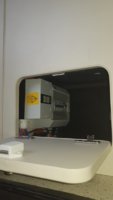
Found some dead space behind the units for the Sterling 1000w pure sine inverter. Its fitted with an additional remote switch, mounted on the drivers B pillar. The location keeps the supply leads nice and short, as the battery is under the drivers seat.
20181201_114139.jpg

The inverter is wired into a relay mounted under the top loading fridge. Supply to consumer unit defaults from the inverter. However, as soon as the mains hook up is turned on, the relay switches across to the shore supply.
20181201_103012.jpg
 
Just doing a wee tidy up and adding a link into this build thread. Pictures showing the six seat layout of the van and flexability of the Smart Bed Evo R rail system are on here.

T6 Shuttle Conversion
 
@Eli1264 @Andyman ,

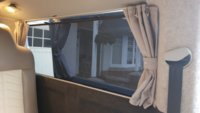
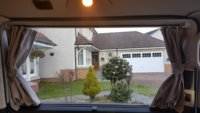
Some members asking for pics of curtain rails on Caravelle head lining. Here's how I did mine without damaging it. Pictures are of a Shuttle with panels carpeted over with four way stretch. I'm sure these are similar to the Velle panels.

20190124_150956.jpg

20190124_151502.jpg

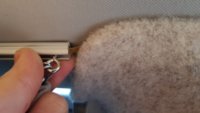
I wasn't keen on the method the company that made the curtains were going to fix the rails to the head lining. Basically by putting screws through it. So instead, I cut some short strips of brass. These were fixed at the end of the track, held in place using the curtain track end loops. These thread into a square nut and stop the curtain sliding off the end of the track. The brass strips then hook over the pillar trims.

I've pulled the track forward in this picture so you can see the brass sliding between the pillar trim and head lining.

20190124_151125.jpg


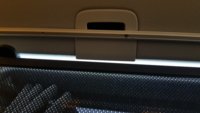
One screw is used to fix the centre of the track. However this screws into the seatbelt aperture and not the headlining. Far cheaper if this ever needs replaced, as opposed to the whole headlining.

20190124_151215.jpg

In hindsight, I would of cut the tracks longer and simply stepped the end so that the brass wouldn't be required to hook over the trim. However the tracks had already been cut by the upholster. Heavy duty double sided tape could be added for security but the tight interference fit seems enough to securely hold the curtains in place, both when both open and closed.

The lower track and side door tracks are fixed using 2mm screws.
 
Last edited:
Front fog/cornering lights now ticked off the list. Thanks to @zebra for his write up on how to do it, @superchargedpolo (Kylesku Campers) for the coding and @Pauly for the parts.

Today's job was fitting a 160 watt photon harvester. Its the last of the big ticket, semi essential item on the build list. Everything else now is just bling, ponce or luxury items that you start appreciating, only when you admit your middle aged.

Drilling a hole in £5000 worth of roof wasn't the most enjoyable experience, but the underside junction box is a snug and Sikaflex sealed fit. Design means it's invisible, no cables on show and it doesn't add another 20mm or so to the vans height.

Double sided high strength tape was used to give a seal around the edges and sikaflex used inboard to ensure any prospect of the panel taking flight, is arrested. Cables run to the underseat Ablemail 12-12-30 DC DC charger. Was happily releaved to see its little green light illuminate, indicating it's being fed electrons from the panel. :thumbsup:

20190320_115920.jpg
 
Front fog/cornering lights now ticked off the list. Thanks to @zebra for his write up on how to do it, @superchargedpolo (Kylesku Campers) for the coding and @Pauly for the parts.

Today's job was fitting a 160 watt photon harvester. Its the last of the big ticket, semi essential item on the build list. Everything else now is just bling, ponce or luxury items that you start appreciating, only when you admit your middle aged.

Drilling a hole in £5000 worth of roof wasn't the most enjoyable experience, but the underside junction box is a snug and Sikaflex sealed fit. Design means it's invisible, no cables on show and it doesn't add another 20mm or so to the vans height.

Double sided high strength tape was used to give a seal around the edges and sikaflex used inboard to ensure any prospect of the panel taking flight, is arrested. Cables run to the underseat Ablemail 12-12-30 DC DC charger. Was happily releaved to see its little green light illuminate, indicating it's being fed electrons from the panel. :thumbsup:
Hey dieseldonkey, as you have a shuttle, as like to pic you brain , I have got my camper to the way I like it but unfortunately there is a couple of thing's that have to be done to actually have it accepted by the DVLA , one is my table is free moving as I don't really want a bar going across my lovely units or a hole in my floor and the second is I only wanted a single hob as really I cook outside my van and use the single hob for a cuppa in the morning , now would you say there is eny benefits from changing a shuttle to a camper on your v5 ?, I can't think of eny if am honest , ano DVLA seam to be given people the run around at the moment but put that to one side for now lol ,as always thanks for your time

View attachment 39263

A wrote summit and its disappeared lol , need to start again :thumbsdown:

Try again , want to pic yer brain dieseldonkey if that's ok . Iv had my convertion done and am really happy with it but unfortunately the DVLA won't change the v5 unless I have my table fixt some way to my units or put a hole in my floor , both options I'm not really wanting , also it states twin hob or oven . A don't need a twin hob as I cook out side my van and use single hob for a cuppa in the morning lol . Is it really worth my while doing theese two modifications to a shuttle as a don't see eny games , did you find eny plus's changing your v5 , thanks againg for your time :thumbsup:
 
@St4n99 If you look at the photo that has my table in it above, it clips onto a rail underneath the worktop. Then simply unclips when not needed. Evo design supply all the parts you need for this.

As for the hob, perhaps you could place a microwave somewhere for the photos. I believe this also counts as an alternative to a two ring hob.

The appliance I use the most, is actually a 700 watt kettle, powered from the leisure battery and an inverter. However a gas ring and kettle will do the job just as well.

I do use the diesel hob for frying things but also take a small microwave, if I know we're going to be on a mains hook up somewhere.

You can do most essential stuff on a burner ring though.
Thanks dieseldonkey , had a look at Evo design website . They have a few rail designs and one does look like it would go nice with my cabinets , didnt think of the microwave if am honest ,al definitely look into that as it probably come in handy if on a site like you said , thanks again for your time :thumbsup:
 
Very nice set up ,well done .
Can you tell me what roof you have used ?
I like the slim fit of it,some others look like a bath tub stuck on top but your one is sleek .
John
 
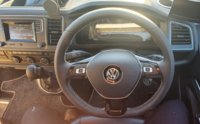
Panadonkia treated to its last modification of the decade. Potentially the last one that needs VCDS to complete too. The old steering wheel with the it ain't pretty but it feels chunky now that Donkey stitched his make do, for now, leather (thats genuine Aliexpress chinese nappa, apparenlty), cover has gone. Probably up cycle the sodding thing into a plant pot holder, for prosperity. Cant believe VW churned out an SE spec vehicle with this horrendous plastic pile of rotational jobby on it.
20190314_131857.jpg

Anyway, now replaced with a custom leather, silver stitched, MFSW with flappy paddles and perforated bits. Means I can keep cruise on the left stalk, just where I like it to live. Euro 5 style. 20191231_131531.jpg

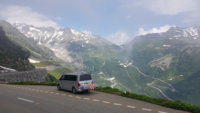
Been great to use the van this year for what it's been built for. Makes it all worthwhile.

H&R ARB test track, Switzerland.
20190709_144031.jpg

20190705_153144.jpg

Al Fresco in France.
20190710_172038.jpg

20190713_232244.jpg

Europa park in Germany

20190704_195728.jpg

20190704_220839.jpg

Dudley...

20190909_162123.jpg

20190420_143321.jpg


20190428_115806.jpg
 
Last edited:
Hi Panadonkia,

The van looks awesome! Taking lots of ideas from your set up. Did you have any issues with the C pillar? I’m hoping to get units from Evo Motion for my Shuttle but worried about having to do a lot of cutting to fit them around the pillar.
 
Hi Panadonkia,

The van looks awesome! Taking lots of ideas from your set up. Did you have any issues with the C pillar? I’m hoping to get units from Evo Motion for my Shuttle but worried about having to do a lot of cutting to fit them around the pillar.

Been a while since I've been on the Evo design website but if memory serves me correct there is an option to select the kit suitable for a twin slider. My kit came with the worktop already cut to fit around the C pillar.
 
Great thanks. I spoke to them earlier and they said it's not a problem. Did you have an issue getting your bed to fit over the plastics side trim? This seems to be the next 'shuttle' hurdle!
 
Great thanks. I spoke to them earlier and they said it's not a problem. Did you have an issue getting your bed to fit over the plastics side trim? This seems to be the next 'shuttle' hurdle!
The rear left panel has a sticky out arm rest bit in the moulding. Its bordered with a rectangular shape. This was cut out the panel and replaced with a thin ply board. Then carpeted over. This means the seat/bed frame and upholstery can slide back and forth without fouling the arm rest. Sorry about fence shadow in pic but hopefully you can see the outline through the carpet of the cut out.

20200504_191028.jpg
 
Thanks for the picture - That’s a good idea. I didn’t want to lose the window blind. Did you do the same for the wheel arch or is the Smart Bed high enough not to catch on it? Thanks.
 
Also (sorry to pester you but it’s hard to fine much in for on Shuttle conversions), did you keep your auxiliary heater in the rear driver side? If so, any issues with fitting the units around it / ducting it out?
 
Your welcome. No, the Smart Bed frame clears the wheel arch. Are you keeping two Shuttle mid row seats in play @Ikelly ? If so Smart beds will make up custom length rails for you, allowing you to keep the existing seat brackets in the floor.
 
Back
Top