First time camper conversion 2024

Amber

Member
T6 Pro
I've posted a few times before and read a huge amount of helpful stuff on here - thank you all!

I thought it might be worth me setting up a thread for my build because I keep forgetting what I've posted or not. I'm converting a 2017 sub T6 - my first time and I'm trying to do much of the work myself.

First job was getting the pop top installed by Westdubs in January - I went to their warehouse near Malvern and they were absolutely brilliant, so helpful and threw in extra little things for free, even carpeting a spare bit of wood for me and was a really reasonable price. So thanks guys - strongly recommend.

Other stuff I have done already:

Bulkhead
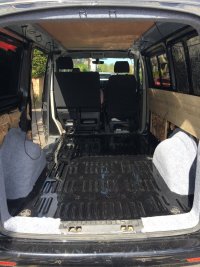
strip ply and floor
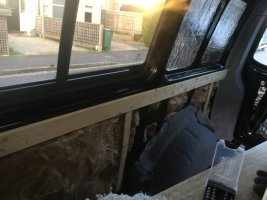
cut out the windows with angle grinder and jigsaw - installed Kiravans windows. Made quite a lot of mistakes here including not protecting them from swarf which has marred the rear windows a bit, and I'm still dealing with a tiny leak in one. - using gorilla pour and seal to fix hopefully!
Fitted a MS Craft Swivel seat
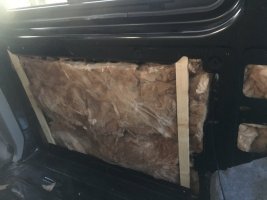
Sound deaden and insulate the walls.
Carpet line around the pop top.
carpet wheel arches etc.

Having trouble pinning down an rnr bed supplier - after one of them went silent on me (still owes me £347 and I am having to raise a dispute with PayPal )

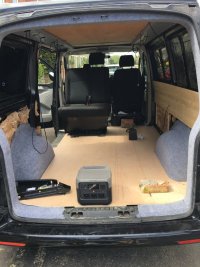
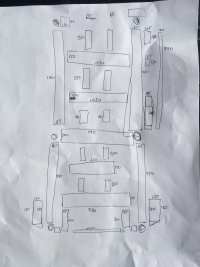
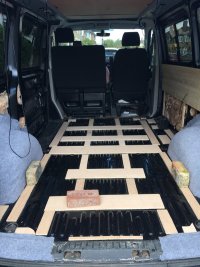
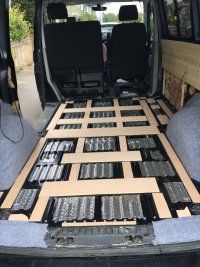
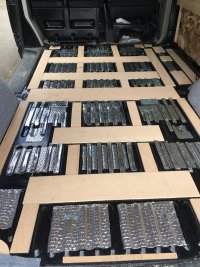
Today I fitted my floor. Measuring the batons and cutting them took a looooong time. Here's my paper plan in case it helps anyone.
I used 9mm ply for batons and for the floor. I cut the floor with a jigsaw in two pieces - its alright.

Stuck the batons down with sikaflex.

10 sheets of Dodo hex in the gaps.
I had a couple of sheets of insulation left over so I spent a ridiculously long time cutting into thin strips and filling the gaps in lots of the ridges which I'm sure will have very little effect, but waste not want not.

Stuck the ply floor down on top of that. Sikaflex and no more nails when I ran out.

Then I remembered that I was going to wait until the vinyl arrived so I could use the floor as a template....whoops.
IMG_5843.jpeg


IMG_5859.jpegIMG_5860.jpegIMG_5862.jpegIMG_5863.jpegIMG_5864.jpeg
 
Done loads of work on the van these last two weekends.

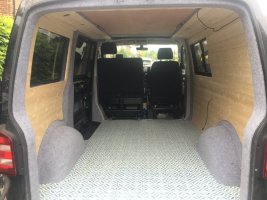
I have installed a vinyl floor. I like the way it looks, but I'm worried it's not going to be very durable, and I have already manage to cut the surface by dropping the bed board on it. Hey ho. At least the mark should be covered by the seat.

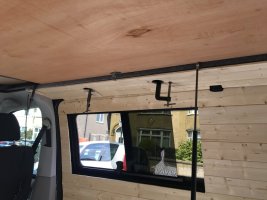
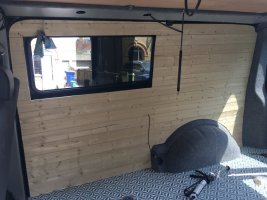
I've also been wood panelling the sides and ceiling, which has been an almightly faff, but I do feel I've turned a corner. I was trying very hard to follow the curves and not to lose interior space, so I mostly went for gluing it down, with some screws to batons hidden inside the cavity. I managed not to add any new screws to the metal work.

I drove to Sheffield yesterday to JDS Metaltech to get my rnr bed installed. Excellent job! I will post pictures very soon.

IMG_5728.JPGIMG_5730.JPGIMG_5918.jpegIMG_5914.jpegIMG_5930.jpeg
 
Now THAT'S cool! I like the timber lining with the carpet!

Very, very smart
 
Now THAT'S cool! I like the timber lining with the carpet!

Very, very smart
aw thanks. I couldn't think how else to do it. I'm not that keen on the carpet look, but I have to say when I finished off all the little bits so you don't see the metal I think it does look all right.

Though I've realised colour-wise the floor doesn't go with the carpet :rolleyes:
Planning to paint the tongue and groove when I get around to it. so maybe I can find a transitional colour?
 
  • Like
Reactions: CAB
Planning to paint the tongue and groove when I get around to it. so maybe I can find a transitional colour?
Consider just giving it either a good wood oil or varnish and make the most of the interesting detail the wood gives?

If not I'd recommend a really light colour.

Both of those work well on narrowboat fit outs I've seen (where the wood lining is the "go to" approach)
 
I've used Deks Olje before in a marine environment - but that might be more suited to hardwoods.

The advantage of a good wood oil is it doesn't form a surface, it just soaks into the wood and stops anything else getting in. It means you can always top it up over time whereas a varnish or a paint would need stripping off.

However it does mean it's a one way street - once you've used oil it's unlikely a paint or varnish will work.

Try some finishes out on some offcuts first and see what you like - a quick simulation of wood oil can be done with some clean cooking oil.

 
Thanks all, I'm going to try the paint look on some offcuts and see how it goes. Good tip.
 
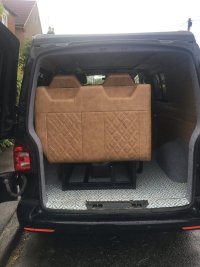
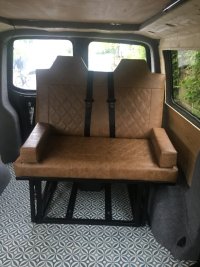
So I want to give a big shout out to Dan and his great team at JDS Metaltech in Sheffield. This is a small, family run business and they've been doing it for I think he said 14 years. I was looking for a budget option that would fit the bill, M1 tested - good quality.

Dan was great at communication - checking he had all the right information. The team fitted my bed in about half an hour. Fantastic job! They made me a bespoke tan leather-look cushion, which I'm really happy with.

When I got home, the gas strut hissed out a load of gas. I contacted Dan and straight away he identified a faulty strut and offered me to either come back, or he posted me the replacement strut. It arrived in a couple of days with the instructions to fit it plus offer of a call to talk it through if necessary - fantastic customer service. Also they went out of their way to help me with a completely unrelated problem... The casing on my seat belt on my bench seat had broken - nothing to do with them - but they found a replacement seat belt and even fitted it for free. Absolutely brilliant, kind service - Thanks guys!

IMG_6001.jpeg

IMG_6003.jpeg

IMG_6004.jpeg
 
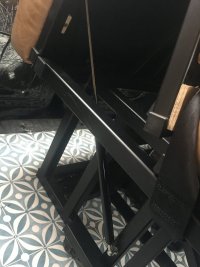
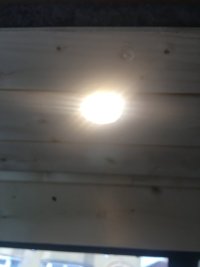
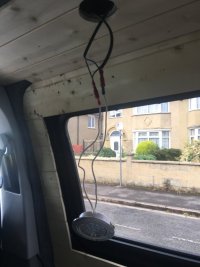
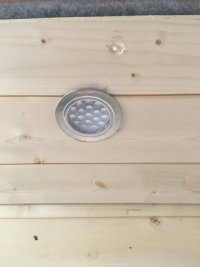
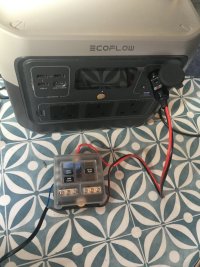
I'm taking the van out for our first family sleepover tomorrow - even though it's' a long way off finishing. Need something to focus the mind! SO I decided what I really need is lights, and spent yesterday fitting this system. I was unbelievably excited to get the lights to turn on!

IMG_6005.jpeg

IMG_6006.jpeg


IMG_6011.jpeg

IMG_6013.jpeg
 
So after a month of doing sweet FA on the van, this weekend I got my act together and painted the wall panelling. First of all I did it in Cuprinol light blue... then decided I didn't like it and re-did in an expensive Farrow and Ball white.
I have also started messing around with a little "kitchen unit" aka dresser from charity shop.
IMG_6166.jpeg

I also installed the solar panels on the roof. This is a job that has been hanging over me as I've been worrying about the precision involved - I'm more of a diy botcher.
I installed 2 x eco-flow rigid solar panels in parallel. I've glued them onto mounts with sikaflex. Hoping them will stay on ok. I haven't ruled out adding an extra screw here and there. I'm thinking it might be good to put a wind breaker in front of the first panel. So thrilled to plug the solar panels into the ecoflow and see it charging up - my first renewable energy production!!

IMG_6164.jpegIMG_6165.jpeg

I've got a trip planned with the kids to drive to Santander and then ferry back to Plymouth - I feel that the camper conversion has reached the stage where that is actually possible now... though obviously I still need to do a heap more work before I'm finished!

One thing that I've been pondering is what to do about my ceiling/ pop-top bed board. Original plan was to tongue and groove as per the walls, however I'm worried about the extra weight and also the loss of height. I'm loving my jds Metaltech rnr, but the height does leave me very close to the ceiling. So the plan I have hit upon is to paint "tongue and groove" on the bed board underside with the help of masking tape strips. This is my practice run which I'm, pretty pleased with:
IMG_6147.jpeg
Before I do that though, I need to get my head around how to make a 2x hinged bed board. About to start scrolling through forum for instructions...
 
For the bifold bed, I set off with a pile of trigonometry, but in the end laid out the positions with string.

Pictures

Drawing of the geometry


Parts list

And I uprated the rams to 220N and M8 fittings rather than the ones from the list.
 
@drinfinity this is amazing - thanks. I just found your post about the struts and am gearing up to order parts.

I already had a bed board installed by Westdubs - single hinge - so I'm planning to re-use what I can - namely the gas struts it comes with - I'm hoping these will work as the longer solid struts - I have read on another post that they will be ok... Though I am imagining I will likely have to change where it attaches. Hard to imagine the mechanics... but I think if I have the right parts I can work it out .... famous last words.

So I am planning to order these

1719178164070.png
Just scratching my head about what brackets I'll need and whether I'm going to have a problem with the existing placement of the other struts. Thinking maybe I'll put these ones above the bed. But I'm not sure how I'll fix them yet.
 
ok I think I have worked this out... the shorter struts at the back will have to do all the pushing work - so I need 220N and I will just have to have my existing gas struts working on fully extended, (ie as solid struts) and relocate where they attach to the board...
 
Last edited:
I forgot I wanted to share this little thing I'm quite pleased with. I didn't want to fork out for a new deeper plastic Kombi step, so I just used left-over window trim to finish off my floor above the step, and I think it works all right - in case anyone else is looking for a budget step option:
IMG_5912.jpeg
 
I forgot I wanted to share this little thing I'm quite pleased with. I didn't want to fork out for a new deeper plastic Kombi step, so I just used left-over window trim to finish off my floor above the step, and I think it works all right - in case anyone else is looking for a budget step option:
View attachment 247663
That’s a neat looking solution!
 
I forgot I wanted to share this little thing I'm quite pleased with. I didn't want to fork out for a new deeper plastic Kombi step, so I just used left-over window trim to finish off my floor above the step, and I think it works all right - in case anyone else is looking for a budget step option:
View attachment 247663
Noice work! I'll be doin that if I have spare window edging!
 
So distance ABC (hinge to bed strut mount when bed flat) has to equal ADC (hinge to roof strut mount to bed strut mount).

When fitting, put the roof mount D on before bed mount C, then you can check again with the string and move C a bit if required.

View attachment 228700

Having just spent an hour in my van dismantling my bed board and playing around with the struts - I actually understand what this diagram means now! I think I have a cunning plan for re-using the bits and bobs I already have (plus a few extra from SGS.) Thank you so much for taking the time to explain how you did it. If my idea comes off I will post my steps.

IMG_6174.JPGIMG_6178.JPG
 
Back
Top