One lass and her van - panel van conversion

fidav

Member
T6 Pro
So after being inspired by Stockwell Campers posts about their van conversion I thought I’d post my journey of converting my panel van.
Although possibly at the risk of being punted off the forum as mine is a T5 and not a T6!
However hopefully vw camaraderie will ensue and I’ll not get any abuse !

The aspiration is a van capable of carrying 4 passengers, a medium dog in a crate and several mtb/road bikes along with the ability to sleep 2 with bikes and dog still in the van without fitting a pop top!

The reality is I’m a full time working, 40 something mum with limited time, skills and funds to do the conversion which needs done before end April to take my son to bike races!!

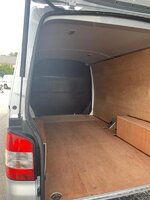
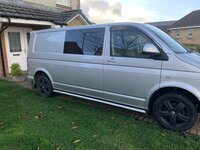
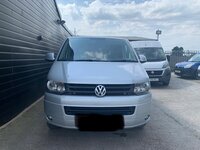
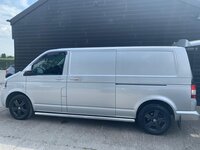
The journey starts with the purchase of a silver highline LWB 2015 plate T5 (or is it a 5.1?) that was a joiners van before I bought it. In other words sawdust and resin in every nook and cranny and needing gutted!
F0196166-A215-44EE-BB8C-E50224157B49.jpeg

6EC136B6-944C-43BE-8F43-861C3D9FAA5F.jpeg

BF3CD5E9-B601-447E-A97F-A29C02F4D3F3.jpeg
 
I bought the van at the tail end of 2020 and decided to spend the winter using the van to help me decide what I wanted in it before I did any significant work . I knew I didn't want a kitchen pod or a rock n roll bed due to the space that they took up and I knew that I wanted to carry bikes without taking of wheels in the van but that was it. I'm so glad I did take several months to get to know the van and what I wanted as I must have changed my mind about 10 times (and still changing it )!! I have the forum to thank for this as reading everyone's posts and seeing what people have done to their vans has helped me rule things in and out before wasting my money.

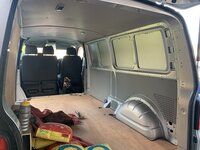
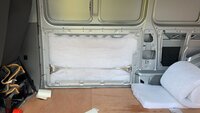
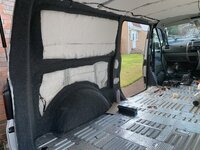
However what I did decide to do early on was to remove the bulk head so I could see the pup in his cage in the rear. The intention was to grind out the lower fitting brackets but due to where the welds were located this meant having to remove the front bench in order to remove the B pillar trim to get to the welds so this was put on hold until I was ready to do the electrics to save taking the seat out and in and out and in. The next plan was to remove the ply that was fitted on the walls and floor and give the van a good clean however courtesy of the pup pulling " I'm freezing faces" at me when being transported in the van and the kids telling me how unfair it was for him in the back with no heater I decided to sound deaden and insulate the van at the same time. I'm glad I did as the noise level in the van increased significantly when the bulk head was removed !

Lesson learned the hard way:
Wear gloves when handling fluffy insulation ! I spent hours picking off bits of white fluff off my fingers, arms and every where else I managed to get the glue !!
A trim removal tool is much better than a flat headed screw driver for popping the original panels off - doesn't remove as much skin on your fingers when it slips!

3AFA69B6-1D43-4707-8D9C-E9A0EE7E9789.jpeg

57276989-2EAF-4717-BBA2-3C0C6A7E9F5D.jpeg
 
Last edited:
Although possibly at the risk of being punted off the forum as mine is a T5 and not a T6!
However hopefully vw camaraderie will ensue and I’ll not get any abuse !

Never mind all that, what we need is lots of photos and updates.

I've seen a few vans converted with a bulkhead put in to form a rear 'garage' where bikes go in sideways. This can be stepped in higher up to accommodate wide MTB handlebars. In the LWB, there is enough room to leave a comfortable sleeping area in the middle between the new bulkhead and front seats. If you sleep with your head towards the front of the van, it's just your feet that are under the handlebar shelf.
Cool thanks for info - I think I have a plan for the seating/ sleeping arrangement ....that posts coming soon !!
 
Next thing was the windows being fitted- decided to pay someone local I'd heard did conversions to do this. Not the neatest job in the world but I guess for £100 to fit I cant really complain as I knew i was getting it done cheap !!
Might need to get the passenger and driver side windows tinted to match, well, as dark as is legal !

6BB7E817-7D63-414C-B106-5747614B83F4.jpeg

212CDA8D-7284-4FCD-93B6-99C28D33E27B.jpeg
 
Nice looking Van! And i love how folk that think they have limited skills have a go at various jobs on their Vans. Then find out how satisfying it is when you stand back and admire your handy work... :)
 
Next thing was the windows being fitted- decided to pay someone local I'd heard did conversions to do this. Not the neatest job in the world but I guess for £100 to fit I cant really complain as I knew i was getting it done cheap !!
Might need to get the passenger and driver side windows tinted to match, well, as dark as is legal !

View attachment 108428

Good idea to have one sliding window each side, my one window behind my gas hob is not best situated and awkward to open/close, especially if the hob is on. That's a
good price you've been given so interested in your 'not the neatest job in the world' comment? I'm waiting on lockdown lifting and have a converter lined up to replace my sliding door fixed window with an opening window, and I'm going to pay over £300. I'm already carpeted and insulated so hoping this will be straightforward.
My thinking behind this was that I plan to sleep at the passenger side of the van so thought being able to open this window would be good. The other window is in case I ever change my mind about wanting a kitchen fitted in the future or if I ever sell the van.
The not the neatest job comment is due to the seal around the windows being uneven and there are bits that seem to have been cut by accident. Fortunately I plan to make a van shade to go over it so the flaws will be hidden.
 
  • Like
Reactions: KR.
Nice looking Van! And i love how folk that think they have limited skills have a go at various jobs on their Vans. Then find out how satisfying it is when you stand back and admire your handy work... :)
Cheers I hunted for about 8 months to get what I wanted ! So far nothings been difficult just very time consuming !
 
Next job .... carpeting the frame (plan to carpet ply panels later rather than use the oem panels).... holly molly this was harder than I thought it was going to be !
What all the videos don’t tell you is that while the carpet stretches its bloomin hard work to make it stretch ! Lots of errors were made during this stage but I think once the panels are on all the mistakes (cutting it too short and having additional joints and getting glue all over it !) will be hidden so all will be good :oops:
The wheel arches look bad but that’s because I carpeted over the bubble wrap insulation however these are going to be hidden in a storage unit and behind a box seat.

Lessons learned the hard way:
Always clean the nozzle on the spray glue before you use it to stop it spraying out in every direction all over your new carpet !
You can turn the Stanley blades around in the knife (Yip I’m a numpty .... fortunately realised before disposing of them !)

C3581F1E-568C-4D55-8C79-DA746FE9322E.jpeg
 
Last edited:
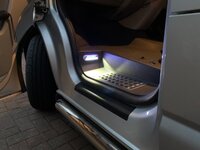
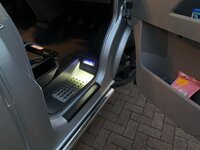
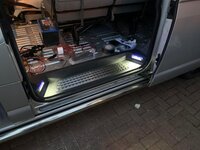
The next plan was to replace all the door seals but somebody on here ( @Stockwell Camper) posted a picture of nice new door steps with lights that got me distracted ........
a few days later and several wire switches around I had the same new door steps fitted :)
Door seals were fitted after but what a pain those were round the front of the cab doors- had to take off the A pillar trims to fit, so what I thought would be a 10 minute job turned into about 2 hours all in !

Lessons learned the hard way:
Never trust that the oem has wired things up correctly !
Don‘t use a screw driver to try and lever on the door seal ... it rips it !

00659CB6-8DF7-4FDB-8D71-1610C5F8E442.jpeg

7409A3B1-D190-4914-9DA6-EC5A68A0B852.jpeg

ACD6D333-C712-4251-996A-58DDCD88A94E.jpeg
 
Last edited:
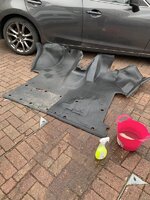
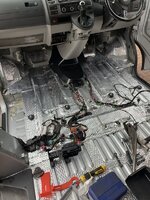
Decided to sound deadening the floor of the cab and clean the floor mat. Must have washed this about 10 times and still it looks manky so ordered a nice foot mat from kiravans to cover but still to fit !


5DDCD370-862E-4B62-9BB6-3346E0021A13.jpeg

766A43BD-60B1-408D-9B48-F3CE31AE4FF2.jpeg
 
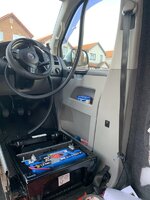
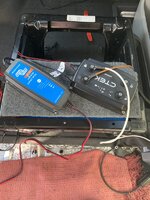
On with the job I’ve been putting off, the electrics-phase 1 - mains hook up, split charger , leisure battery and battery charger.

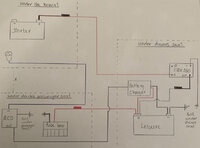
I know I don’t have patience with fiddly jobs so got a custom wiring kit made up from @travelvolts along with lots of advice ! While I found lots of advice on line I decided I needed to draw out my intended set up for everything upstream of the fuse box. I ran this past TravelVolts first as he’d made me up the wires and supplied the kit.

I opted for the mains hook up under the bonnet and was hoping I could site the rcd here but not a chance ! The rcd box I have is huge and there’s not enough space for it needs to go under the passenger seat (that will be in phase 2).

After many hours of procrastination phase 1 is almost complete ! Just some wire terminations to be done after I ended up shortening some cables and cut the adapter plug off the battery charger.

Hoping I can get the drivers seat back in this weekend after I run the cables for the usb/12v lighter socket and the 230v

Lessons learned the hard way:
Don’t lay your floor back down until you have ensured you don’t need to run any more cables !!
Don’t fit the front seats until you have run all the wires you need !

31D8A3F3-B628-4882-9A3D-7F540BD14A02.jpeg

D7A02D84-E824-4C06-8D83-9C80FCCB69B6.jpeg

37381AA1-0CDD-407B-876E-E2F22A6B27C1.jpeg
 
Your doing great so far, and I love the schematic drawing! Well done.
 
Back
Top