T6 SWB camper build

Pete C

Senior Member
Moderator
VIP Member
T6 Legend
I had planned to do updates to this as we went, but time pressures meant it didn’t happen, so here goes anyway - pretty much the whole build in one go.

We made our minds up a while ago that we wanted a campervan, but hadn’t decided what type to get/build. My parents had a couple of older VW camper vans which we had used ages ago, so we had some basic idea of what we wanted. We also quickly realised that new was out of the question.

Having spent some time on forums like this I had got some idea of what it would take to build a campervan, but we still thought something secondhand and already built was our best option. I also realised that if we were going to go the “build it yourself” route, then a VW Transporter was the best option due to the number of after market suppliers and thus the number of options open to us.

Having looked around at various secondhand converted campervans we realised that we weren’t going to find what we wanted at what we thought was a reasonable price - generally they were too old, not converted to a high enough quality, or had things that we just didn’t need or want (see later).

So then we looked at used panel vans, and realised that the vast majority of the lower mileage options were either 1 year old ex-lease vans (often from a VW dealer) or 3 year old ex-lease vans. Eventually we gave into the inevitable, and bought a 1 year old T6 from a VW dealer.

All the looking around at physical vans, and at resources on the web, had helped us build a pretty clear picture of what we wanted:

Van:
SWB - ease of driving and parking
102hp - not fussed about speed
T30
Aircon
Cruise control
Rear parking sensors.
Not fussed about how it looks from the outside other than it must have body coloured bumpers
Not white

Conversion:
Function over form i.e. not fussed about cloth lining everything, simple lighting, etc
Sleeps 2
Would not be used continuously on long trips i.e. we would use hotels, B&B as well
No sound system needed
2 burner hob (no microwave)
Sink with just cold water
Need fridge
Need heater
Need to be able to seat 4 if being used as a family vehicle
Not fussed about a pop-up roof (but this might change over time)
Leisure battery

We used this set of requirements to try and plan out the sequence of activities for the build; the main reason being that we didn’t want to have to undo something later on due to not thinking the process through.

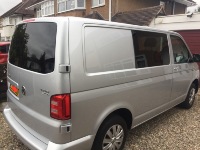
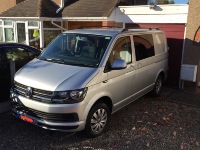
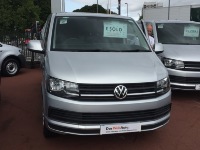
So this was the van at the dealers, a pretty standard 1 year old T30 102hp Trendline. Bought for way more than we planned, but a bank loan helped that :)
01.jpg

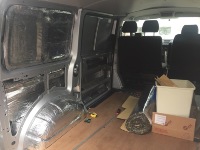
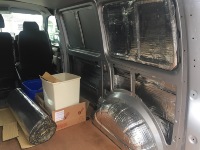
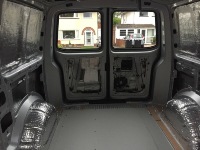
Back at home this is what we had inside - a standard ply lined panel van. The beauty of a van this age is that everything is still pretty clean, and hasn’t rusted tight. You don’t have tons of rubbish hiding away in the nooks and crannies.
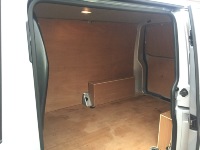
02.jpg


Pete
 
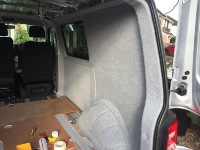
My son and I removed the ply lining on the walls, and the factory roof panels, getting ready for sound and thermal insulation. We removed the ply floor right at the last possible point in the build to help preserve our knees from the floor corrugations.

Getting the bulkhead out is easy. Getting the bulkhead brackets out on the sides and floors is a little more brutal, but there plenty of helpful guides on the internet.

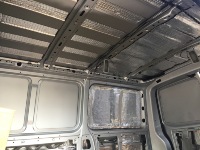
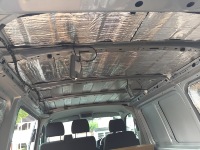
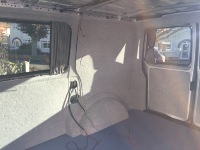
We put Silentcoat sound insulation on all panels, followed by Dodo van insulating liner. The panels not covered in the pictures are ones that we knew were going to be cut out for windows.

03.jpg

04.jpg

05.jpg

06.jpg

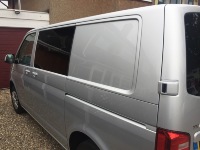
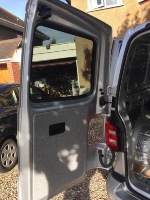
Then we had the windows fitted. I didn’t fancy cutting holes in the side of the van, so gave that job to Bodans just down the road from us at Shrewsbury - they did a great job.

I also fitted Omtec roof rails (yes, with plenty of sealant around the bolts), and on the nearside this was on top of a Lightning Leisure awning rail.

07.jpg

08.jpg

09.jpg

10.jpg

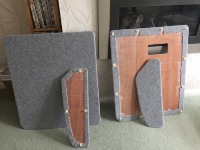
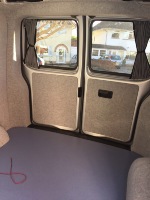
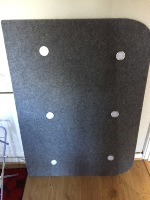
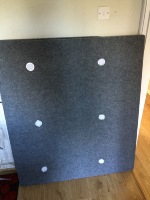
Next we started on the lining. We bought a set of ply panels for the sides and roof, fitted invisible fir tree clips, then stuck the lining to the panel. These were the first panels.

11.jpg

12.jpg

As we planned to fit LED lights into the roof, and 12 volt outlets on the nearside of the interior, we made sure that all the wiring was in place ready to be connected at both ends before we started to cover and fit the panels.

Pete
 
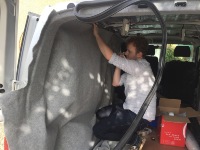
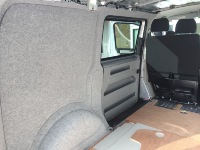
Covering the ply panels is easy. Covering the van metalwork is harder. Being realistic, the vast majority of the lining you do is covered up in a camper conversion. We had an issue with covering each of the wheel arches, but our issues were pretty minor, and both are invisible now the conversion is complete. We were very happy with the overall outcome.

13.jpg

14.jpg

15.jpg

16.jpg

17.jpg

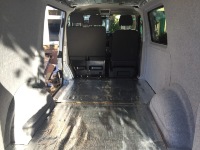
The last photo above shows the floor sound insulation in place before the ply and lino went down. We completely failed to take pictures of the floor build process, but basically we used Sikaflex to bond ply battens wherever we could to the “dips” in the corrugated floor, thus bringing these up to the same level as the “peaks” in the floor. We then put Tecsound insulation on top of these. The ply floor was bought pre-cut, and this was lightly trimmed where required, and then screwed into the wooden battens to hold it in place. The Altro Contrax lino was also bought pre-cut, and this was dropped on top of the ply (after a bit of trimming). We didn’t need to secure it as there are plenty of other screws and bolts going through it by the time the conversion is finished.

You can also see that we fitted a Kiravans side door store to maximise the storage capability.

18.jpg


Pete
 
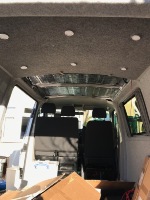
We used a slightly darker lining material for the 2 roof panels (again bought pre-cut), and we fitted 6 LED lights to each panel. Each set of lights can be switched/dimmed independently.

We also started to fit Kiravans black-out curtains to all windows.

19.jpg

20.jpg

Fitting the roof panels was much harder than the side panels. Obviously you are taking the panel weight as you fit it, but it’s harder to line up the hidden clips with their respective holes, and the bow of each panel works against you as you try and fit the clips in. We resorted to using additional screws in the rear panel, then covering these with screw covers. If I was doing this again, then I wouldn’t use invisible clips for the roof, and live with the clips heads showing.

We re-used the 2 factory plastic trim strips that hide the gaps between the roof panels. We did have to fit longer fir tree clips to these to cope with the greater thickness of the new roof panels. Don’t try and re-use the black clips that come with them - they are not strong enough and are not re-usable.

21.jpg

At some point in all this we fitted a Kiravans passenger seat swivel.

23.jpg

Pete
 
With the van floor, walls and ceiling sorted, we knew we had to turn to the electrics before we considered installing the furniture.
We knew we needed:

Leisure battery charged from engine when on the road and by standard mains charger when on hook-up.
RCD protection when on hook-up
Dimmable front and rear roof lights
Electric fridge
Pumped water
Power for heater
USB charger
Couple of “cigar lighter” outlets - one on either side of van interior.
Fuse box and earth distribution bar in furniture unit
CBE switch units and outlets mounted on furniture unit
Option to plug in a solar charger to charge the leisure battery and run the fridge

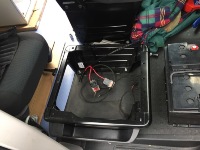
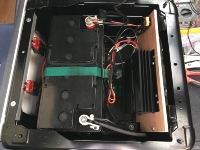
We decided to mount the leisure battery under the drivers seat, along with the DC-DC charger. Travelvolts provided everything we needed to get this in place, including the Ablemail charger and excellent instructions to wire it up.

Everything is fully fused into the charger and battery, and I went for 2 separate fused feeds out of the battery into the back of the van - one for the fridge and one for everything else. I went for a separate feed for the fridge as I had heard stories about start-up currents being an issue. It also meant that i just needed to pull the fuse for that to completely isolate it, if it won’t going to be used for sometime. In general I went for the fewest switches possible in every circuit.

24.jpg

26.jpg

We now had 2 power leads and 2 ground leads in the back of the van, ready to be connected to something, and that meant we had to buy some furniture.

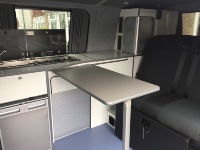
We knew we wanted to keep it simple, and didn’t want roof-level storage units. We also needed space for CBE switches and units. Evodesign’s units looked really good, but the simplicity of Kiravans units, plus the fact that they were pre-assembled, and that they were doing a discount offer at exactly the right time meant we ordered a set of their white units.

These arrived promptly, and look to be of good quality and well assembled. We had a couple of minor issues with parts, but these were all sorted quickly.

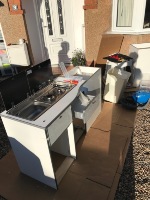
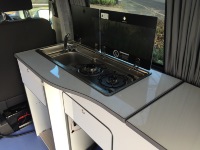
They come pre-cut for the Smev sink/cooker unit, which is just as well, as the cut-out involves rebating with a router too - not something I wanted to tackle.

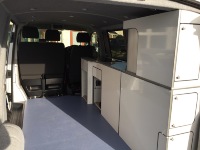
It all went together pretty well, and we did plenty of trial fitting to get the best fit possible.

27.jpg

28.jpg

29.jpg

30.jpg

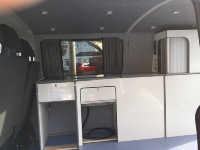
The fit on the side at the back of the van was not perfect, but of course it depends on how thick your floor is and how thick your ply panels and lining are. We filled the small gap between van and furniture unit with extra lining material, and it looks fine.

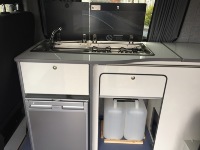
As the furniture went in we had to make sure that the electrics, fresh water, waste water and gas could drop into place at the same time. In keeping with the principle of “keep it simple” we had decided on internal water containers, and a camping gas 904 canister in the back of the van. The Dometic fridge slotted in neatly too.

Pete
 
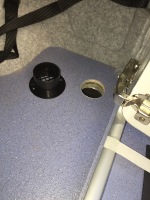
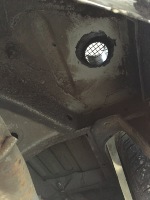
We also fitted a gas drop vent in the rear locker where the gas canister will be housed, and there is another one underneath the hob. The mesh on the rear one is removable, so that it can be used to bring in hook-up or solar power cables.
The power supply from the leisure battery runs to a fuse box under the sink, from where power is distributed to each appliance or outlet.

We also fitted a Victron battery charger/power unit for use when on hook-up (also from Travelvolts).

31.jpg

32.jpg

33.jpg

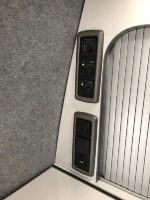
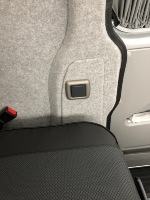
The CBE switches and outlets were mounted into the unit, along with a 12v outlet near the side door, suitable for awning lighting etc.

33a.jpg

33b.jpg

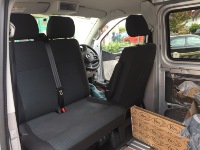
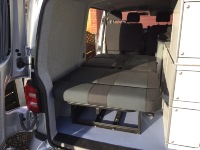
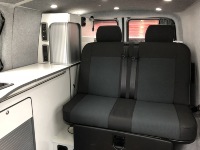
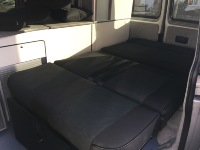
With the furniture unit fully in place and all utilities connected we needed to get a bed/seat next. This had to be crash tested, as we wanted to be able to carry 4 people in the van once finished. The choice of bed for us was really simple as Streamline Auto-beds are just a few miles from us in Wolverhampton, do a seat/bed at a good price, and would fit it for free. This was sorted really quickly, and we are very happy with it.

34.jpg

35.jpg

36.jpg


Pete
 
Next it was the heater. My wife deemed this essential, but we knew it would not get loads of use, and as a relatively light use camper, we didn’t want to spend loads. The Propex HS2000 seemed to fit the bill, so we bought one of those. Fitting was more straightforward than i expected, and there is a thread somewhere else on this forum which I started, which shows what we did.

Propex HS2000 heater location

My biggest concern was getting the physical location right, so that the pipes on the underside did not foul floor strengthening bars etc. This was easier than I expected, as the bolts for the bed gave me perfect reference points both inside the van, and on the underside.

The heater control switch/thermostat mounted on the furniture unit, accessible whilst still in bed, which I am told is essential for those cold mornings.

37.jpg

Fitting the table was straightforward.

41.jpg

I made the kick plate on the front of the bed removable and made some simple storage boxes behind it to maximise storage space. A single off-the-shelf plastic box slides under the bed from the rear to use that storage, and we didn’t bother putting a rear cover on the base of the bed as whilst it tidies the back end up, it limits storage possibilities. Under the bed we currently have a portable toilet, a folding table for outside, 2 chairs, a sun canopy and poles, a Kiravans barn door awning and a few other bits and bobs.

Putting in the gas supply was pretty easy (but new to me). The 904 gas cylinder sits in the rear floor locker, along with the RCD outlet. A flexible hose from the regulator goes immediately to a 2 way gas tap - one switch for the heater and one for the hob. Solid copper pipe then runs to each gas appliance, with the final run to the hob being a short length of flexi hose again.

We haven’t worked out yet how we will fully use the storage units, but we reckon we have plenty of space. We can always use a roof box for longer trips.

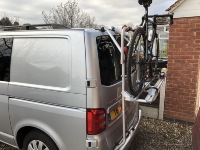
As I enjoy cycling, we have bought a Fiamma 2 bike rack, which seems to fit OK. Need to test it on a short run first though.

43.jpg

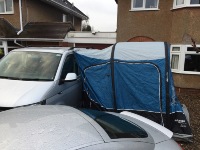
And we have done a trial run of a Vango Idris drive-away awning. You can’t get tent pegs into our drive, so the first proper test of our skills will come on the first trip away !

42.jpg
 
That’s mostly it for the main build, which took about 6 months. We still have a list of small things we want to do, and we are accumulating all the cutlery/crockery etc we know we will need.

I strongly suspect that once we start using the van in anger, then more “cosmetic” exterior enhancements like alloys, lowering, better headlights etc will start to happen, but our bank balance needs to recover a bit first !

If there was one piece of advice that I would give someone contemplating converting their own van it would be never forget that you are not justing building a campervan, you are designing and building a campervan. Make sure you have the design clear in your head or on paper before you start, otherwise you will end up undoing stuff or making potentially expensive mistakes.

Pete
Respect, wish I had the skills to do all this........oh and the time!
 
Looks great, well done on all the work now time for some adventures! Is that Clive from Birmingham van centre in the first photo. If so we found him good to deal with.
 
Last edited:
Brilliant thread for anyone looking at a DIY conversion- lots of work has gone into the conversion and now documenting it, and your thought processes, here for others to see and follow.

Van looks great - hope you have many happy years camping in it!! Enjoy!!!!
 
Looks great, well done on all the work now time for some adventures! Is that Clive from Birmingham van centre in the first photo. If so we found him good to deal with.

Good spot ! I did wonder about blanking out his face, but thought no-one would notice. Good publicity for him/them I suppose :)

Pete
 
Mate that's really impressive. I love to see DIY (loose term) conversions, and i'm sure you must get a little more satisfaction knowing you did everything yourself.
Like most, I wouldn't have the time to carry out this job (yet) but when I do, I cannot wait for the hours tinkering in the garage, building it my way.

Well done.

Ps, I couldn't give up riding for that long, so extra kudos.
 
Pete, great build. Can I ask what lining carpet you used and especially which colour? I am looking for a light grey one. Also where did you get the pre cut flooring and lino from? It looks a good fit.
 
Pete, great build. Can I ask what lining carpet you used and especially which colour? I am looking for a light grey one. Also where did you get the pre cut flooring and lino from? It looks a good fit.

The lining was from Harrison Trim Supplies:

Walls: Easyliner - Colour Silver EL54
Roof panels: Easyliner - Colour Smoke EL154

Lino was also from Harrisons. It needed minor trimming, but it's a bugger to trim as Altro blunts a knife scarily quickly due to its toughness.

The 12mm ply floor was from Ebay - this one from custom shop designs:

VW T6 Transporter SWB Camper / Day Van Interior 12mm Floor Ply Lining Kit | eBay

Again - minor trimming required.

Pete
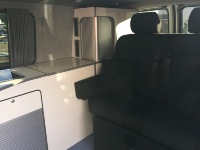
 
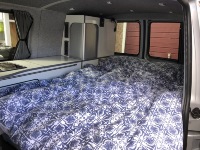
Bedding etc has now been purchased ready for the first trip, which be the Lake District later this month.

IMG_5179.jpg

I love the fact that all the bedding, mattress etc can be rolled up into the back of the vehicle, and the seat re-instated in about 60 seconds.

Pete
 
Back
Top