So, the Oil Service reminder is pinging on my dash every time I start it up and, at nearly 4 years old, I thought I would do this myself this time.
It’s useful having a carport to work under when its raining, but it tends to hoard windswept debris so a quick sweep up is always needed before starting work.
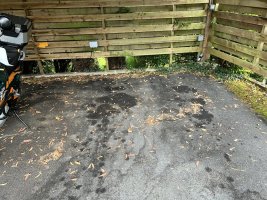
Not much room under here so it needs jacking up to get sufficient access underneath.
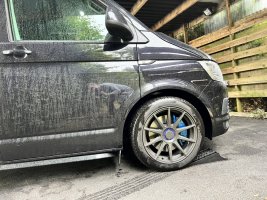
Thankfully, I have VB Air, so setting this to max height when the front wheels are up on a pair of levelling blocks is just enough clearance. The axle stands are a precaution, and have no weight on them but will prevent a drop of any more than about 1cm at most.
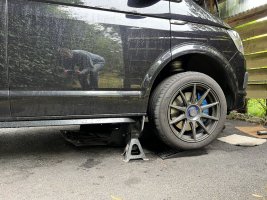
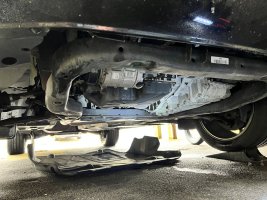
I have an aftermarket engine tray fitted. This is held on by 6 bolts and is easily removed, though it’s size can make it a bit awkward to support.
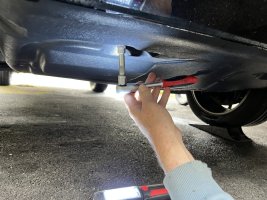
With the engine tray off, the engine sump is revealed.
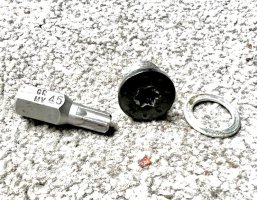
The sump plug is at the rear of the sump and is a Torx job (I thought it was a spline at first, until I got a good look at it - and found that a spline bit didn’t fit).
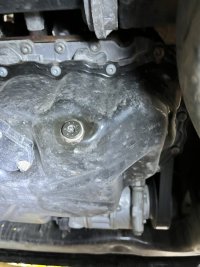
A T45 bit does the job. The van engine was nice and warm, having just driven to the dealers and back to buy an oil and air filter, so drained easily.
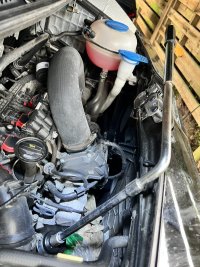
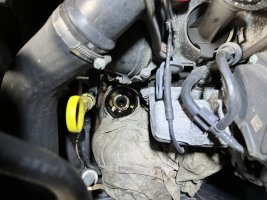
Next step was to remove the oil filter, which is above the alternator to the right of the engine. I stuffed a rag around it to prevent any oil draining into the electronics around the alternator. The instructions are to crack it open by 1/2 a turn, which releases a valve inside allowing the oil to drain into the sump rather than over the alternator when you remove it. However, it was refusing to budge. I had bought an oil filter wrench for the job and that was griping well, but I couldn’t get any movement from it. I tried my torque wrench on it, and that took 60Nm without success. So I ended up with an extending wheel-nut wrench and even with that it took some effort to get it to shift. Thankfully, once it started moving it came out OK with no signs of damage. I’m not sure why it would have been so tight?
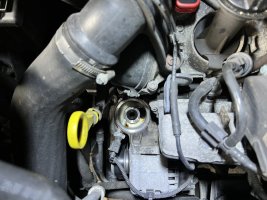
As suggested in the maintenance manual, the old seal had remained on the engine, so this had to be removed, and the mating surfaces wiped clean. I wiped some clean oil over the new seal, and on the threads of the filter, before fitting it and torquing it to 18Nm.
Then I refitted the sump plug, torquing it to 30Nm before filling with fresh oil.
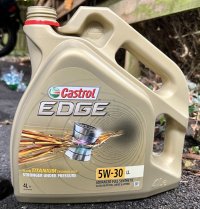
It took about the specified 5.7l and, another benefit of VB Air, I was able to level the van to take the final dip stick reading.
I also changed the air filter while I was at it, and this was just a case of unplugging one electrical connector, removing one hose, and unclipping two spring clips before the cover can be removed. I didn’t think that the old filter looked too bad until I took out the new one.
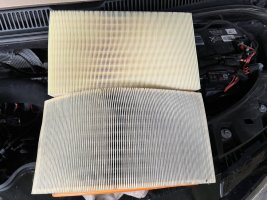
The above is the old and new air filters.
Once done, I could park it back beside my bikes before using VCDS to reset the oil service reminder.

It’s useful having a carport to work under when its raining, but it tends to hoard windswept debris so a quick sweep up is always needed before starting work.

Not much room under here so it needs jacking up to get sufficient access underneath.

Thankfully, I have VB Air, so setting this to max height when the front wheels are up on a pair of levelling blocks is just enough clearance. The axle stands are a precaution, and have no weight on them but will prevent a drop of any more than about 1cm at most.

I have an aftermarket engine tray fitted. This is held on by 6 bolts and is easily removed, though it’s size can make it a bit awkward to support.

With the engine tray off, the engine sump is revealed.

The sump plug is at the rear of the sump and is a Torx job (I thought it was a spline at first, until I got a good look at it - and found that a spline bit didn’t fit).

A T45 bit does the job. The van engine was nice and warm, having just driven to the dealers and back to buy an oil and air filter, so drained easily.

Next step was to remove the oil filter, which is above the alternator to the right of the engine. I stuffed a rag around it to prevent any oil draining into the electronics around the alternator. The instructions are to crack it open by 1/2 a turn, which releases a valve inside allowing the oil to drain into the sump rather than over the alternator when you remove it. However, it was refusing to budge. I had bought an oil filter wrench for the job and that was griping well, but I couldn’t get any movement from it. I tried my torque wrench on it, and that took 60Nm without success. So I ended up with an extending wheel-nut wrench and even with that it took some effort to get it to shift. Thankfully, once it started moving it came out OK with no signs of damage. I’m not sure why it would have been so tight?

As suggested in the maintenance manual, the old seal had remained on the engine, so this had to be removed, and the mating surfaces wiped clean. I wiped some clean oil over the new seal, and on the threads of the filter, before fitting it and torquing it to 18Nm.


Then I refitted the sump plug, torquing it to 30Nm before filling with fresh oil.

It took about the specified 5.7l and, another benefit of VB Air, I was able to level the van to take the final dip stick reading.
I also changed the air filter while I was at it, and this was just a case of unplugging one electrical connector, removing one hose, and unclipping two spring clips before the cover can be removed. I didn’t think that the old filter looked too bad until I took out the new one.

The above is the old and new air filters.
Once done, I could park it back beside my bikes before using VCDS to reset the oil service reminder.

