Lola ex AA build

dopeytree

Member
VIP Member
T6 Pro
Heya

New member here with a ex AA T6.
Managed to find one with only 40k on the clocks. 2017.
Has front radar too for emergency breaking etc.
Its a t32 so has the punchy 150 engine I believe and is good for towing.. not that I do any of that.

Initially I was looking at ordering a new van. I found a way to go direct to factory rather than through a dealer but the build times as we all know is ages. I was being told march 22 so basically a year.

I've done up a caddy maxi before 2011 ex British Gas so know their pretty good vehicles and there's a great mod scene for the VW's.

I'll be using for work & play. Work is flying drones for film & tv.
So I'll will be moving over my heavy duty leisure battery system over.

I'm undecided about windows at the moment. Probably keeping the bulkhead at the moment for extra security & privacy.
I was looking at ambulance seats but I think I want a minimal setup.
May add some kind of rear folding bench seat against the bulkhead.

In my old caddy I got the kombi seats fitted but it cost so much and doesn't quite suit my needs. Really I want seats that can face the bootway so you can park up and open the tailgate to the view.

In the rear I'm copying a friend who has basically used upholstery material to cover the ply panels rather than fit carpet everywhere as the carpet looks a bit cheap and tacky. Been there done that. Theres the alcantro stuff too so maybe I'll weave in some of that but basic plan is to leave some metal exposed and have fabric on ply side panels. So full right panel, left door panels, then left rear panel & 2 panels for the tail gate.

Anyway here's what I've been up to.

So here's Lola as bought:

View attachment 127498
220177749_10160286820377494_3472821478531928850_n-2-jpg.127498


So far I've added:
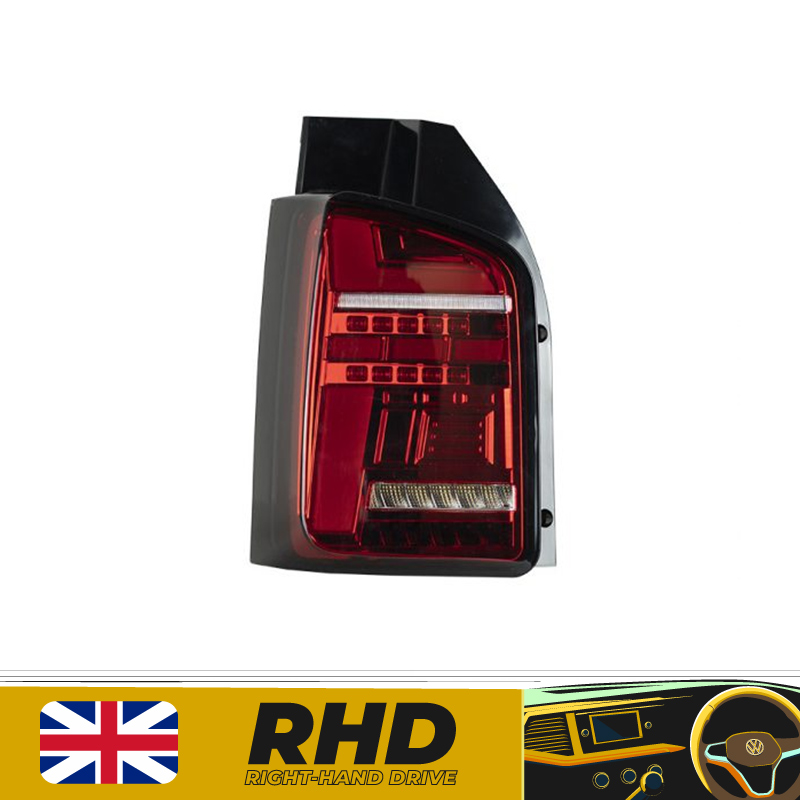
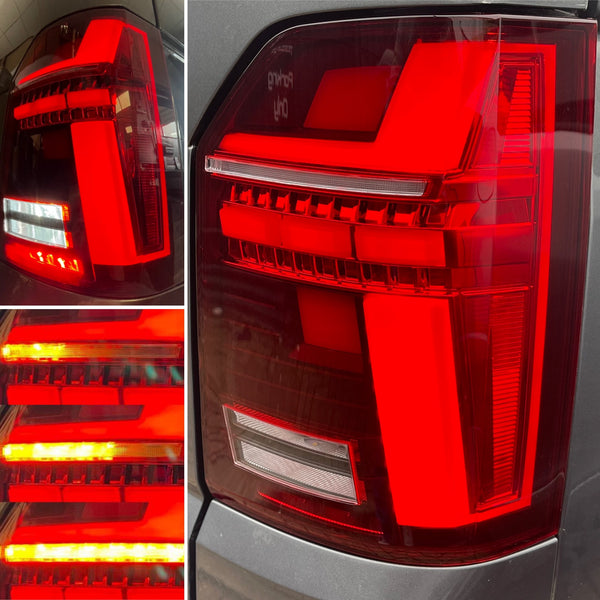
- Transporter HQ front drl headlights & rear LEDs.
- Electric tailgate kit from hansshow.
- Black 16" alloys.
- RCD330 headhunt for CarPlay.
- Vibe plug & play micro amp & speaker kit.
- Pioneer underseat subwoofer.
- VanX glovebox.
- Piano black dash surround pieces. (I bought the outer air vents then DIY sprayed the rest to match)
- Deep kombi door step with led.
- Black roof bars.
- Black spoiler.
- Black side bars.
- MFSW with cruise control.
- Black air vent trim.
- Soundproofed floor.
- Wooden floor in.
- Rear camera.
- Rear parking sensors.
- Gearstick chrome cover.
- Passat W8 lighting.
- VCDS coding for auto lock & unlock, dial sweep, large mph, dipped beam stays on with headlight, rear camera coding

Still to do:
- Fit the rest of the soundproofing
- Fit the heated seat kits
- Fit the seat covers
- Fit led lighting
- Fabric the rear panels
- Fit the side ply panels.
- Wire up the leisure system 3x 120ah batteries with inverter.
- Fit in my pull out draw for building kit on etc.
- Build in some storage on the side
- Build some fold down laptop table.
- Dashcam.
- Fit the aftermarket blindspot sensor system.

View attachment 127499
226534618_10160303980367494_8687768437657597552_n-jpg.127499


Loving it so far.

The only thing I miss from my previous 4x4 was the way when selecting reverse gear the left mirror would dip down so you can see the kerb.
Anyone every seen a way to code for that?

Cheers
 
Adding some build pics here:

Audio wise I highly recommend the Vibe micro amp kit for the t5 / t6. Its a complete plug & play kit. Comes with some sheets of sound deadener.

In past cars I've always swapped the factory speakers out. Some I've changed the headunit & added a subwoofer but I've never had an amp.
Always thought it was too much wiring.

You do have to drill out your old speaker holders as they're riveted on but everything else is easy.
The micro amp itself goes in behind your glovebox or you can put it elsewhere but that's the easiest.
The harness plugs into the headunit which I had changed to the rcd330 for CarPlay anyway.
The vibe microamp comes prewired with RCA outputs that can be used for input or output so I used these to feed to my pioneer underseat subwoofer.
The harness has the blue remote turn on wire too, and you could probably piece power too but I have a leisure battery under the passenger seat so all sorted.

Sadly I didn't take photos of the whole build just the door half apart. Easy to sound deaden with everything off.

nc_ohc=qGBr89CC7T4AX8oSo6C&_nc_ht=scontent.flhr1-1.jpg


nc_ohc=3vpUkgxViJUAX_vvIlO&_nc_ht=scontent.flhr1-1.jpg

s-l1600.png
 
Last edited:
  • Like
Reactions: CAB
Headlights

Factory Stock Units
nc_ohc=_MtB04VKNlUAX8JTr3A&_nc_ht=scontent.flhr1-1.jpg

TransporterHQ Lights v3 - Front DRL lights with sequential indicator & rears with LED.

In the end I actually swapped the front ones for the opaque drl version - otherwise you can see all the lens which looks tacky.

8ORvMh&tn=ZN46U2nvqcTp46sN&_nc_ht=scontent.flhr1-1.jpg
nc_ohc=Soft8KkJ31QAX8HS983&_nc_ht=scontent.flhr1-2.jpg

So transporterHQ do a nice set of LEDs for the dipped beam which is fine as its hidden behind projector but the main beam a h1 bulb is halogen and easy seem and checked during MOT... so I've done some colour testing to find a bulb that best matches the LED dipped bulb.

Philips LED dipped beam - blue
-_g24U&tn=ZN46U2nvqcTp46sN&_nc_ht=scontent.flhr1-2.jpg

Stock halogen high beam - very yellow
nc_ohc=Py0ukBpLhEwAX-eV5bf&_nc_ht=scontent.flhr1-2.jpg

High Beam - Maruta bulb - Mild yellow tint
nc_ohc=tRrEZwaDu3oAX903AD2&_nc_ht=scontent.flhr1-2.jpg

High beam - Japanese bulb - whitish colour
nc_ohc=ufWLoWKKhvwAX8QWPOE&_nc_ht=scontent.flhr1-2.jpg

High beam Osram blue - whitish blue
nc_ohc=A541KLhizYwAX-0f8HP&_nc_ht=scontent.flhr1-2.jpg

Which do you prefer?

I personally preferred the Osrams.

You might think what the f*ck who tests bulbs but its weird when you drive to go from a blue dipped beam to a yellow high beam.


Since doing this I coded the dipped beam to stay on when the high beam is on so this blends the colours but also give you the best view of the road.


Here's the new opaque DRL transporterHQ lights much nicer than the first ones they sent.
nc_ohc=ha7nexzo-DcAX_AAFdC&_nc_ht=scontent.flhr1-1.jpg
 
Mine didn't come with any side step so I got the deep kombi step off Ebay with the lightbulb to go in.

Here's a test fit alongside the ply floor kit. The floor ply needing trimming by about 1cm.


nc_ohc=rr8_4eqN6VcAX8dts68&_nc_ht=scontent.flhr1-1.jpg

Sound proofing some of the panels
nc_ohc=NNC5TQMR6L8AX8v-eoZ&_nc_ht=scontent.flhr1-2.jpg

Soundproofing the floor and glueing boards down to level the floor.
_MG_tH&tn=ZN46U2nvqcTp46sN&_nc_ht=scontent.flhr1-2.jpg

Got some carpet underlay off Facebook Marketplace for £20. Not quite sure how I'll use it yet.
nc_ohc=P9MhcB5ibmYAX-IHBjR&_nc_ht=scontent.flhr1-2.jpg
 
  • Like
Reactions: CAB
Haven't had time to wire up my big inverter system so testing this little one of the already fitted leisure battery.
It did ok but the fuse blew at the end of the day & I didn't have any that big with me. Luckily just about had enough drone batteries left for the sunrise shots needed the next morning.

nc_ohc=kQDT9VmMo_8AX8mVNgn&_nc_ht=scontent.flhr1-2.jpg

nc_ohc=_n7l6km_WScAX8ghMvg&_nc_ht=scontent.flhr1-1.jpg

_GEQKn&tn=ZN46U2nvqcTp46sN&_nc_ht=scontent.flhr1-1.jpg
 
Wheels

On past vans I've gone in for 18" diamond cut that look great but these days I drive through fields & gravel quarries so I want something a bit more practical.

Originally was thinking swamper style with off road tyres on the steels.

But found some of the genuine Clayton 16" alloys powder coated in black on FB marketplace. For £300 fitted with decent tread a bargain.

Before
nc_ohc=B4bBwjYkLWEAX906yC9&_nc_ht=scontent.flhr1-1.jpg

After
nc_ohc=B-_Ga3iqQk4AX8Ujsze&_nc_ht=scontent.flhr1-2.jpg
 
Having a soft floor could be useful...
nc_ohc=ZeJF0qLuGnEAX9ecrdq&_nc_ht=scontent.flhr1-2.jpg


Cleaning & spraying up the towbar
nc_ohc=ZvjSoOGOL68AX_MeUR5&_nc_ht=scontent.flhr1-1.jpg

Fitting A pillar handles.

Order the kit off Ebay.
Drill the existing trim - its market on the back.
nc_ohc=P6iDKZ_mF2IAX8byivk&_nc_ht=scontent.flhr1-1.jpg

You then bold the plate to the side then put the trim back on.
Then offer up the handle & bolt in.

nc_ohc=7SMM3IB8pKUAX9wZS4g&_nc_ht=scontent.flhr1-2.jpg

nc_ohc=-S5mynuqOgwAX8bUiVP&_nc_ht=scontent.flhr1-2.jpg
 
  • Like
Reactions: CAB
A while back I bought some electric mirror motor kits from Taiwan but they didn't fit my mirrors so I sent them back.
Then I bought a whole folding mirror set from Sweden.
After many hours messing around got them working with the factory switch following the relay guide on the forums.
The problem was actually one relay I was using was damaged. So easy fix. They now unfold on unlocking.
Also added in some puddle lights.
 
Wheels

On past vans I've gone in for 18" diamond cut that look great but these days I drive through fields & gravel quarries so I want something a bit more practical.

Originally was thinking swamper style with off road tyres on the steels.

But found some of the genuine Clayton 16" alloys powder coated in black on FB marketplace. For £300 fitted with decent tread a bargain.

Before
View attachment 127749

After
View attachment 127750
Clayton wheels not load rated for a t32 and should fail a class 7 mot if done correctly.
 
Windows.

Opting for 1 tinted real window in the left sliding door.
Fake blackout window on the right hand side as this will be a wall inside the van.
Rear windscreen will also have a fake blackout window on.

Fake windows help the van look much nicer with reflections etc. Plus it would just look wield only having a left window!

Method. Most window suppliers give good video instructions. Van Windows & Van Glass | Tinted Privacy Van Windows | Camper Glass

_nc_ohc=h4cLe_TQn7IAX_pmOtF&_nc_ht=scontent-frt3-2.jpg


All vans come with a inner & outer skin - this is the template for the van window cut out.
From the inside use metal holesaw to cut 4 holes in the corners.
On the outside use ruler to join the 4holes up.
Put tape along the bottom to catch any metal shards.
I then used a nibbler attachment on a drill to cut the lines.
Use a jigsaw to cut through the reinforced bits in the middle.
Congrats you now have a big hole in you van.

_nc_ohc=KGF5TYME43AAX_5oIyP&_nc_ht=scontent-frx5-2.jpg


Ok so its not massively neat lets smooth it out by going over it again.
You hide all this with rubber trim anyway.
Then to stop any rust coat all the fresh metal edges with some of the black primer that comes with the window fitting kit.

_nc_ohc=vYvGFsO89EUAX9KY68M&_nc_ht=scontent-frt3-1.jpg

Then also coat the outer side. Leave a gap of about 2cm at the edge of the panels - otherwise you'll see the black primer.
Do a smaller band on the window glass. Watch a video to see exactly how.

_nc_ohc=aHrnMUZD2sYAX_-mfN_&_nc_ht=scontent-frt3-1.jpg

Then time for the adhesive. Best to do this on a warm day or if it's cold then warm the adhesive tube on a radiator etc.
Cut the nozzle to a sharp V as described in the camper glass video.
Then slowly work you way around the van pane. I normally do a 2nd layer as a backup.
Then slowly offer up the window. You might want to wiggle it a little bit to manoeuvre.
Then press in to make sure full contact. Not too hard.
Tape window to the top of the van to help keep in place while adhesive cures.

_nc_ohc=xcaIVB60LCQAX-k8Ry9&_nc_ht=scontent-frx5-2.jpg

Finished product.

_nc_ohc=v8Fr3fnV9uUAX_fF8m8&_nc_ht=scontent-frt3-1.jpg

The fake windows are much simpler as no cutting involved. You just leave a small gap in the adhesive at the bottom centre for any air pressure to move.

Obviously if you don't want to do any of this yourself - you can call up any windscreen repair people who will fit for you for around £150.
 
Wooden roof.

I've had carpet in a caddy before and I hate the stuff.
So was looking into getting a wooden roof.
Needs to be lightweight as most make mistake of stake putting up thick pieces of wood which just add weight to the build.

There's a company than do a nice veneered oak 2 piece roof panel but they don't deliver so its a long drive all the way to cambridge to collect & fit.

Looked at Oak strips to create my own effect but cost was about £300 plus a lot of time.

Opted for pine tongue & groove thinnest available.

Wickes 8mm thick t&g 2.4m is the right length for a SWB or the 3m for the LWB.
Mines a SWB.

4 packs of 5 planks is around £60.

Plus a few battons to make installation easier. Think I got 10mm.

So 3 battons on the horizontal beams that's pretty self explanatory. Below is a test fit to see how much needs trimming off the planks.

_nc_ohc=MT6BAWtUtCEAX-t5d0t&_nc_ht=scontent-lhr8-2.jpg

The outer plank on each side of the cab corners will have no support. Use batton to go around the corners so there will be something to screw the plank into.

_nc_ohc=mevxMnNiX4wAX_o970-&_nc_ht=scontent-lhr8-1.jpg

_nc_ohc=aCLo1HdYplQAX9GkPJM&_nc_ht=scontent-lhr8-1.jpg

I've added 2 spotlights in the middle. This is just on a switch by the tailgate will be wired to leisure battery.
Originally I was gong to add 4x spotlights and a dimmer. But that's a lot of extra wiring and the dimmer panel wasn't very good.

I've taken the feeds from the rear 3way switch and wired to a 3way switch. This is connected to my bluetooth led controller and then to led light strip.
Wired direct to leisure battery but using BCM wire as a trigger.

This means when I open a door the LED strip will glow red or whatever colour I've chosen. The 3way switch means I can also override it to stay on indefinitely.
I'll probably add a 2nd strip light near the floor with another bluetooth controller so I can have 2 colours light up when opening a door.

_nc_ohc=xx4CybXKmE0AX-HF8Oe&_nc_ht=scontent-frt3-2.jpg

This is the 3way courtesy door open wiring diagram taken from the forum. It's best to use a little mosfet module as otherwise the LED stripe lights can flicker when first turning on. This way they will fade up & down when you open a door. It's a small thing but gives a luxurious feeling.

lights controlled both by the V. copy.jpg
 
  • Like
Reactions: CAB
Control panel.

- Spotlight switch
- 12v socket & USB (with folding safety caps)
- Inverter Remote
- 240v switches x2 (with safety folding caps)
- Energy Monitor
- LED strip switch=on with door /off/on


I wanted a smart control panel plus it makes installation easier as other wise I'd be drilling large holes through cloth which I don't think would go so well.

First plan was use metal bar around 15cm x 60cm but couldn't find anything for a decent price plus then more headaches of cutting the metal bar compared to wood.

Found this piece of wood laying around which was about the right size.

Sprayed it black then started to drill it - but of course it started to mess up the soft wood, so turned wood over and will use the wood grain side.

It's quite nice.

Finished with OSMO Matt Clear oil.

_nc_ohc=HKSb4gmMFOwAX8vEYt0&_nc_ht=scontent-frt3-1.jpg
_nc_ohc=uMUDAlRcP7sAX8X8eif&_nc_ht=scontent-frt3-1.jpg
_nc_ohc=I1cs6fBbFMsAX_Peh-a&_nc_ht=scontent-frx5-1.jpg
_nc_ohc=H77rvMpa69oAX8Ke2EC&_nc_ht=scontent-frx5-1.jpg
 
Last edited:
BARNDOORS 6.1 style - TransporterHQ:
VW T6 Sequential Indicator LED Rear Lights for BARN DOORS - Red (T6.1 Style) - T6 Lights - Transporter HQ

TAILGATE 6.1 style - Travelling-lite:

_nc_ohc=RxISIuzlunsAX9FO6jP&_nc_ht=scontent-frt3-2.jpg

The previous lights transporterHQ rear lights were too dark doesn't look good against the yellow. So put up for sale online.

Ordered a cable from pauly to fit the 6.1 lights. Ordered some lights on ebay then got a message from seller saying the warehouse doesn't actually have stock...
Refunded. Quick scout around and travelling-lite have these wicked new tailgate 6.1 style lights on pre-order with delivery in early feb. Perfect.

They have dynamic indicators. Also come with a wire that you plug into both lights meaning you now get DUAL reverse lights & Dual fogs.

_nc_ohc=QCiDsfgy6nwAX-0IqG9&_nc_ht=scontent-frt3-2.jpg_nc_ohc=GqGoOqNBhMoAX9bks0F&_nc_ht=scontent-frt3-2.jpg
 
Last edited:
Fitted the rear tailgate glass. Its a fake blackout glass to make the van look a bit more normal.
Inside the tailgate I've got 2x folding chairs held up with powerful magnets.

That's now all the sides covered in some glass.
Next on the list is get bumpers colour coded.

_nc_ohc=m2MMJepHFLgAX_7mY_c&_nc_ht=scontent-frt3-1.jpg
 
Last edited:
  • Like
Reactions: CAB
Fabric - after a few back and forth to the shop to get fabric then order some more. They sent out the wrong one so had to wait a few days.
Anyway here we have some grey hessian (but not too hippie) style fabric to go into the side panels instead of the shitty carpet everyone uses.
I did carpet in my old caddy and hate it. It doesn't look as nice after a year or so.

- Carpet is cheap and easy
- Stretch faux Sued is nice but not quite the right look. Probably good for a headliner.
- Vinyl is waterproof so easy to clean but is shiny.
- Fabric is available in lots of styles and easy to fit. On trend at the mo.

Inspiration for fabric here:
485eb0dcceeabd540a2b705da1731e19_2048x.jpg

Here's what we bought.
_nc_ohc=Ry2kwsFoCGsAX9rccn7&_nc_ht=scontent-frx5-2.jpg
Testing panel fit.
6z30WSsejWHeJoiexOk78Es35oZ&_nc_ht=scontent-frt3-1.jpg
Cutting fabric to size.
_nc_ohc=AOabagfcStkAX96JI72&_nc_ht=scontent-frt3-2.jpg
Cut a shelf out for the sliding door. Hoping to make it out of some fabric stapled to the back of the panel.
_nc_ohc=2chwt4JhDt4AX_deUWj&_nc_ht=scontent-frx5-1.jpg
Figure easiest to start with the smallest panel.
Here's the panel 80% done just waiting for spray glue to dry. I used spray glue with a normal stapler around the edges. Once glue to dry I'll use a blade to cut and fold over the hold in the middle of the panel then staple the pocket to the outside. Then screw the panel to the van. Simple eh....
_nc_ohc=pSd1rIPCSCIAX_c21sG&_nc_ht=scontent-frx5-1.jpg
 
Last edited:
Adding this here for anyone wanting RGB Dimmable Bluetooth Footwell Led lights lighting

I've used these tiny bluetooth controllers for my RGB strips in the rear of the van. No reason why they wouldn't also work on footwell RGB lights.
Some people report flickering to do with the PWM. The flicker fix is to use a mossfet driver.

Mossfett trigger driver £4.80

s-l500-3.jpg


RGB LED Bluetooth controller. £6.99


51YeBfRJkvL._AC_SL1170_-2.jpg


Wiring diagram
Screenshot 2022-02-06 at 23.28.47.png
 
Back
Top