Reverse Camera......
Again, just my method and route, not saying its the best way, nor the correct way
I opted for the Wolfbox G840H rear view camera with front facing recording, this just clips onto your existing rear view mirror (which AA vans dont have so, £10 from eBay)
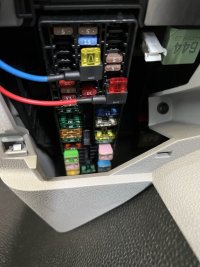
Ignition live was ran down the passenger A pillar, behind the glovebox and to the fusebox. The instructions tell you to find the fuses you need but luckily, I had redundant wiring (the red and blue cable) there so just pulled those out and used those two, win win!

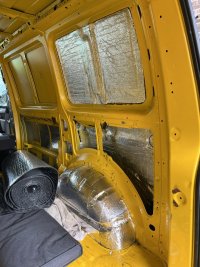
Rear view feed was ran into the cabin roof void and then down the B pillar to the floor where it can enter the cavity of the van that will be soundproofed and insulated. This then runs all the way to the rear arch where you need to rise up and run across to the NSR rubber hose that contains the tailgate wiring


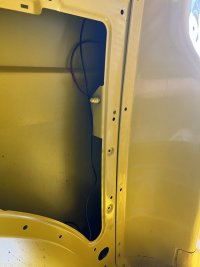
As picture above, you need to run the cable all the way through the rubber hose, down the tailgate and get it to bend into the void so you can grab it (pig of a job to be quite honest). I used welding rod and it did the trick after many attempts. as you can see, I then cable tied it to the existing wiring to keep it neat. I haven't documented it but the reverse camera is already in postion prior to this write up, so I then just plugged in the connection and taped it up.
Reverse Live needs running to the rear light cluster so you will need to extend the red wire as it isnt long enough when provided. The route I chose was straight out of the tailgate rubber hose, down the NSR cavity and into the light cluster (remove light cluster via two screws and then remove rubber bung. Remove the connector block and cut the GREEN/BLACK wire further up and crimp the red reverse wire into the GREEN/BLACK wire at one end then crimp the other end of the GREEN/BLACK into it.


Thats it! You're are done (subject to a sucessful test ha ha). No finished pic of the rear view mirror camera working as the ebay mirror needed bonding on as it was a crap 3rd party copy part so it had to be left in situ to set.
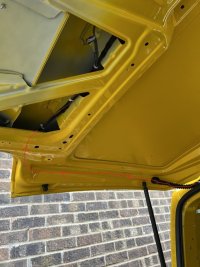
Pic of the tailgate (just remove one of the numberplate lights to route the cable into the tailgate)

Another job done! This weekends plan is to start the soundproofing and insulation but then i'm done until the windows go in on the 16th August
Chris
Again, just my method and route, not saying its the best way, nor the correct way
I opted for the Wolfbox G840H rear view camera with front facing recording, this just clips onto your existing rear view mirror (which AA vans dont have so, £10 from eBay)
Ignition live was ran down the passenger A pillar, behind the glovebox and to the fusebox. The instructions tell you to find the fuses you need but luckily, I had redundant wiring (the red and blue cable) there so just pulled those out and used those two, win win!

Rear view feed was ran into the cabin roof void and then down the B pillar to the floor where it can enter the cavity of the van that will be soundproofed and insulated. This then runs all the way to the rear arch where you need to rise up and run across to the NSR rubber hose that contains the tailgate wiring


As picture above, you need to run the cable all the way through the rubber hose, down the tailgate and get it to bend into the void so you can grab it (pig of a job to be quite honest). I used welding rod and it did the trick after many attempts. as you can see, I then cable tied it to the existing wiring to keep it neat. I haven't documented it but the reverse camera is already in postion prior to this write up, so I then just plugged in the connection and taped it up.
Reverse Live needs running to the rear light cluster so you will need to extend the red wire as it isnt long enough when provided. The route I chose was straight out of the tailgate rubber hose, down the NSR cavity and into the light cluster (remove light cluster via two screws and then remove rubber bung. Remove the connector block and cut the GREEN/BLACK wire further up and crimp the red reverse wire into the GREEN/BLACK wire at one end then crimp the other end of the GREEN/BLACK into it.


Thats it! You're are done (subject to a sucessful test ha ha). No finished pic of the rear view mirror camera working as the ebay mirror needed bonding on as it was a crap 3rd party copy part so it had to be left in situ to set.
Pic of the tailgate (just remove one of the numberplate lights to route the cable into the tailgate)

Another job done! This weekends plan is to start the soundproofing and insulation but then i'm done until the windows go in on the 16th August
Chris


