????? Work van ????? more like show van That's immaculate
You are using an out of date browser. It may not display this or other websites correctly.
You should upgrade or use an alternative browser.
You should upgrade or use an alternative browser.
Work van Wednesday
- Thread starter Ed Webb
- Start date
-
- Tags
- photography
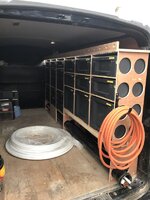
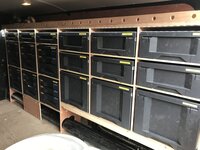
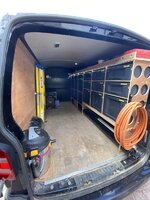
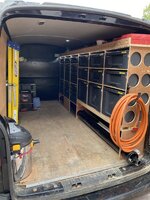
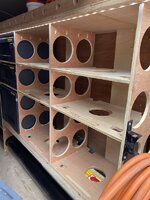
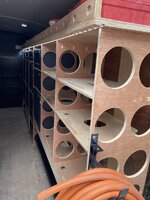
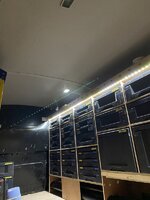
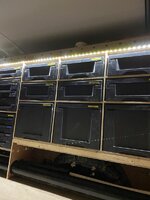
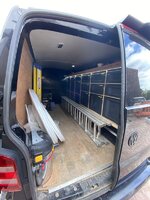
This is my racking that me and my dad carried out this weekend. The 4” holes are in it to make it lighter. There are 66 total what a difference it made. Led strip is wired to interior light to will come on and off with that. Boxes are from a site call Auer ( Plastic storage and transport products | AUER Packaging ) It’s there toolbox pro versions. The ‘feet’ on the boxes are routered out so they sit in there perfectly. Any more info or pictures wanted let me know!! 


WVW. All the day job tech projects are on hold. The ones we could complete are all done.
Inspired by @Bodyboarder81 and his work, I've been clearing a part of my garden I've never ever been to. One of the loads of roots, trunks etc..
View attachment 75955
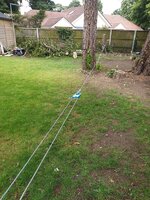
Fun with pulling out massive roots with a mahoosive winch and a couple of snatchblocks....
View attachment 75956
Timberwolf on hire tomorrow to get through the rest...
that’s some good going with a winch to get that holly root up !!
that’s some good going with a winch to get that holly root up !!
There were three holly trees, one of them quite big, all grown together. It was a two snatchblock effort. Luckily it didn't pull any of the other trees down that I was winching off.....
I then had loads of work in getting the earth off and trying to trim it all down to lift into the trailer.......
Last edited:
My daughter and boyfriend bought a derelict house last summer. I spent all autumn ripping it to bits and turning in to a lovely home, and I'm working on the garden now, it was a jungle. I've felled and removed loads of trees, shrubs and debris, earlier this week I rotovated after a day on the stump grinder, and bought in some topsoil to level things up.
l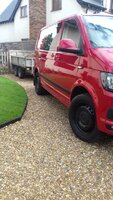
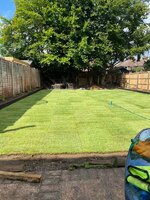
Today it was time to get the turf laid, the day when all the graft shows results.
And later with a few aches and pains, time to admire the result!
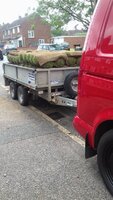
Having a van and trailer makes jobs like this so much easier, I got a big discount for collecting the turf myself. The van is great for transporting tools and smaller stuff but the trailer is great, load and unload from either side or rear, and at a comfortable lifting height. With soil, sand and loose aggregates it is so much easier to shovel out of the trailer than to shovel out of a dumpy bag. I wouldn't be without it. And hose it down afterwards, keeping the van clean (ish!).
l

Today it was time to get the turf laid, the day when all the graft shows results.

And later with a few aches and pains, time to admire the result!

Having a van and trailer makes jobs like this so much easier, I got a big discount for collecting the turf myself. The van is great for transporting tools and smaller stuff but the trailer is great, load and unload from either side or rear, and at a comfortable lifting height. With soil, sand and loose aggregates it is so much easier to shovel out of the trailer than to shovel out of a dumpy bag. I wouldn't be without it. And hose it down afterwards, keeping the van clean (ish!).
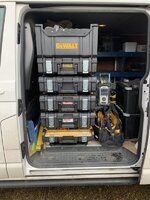
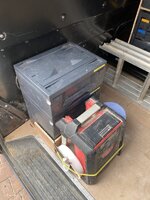
I've invested in Toughsystem boxes for tool storage. I got a DS Carrier (trolley) removed the wheels and the handle, bought a couple of extra brackets, and mounted it the the racking that sits against the bulkhead. The cases are easy to remove individually, it looks smart, they can be locked in place. Easy life
awesome work,This is my racking that me and my dad carried out this weekend. The 4” holes are in it to make it lighter. There are 66 total what a difference it made. Led strip is wired to interior light to will come on and off with that. Boxes are from a site call Auer ( Plastic storage and transport products | AUER Packaging ) It’s there toolbox pro versions. The ‘feet’ on the boxes are routered out so they sit in there perfectly. Any more info or pictures wanted let me know!!View attachment 75958View attachment 75959
can you post some more pics pls . . .
nighttime so we can see the lights,
some boxes out so we can see the routered feet etc . .
Dads van, picked up from being ceramic coated.

 www.staffordshirecarcare.co.uk


Home | Staffordshire Car Care
Uk Leading Installers of Ceramic Protection, Paint Protection Film Car Care. The Staffordshire Detailing Studio is Located on the outskirts of Lichfield Stafford in the heart of the Midlands.

I have only just seen this message sorry. I will take a load of pictures today and post them up.awesome work,
can you post some more pics pls . . .
nighttime so we can see the lights,
some boxes out so we can see the routered feet etc . .
@Dellmassive Posted them below. Enjoy!
Last edited:
So here’s all photos I’ve taken today.
First 2 are just of the racking in general.
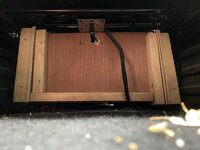
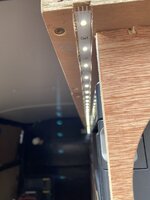
3rd photo is off the LED lights that have been routered out so that I don’t catch them when removing top boxes.
4th photo is of the racking with some boxes removed. They’re all done like this total of 72 (Possibly 62) I think it was 113mm holes were done.
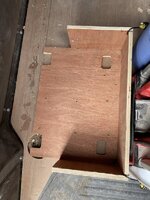
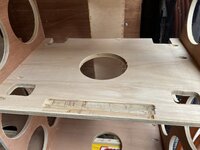
5th is the base that holds the boxes in place. I used pocket screws in order to get a good fixing into the dividers with the 4 feet so the boxes hold them self in place. I also had to router a small lip on the front as the boxes clip together. (Didn’t realise this till I had it all in and wasn’t happy with the boxes lip sticking up.)
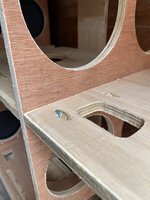
6th pocket screws.
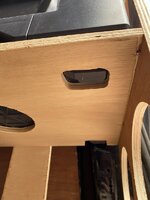
7th photo of the holes.
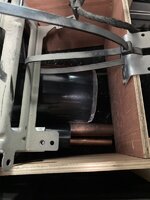
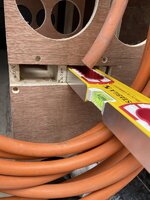
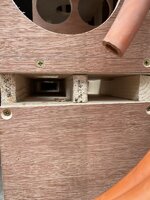
8th and 9th, this is where I store my levels. 1200 and 600, they have stoppers in them so the levels won’t go any further in. Done this to keep them safe.
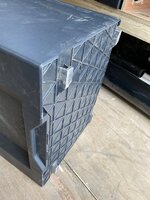
10th just the base of the box.
11th the box in place so you can see how it sits. The feet of the boxes are approx 11mm so I used 12mm ply which makes them almost flush.
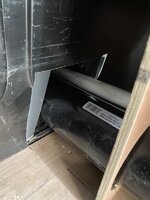
12th so I’m a plumber and need to get 3m pipe in and can’t stand the noise of a roof rack. I cut a hole into the bulk head which allows me to easily slot 3m into the van.
13th 14th 15th kind of cheated! These are photos taken on a timer with the doors closed so you can see how bright it is on a night.
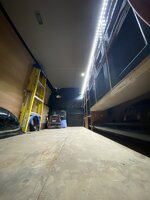
16th ladders and plastic pipe in. Nice and tidy!
Any other questions do let me know!
Some bits I would do different is, have some carpet or something along them lines where the wood touches the bulk head as it does make a bit of a squeaking noise.


Hi just seen this....that’s cleverSo here’s all photos I’ve taken today.
First 2 are just of the racking in general.
3rd photo is off the LED lights that have been routered out so that I don’t catch them when removing top boxes.
4th photo is of the racking with some boxes removed. They’re all done like this total of 72 (Possibly 62) I think it was 113mm holes were done.
5th is the base that holds the boxes in place. I used pocket screws in order to get a good fixing into the dividers with the 4 feet so the boxes hold them self in place. I also had to router a small lip on the front as the boxes clip together. (Didn’t realise this till I had it all in and wasn’t happy with the boxes lip sticking up.)
6th pocket screws.
7th photo of the holes.
8th and 9th, this is where I store my levels. 1200 and 600, they have stoppers in them so the levels won’t go any further in. Done this to keep them safe.
10th just the base of the box.
11th the box in place so you can see how it sits. The feet of the boxes are approx 11mm so I used 12mm ply which makes them almost flush.
12th so I’m a plumber and need to get 3m pipe in and can’t stand the noise of a roof rack. I cut a hole into the bulk head which allows me to easily slot 3m into the van.
13th 14th 15th kind of cheated! These are photos taken on a timer with the doors closed so you can see how bright it is on a night.
16th ladders and plastic pipe in. Nice and tidy!
Any other questions do let me know!
Some bits I would do different is, have some carpet or something along them lines where the wood touches the bulk head as it does make a bit of a squeaking noise.
View attachment 78718
View attachment 78719
View attachment 78720
View attachment 78721
View attachment 78722
View attachment 78723
View attachment 78724
View attachment 78725
View attachment 78726
View attachment 78727
View attachment 78728
View attachment 78729
View attachment 78730
View attachment 78731
View attachment 78732
View attachment 78733

Littlespark
Member
Im a new member, just bought a transporter and was looking for ideas for the back.
Thats a lot of plywood!
I've got some euroboxes. Gonna just build a frame around them.
Thats a lot of plywood!
I've got some euroboxes. Gonna just build a frame around them.
It was only 1 sheet of 18mm and 2 sheets of 12mm. Good luck and welcome!Im a new member, just bought a transporter and was looking for ideas for the back.
Thats a lot of plywood!
I've got some euroboxes. Gonna just build a frame around them.
Littlespark
Member
Thanks for the welcome.
it looks like you’re a joiner, with all the fancy tools that go with it.
I’m just an average electrician, so cutting a straight line is difficult enough.
I’m working on a raised floor between the boxed in wheel arches, with sliding euro boxes underneath.
it looks like you’re a joiner, with all the fancy tools that go with it.
I’m just an average electrician, so cutting a straight line is difficult enough.
I’m working on a raised floor between the boxed in wheel arches, with sliding euro boxes underneath.
I’m a plumber! Good luck thou. Post some pictures when you’re doneThanks for the welcome.
it looks like you’re a joiner, with all the fancy tools that go with it.
I’m just an average electrician, so cutting a straight line is difficult enough.
I’m working on a raised floor between the boxed in wheel arches, with sliding euro boxes underneath.
Similar threads
- Replies
- 4
- Views
- 499
- Replies
- 3
- Views
- 946
- Replies
- 3
- Views
- 497

