T32 Lwb Conversion

col661

Member
T6 Pro
Hi all,

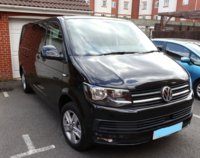
Picked up a new Kombi van few months ago and started our conversion journey. We don't really have a solid plan on what we are doing but will use it as we go along and develop it organically as we determine what we need. Its a daily drive so I wanted a 5 seater from the off with some flexibility.
Inked20190429140841_IMG_0305_LI.jpg
Its a 2018 LWB 150 DSG Highline model

20190429140939_IMG_0307.JPG

Comfort dash, heated seats and twin captains
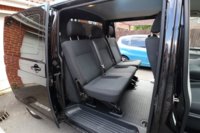
20190429141019_IMG_0308.JPG

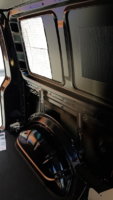
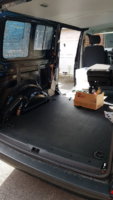
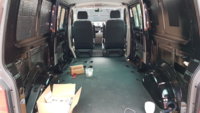
So flexible with the rear seats - first job, out with the bulkhead
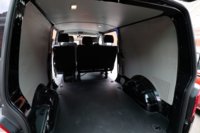
20190429151106_IMG_0315.JPG
Really easy to remove, just a few screws and wriggle out. One head was rounded but easily drilled out.

Will add my mods as I go along. If anyone has any useful tips.. please say as a complete novice here but up for a challenge!
 
20190920_135931.jpg

Wanted the van to look a little less van like so added some S/S runners from Vandemon. Really easy to fit actually. A little Dremel tool was handy for removing the small section of tray where the spigot connects to the van underside.
 
Last edited:
Bought and added some Heko wind deflectors, just to get rid of some of the buffeting noise. With the window front and rear open now, get a nice flow of air on a warm day.

20190808_093054.jpg
 
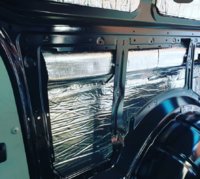
Next real 'proper' job was to start applying the insulation and sound deadening. Panels off, really easy with a trim tool. Removed the VW wooly bits they stuck to the panels but left the flat bits stuck to the panels.

IMG-20190808-WA0000.jpeg

IMG-20190808-WA0002.jpeg

Silent Coat all round for phase 1.

IMG-20190808-WA0004.jpeg

Much tea was druken over this weekend!

20190809_122022.jpg

Then it was onto the Dodo acoustic phase 2.

Screenshot_20190920-142943_Instagram.jpg

Then an all round with the Dodo Thermal Fleece phase 3

20190811_154746.jpg

20190811_161753.jpg

More tea!

20190811_151546.jpg

Tailgate was the most fiddly. Added some extra wight to the tailgate but plans to upgrade struts would sort that hopefully over the standard 900n struts

That was it.. back on with panels and wow... what a difference. Silent coat certainly made a difference in 'tin' noise and now you can barely hear traffic when stationary when stop/start kicks in. Left the roof as a pop top is going in and not sure on floor yet. Wheel arches will get done once carpeting is scheduled in.
 
Next thing added was the bike carrier. Expensive, but I ride mountain bikes and wanted somewhere to transport while covered in mud during the wet months of September to June.

20190819_082101.jpg

Proper sturdy and feels like will last a lifetime. Added some 3rd party 1200n struts to take the extra weight.. sorted.. I thought.
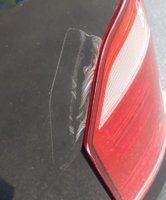
I had pulled off one of the strut 'C' rings and must have bent it. Couple days later in supermarket.. BANG.. strut popped off bottom joint punching out and breaking rear light!

20190912_075132.jpg

Proper gutted and was right faf trying to get the light back in whilst holding up the tailgate minus one strut.

Found a less deformed clip and tried again. Seems to be holding up for now but leaving in the smashed cluster until I'm sure its all as should be.
 
On removing the carrier for the pop top work to take place, found the stickers that protect the paintwork have bunched up. Fine on the top but just the bottom ones look rubbish. Anyone else had same and has a better solution please let me know. Might get some replacements and trim right down when it goes back on so cannot be seen under the rubber feet.

20190918_070244.jpg
 
We even managed a camp in it few weeks back, awning from our Coleman tent fitted amazingly well. Blow up bed in back was really comfy! Wife sold on the idea now of camps out.


20190705_151704.jpg Inked20190705_151624_LI.jpg
 
Back
Top