Retrofit: Power fold mirror with fold on remote lock

Especially recorded for you @Andysmee

Thanks, that's interesting. Would be interesting to see the voltages if you pop out the puddle light and show the signals. Perhaps I need to get my van fixed
 
Last edited by a moderator:
...
Perhaps I need to get my van fixed

...
With your kind of case there are always 3 types of issues(installer making incorrect assumptions, wrong equipment/tools used, wrong/incorrect/unsuitable components used).
All you need to do, is simply eliminate and you will get to the bottom of this problem.

By allowing for these lights to stay on all the time you will most likely experience "quiescent current" problems and faults.

If you need more help/support I am happy to provide it.

Or maybe you have connected to incorrect wires?
 
  • Like
Reactions: mmi
Well, you've seen the wires I've tapped into, so I hope it's not that. Could you check my pictures and let me know?
 
Mate, you have stop making assumptions and start verification. In order to get this sorted you have to proceed with elimination methodology.
I am not there so I won't be able to do much but you can.

1.Try different light on your wiring.

2. Use different +12V on your existing setup.

3. Use different 0V( any local GND point).

I am pretty sure that once you do that you will be wiser and you will achieve some progress.
 
  • Like
Reactions: mmi
Mate, you have stop making assumptions and start verification. In order to get this sorted you have to proceed with elimination methodology.
I am not there so I won't be able to do much but you can.

1.Try different light on your wiring.

2. Use different +12V on your existing setup.

3. Use different 0V( any local GND point).

I am pretty sure that once you do that you will be wiser and you will achieve some progress.
I did test the voltages against the main gnd on the door. Thanks for your help
 
I did test the voltages against the main gnd on the door. Thanks for your help
Shouldn't you actually measure the voltage across your load, that is permanent +12V feed and "floating" door switch line (black wire on RHS, black/brown on LHS)?

Just to clarify, did you measure the 5.5V against the ground when LEDs were dimly lit, or without load (open circuit)?
 
Shouldn't you actually measure the voltage across your load, that is permanent +12V feed and "floating" door switch line (black wire on RHS, black/brown on LHS)?

Just to clarify, did you measure the 5.5V against the ground when LEDs were dimly lit, or without load (open circuit)?
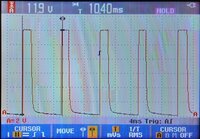
The +ve 5.5V was the potential difference between the red / white at 12V and the black (or black / brown on n/s) with the door closed. With the door open, the potential difference was 12V (see picture for exact voltages). This was measured without the load attached.
 
  • Like
Reactions: mmi
The +ve 5.5V was the potential difference between the red / white at 12V and the black (or black / brown on n/s) with the door closed. With the door open, the potential difference was 12V (see picture for exact voltages). This was measured without the load attached.
Thanks.

For the same front door lighting I took the positive feed from BCM courtesy circuit timed positive feed (=feeding cabin overhead + cargo area lights). My reasoning was to make them eventually switch off as quite often I have a door open for hours - so have also them under van's energy management now. Just double-checked last night in the full darkness that my lights are totally off when door is closed (both unlocked and locked).

Unfortunately I didn't check the voltages across lights when installed them.

However, I used same principle to install lights into tailgate - using door switch on the tailgate to "ground" them. Below a picture of "the sensing voltage of the BCM" when tailgate is closed (no load attached). 11.9 V for 2.5 ms at 100 Hz rate.
Tailgate_sense_20200713_a.jpg
If the BCM is doing the same on the front door sensing this might explain the open circuit voltage you saw. For this waveform a multimeter indicated 5.6 Volts (against the ground, open circuit). In my blurry notes is that having a 1 kohm load the voltage dropped below 0.5 Volts, also have a note of max. current available being 1.1 mA.

Anyways, intriguing challenge - wondering if my LEDs have a voltage threshold before they turn on which might explain something, or is it just because of different feed. Anyways, at the time I was prepared to put a diode into the black wire from the BCM (or black / brown on n/s) wire to stop the "back-flow" - if had resulted glowing LEDs.
 
That's really helpful. I did wonder if the 5.5V was a PWM outcome. Also was going to suggest that the puddle lights that Robert has might have a higher activation voltage than my ones - but diodes are usually 6V, if I recall correctly, so maybe mine are flashing/pulsing?

I don't think there is a BCM controlled feed in the door card? Of course I've just run one into the door for the mirror puddle lights, so that is a great solution, I can replace the red/white with the 12V I brought from my footwell light feed. Since the door being open only ever matters when the courtesy lighting is on, that's spot on!

Thanks again for taking the time to get that waveform!
 
  • Like
Reactions: mmi
@Robert out of interest, what are you planning to do on your lights? I think you are like me and have a courtesy feed in the door cards for the mirror puddle lights?
 
I don't have any plans to my lights as I have done all mods that wanted to have.

The only thing that I will be doing soon is new wiring for the mirror camera as a part of (AREA VIEW 2) system.

And yes my under mirror light is fed directly from ceiling lights.
 
  • Like
Reactions: mmi
Not the same but I’ve feed my outside sidebar puddle lights off the same circuit that powers my footwell lights. These come on when I unlock the van or open the door. Would this not be a good circuit to fed from for your lights?
 
Not the same but I’ve feed my outside sidebar puddle lights off the same circuit that powers my footwell lights. These come on when I unlock the van or open the door. Would this not be a good circuit to fed from for your lights?
In light of what we've discovered, yes. The only downside is the lights on the door that is not opened will light up as well.
 
To get power fold mirrors with fold on remote lock on T6 there are generally speaking two ways.

OPTION 1 (OEM)
Parts required:
- 2 off power folding mirrors (7E2857508DG & 7E2857507DB)
- 2 off door control modules (7E0959801L & 7E0959802L)
- 5 off pre crimped wire 000979009E
- 1 off 7E1959565K mirror switch with folding
Wiring:
Driver door(2 wires from folding motor to door control unit pins 14 & 15 and 1 wire from folding switch pin 8 to door control unit pin 12)
Passenger door(2 wires from folding motor to door control unit pins 14 & 15)
VCDS Coding:
How to Program folding mirrors - Pictogram
Cost:
Approximately £600
Functionality:
Mirrors fold when folding switch is in fold position and ignition is ON.
After VCDS coding mirrors fold on remote lock but long press is required.
Unfold when ignition in switched ON.

OPTION 2 (aftermarket)
Parts required:
- 2 off power folding mirrors (7E2857508DG & 7E2857507DB)
or
- 2 off power folding motors only
- 1 off mirror folding control module(made in China, £5 on Ebay)
- 1 off pre crimped wire 000979009E to get signal form door mirror folding switch
- 1 off 7E1959565K mirror switch with folding
Wiring:
View attachment 30308

VCDS Coding:

None.
Cost:
Approximately £250 - £300
Functionality:
Mirrors fold when folding switch is in fold position and ignition is ON.
Mirrors fold on remote lock.
Mirrors unfold when unlocked or when ignition is switched ON(can be chosen by connecting or not unlocking signal).

Obviously I picked option 2 and used folding motors kit with LED blinkers.
Best functionality and best value for money.;)

This is awesome info @Robert.
I currently just have the standard mirrors that I have to manually fold up. Do the motor modules fit and work in these units? MY2019. I was under the impression I would need to buy complete units which has been putting me off a bit, but hadn't noticed the 'motor' only method previously.
Thanks
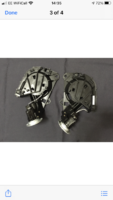
Yes you can install folding motors only. Very simple installation.
Did you see my part list?
Photos here ---> https://www.t6forum.com/threads/power-fold-mirror-retrofit-with-fold-on-remote-lock.885/post-134947
and actual listings here ---> https://www.t6forum.com/threads/power-fold-mirror-retrofit-with-fold-on-remote-lock.885/post-135219
 
@Robert thanks
Is there a different parts list to you one in quoted post above?
I'm liking option 2 and I've seen a pair of motors for £130, not new though. Seller said he changed them as the wouldn't fold on key, but the control module gets around that issue from what I can tell.
Thanks
 
There is only one part list, sorry for typo.
Can you show us the motors you have seen?
£130 sounds like correct price for a pair of brand new folding motors.
 
  • Like
Reactions: mmi
Following on from some great advice from @Robert (big thanks) i have started my journey to mirror folding bliss - hopefully.

Ordered these from Roberts contact in Taiwan. Shipped on 24th and in my hand on 29th all for £172


D822DA58-EA7C-441E-8C19-C186B2C2DD27.png
Door switch from TPS for £35.
2 12 relays from eBay £6 the pair.

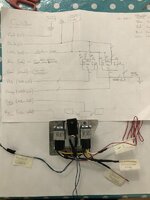
Made a start mounting it on a plate.
4CE5A4DB-44A6-4F34-9915-540D27FB5B54.jpeg
Need to decide where to mount it now. Either behind dash or in drivers door. My preference is drivers door as all the feeds I should need will be in there, but I haven’t had the door cover off yet to look at space.

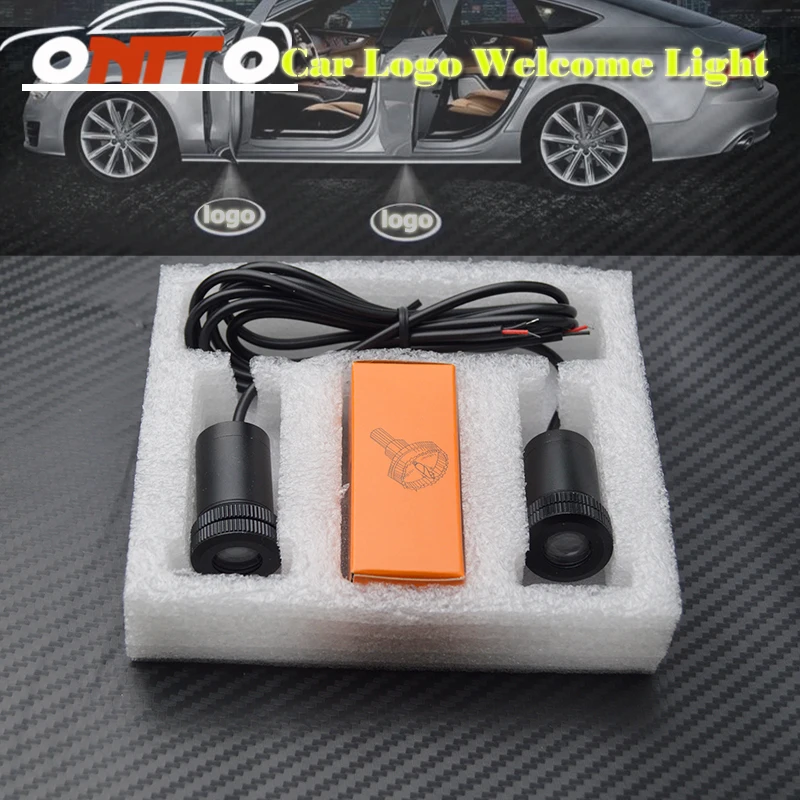
Also, does anyone have a link to those cheap VW projector puddle lights that mount in the bottom of the door card? The old links that were posted are no longer active. I’m looking for the ones that just need a hole drilling.
Thanks
 
Back
Top