[Guide] Mobile Solar Panels ? . . . - How I Did It -

Ty dellmassive for your time n effort.
I have gone and popped down and measured and it will just fit with a bit of overhang by the steering wheel.

the intention for now is to pop it on the dash lock up walk away.
but if I am there at the direction is right I intend to attach to the pop top. Put straps on and 3D print some hooks to go under the lip of the pop top, so attach in the Down position then pop up, and it will be hooked on the roof.

but then I would only hookup direct to the leisure battery in that setup.
i am not worried about the van starter battery, I have a portable jumper battery that’s in the cupboard. So that’s covered.

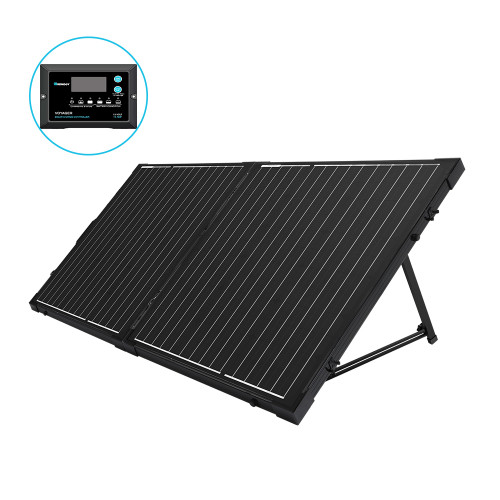
its more around preference for hooking direct up to that battery. I think the lensunsolar has anderson connectors already on there.

so for now u suggest extention to the cigarette socket with 10a fuse.
but can go higher with the fuse if direct to the battery.

Of course right now I want it to just charge both batteries trickle l being just sat there.
but later modify it.

interesting though it’s about £100 difference between 50w solution to 100w solution, well being picky with the panel shape lol.
 
Here we go..

Solar charging the Starter batter via a 50w small foldable panel...

Folds away into the door pocket when not in use.

A small simple easy solution.

It's a 50w mono foldable panel with a 10a PWM controller, hacked onto a 12v socket.

Pics...
View attachment 47997 View attachment 47998 View attachment 47999 View attachment 48000

have you measured what output you get out of this on the dash through the glass? Thinking of either a 50w or 100w folding panel on the dash like yours.
 
have you measured what output you get out of this on the dash through the glass? Thinking of either a 50w or 100w folding panel on the dash like yours.
50w is perfect for dash mount. (3A)

100w may be a to large physicaly (6A)

The thing is if you have ANY shading on any panel the output will drop off to next to nothing.

I'll try out the Rengy 100w semi flexible folding panel later and see if it fits.

I'd normally place a 100w panel on the floor.. or then on roof.

I've not exactly measured the outputs on dash verses roof as yet because you would need perfect clear sunny day with 100% sun. Plus the output changes as the battery chargers....

A fair test would have to be a fixed load.... say 3A worth of halogen bulbs. And then a timed 10min exposure test In each position, with the total wh metered with a power meter.

What I've noticed is that most panels will generate the listed voltage when exposed to strong sun ... what realy changes is the current availability... so flat on the foor vs 45deg angle toward sun.

With that in mind I would assume a 10-25% ish reduction in total power due to reflective nature of glass at certain angles of the sun vs perpendicular to windscreen.. ie. Sun as solar max is Miday when direct ever head, which will hit windscreen at 45deg angle so some solar energy will be reflected away.

Angling the panel toward the sun definitely helps max yield.

That's all getting a bit geeky..... we know from the tests above that a 50w panel on the dash will provide 3A and will charge the stater battery and possibly the aux battery via a dc-dc etc.

@Martinf used a 20w panel..... but that's down @ 1.2A charge range and a bit low for me.

50w @ 3A is perfect for dash mount.

100w @ 6A is possible but need to fit with no shadowing.

Also dont forget these panel get Hot!!! From the solar absorption.. the lensun 110w magged to the roof was very, very hot when I took it off after being in the sun.

The foldable ones have material backing that protects the dash from any heat.
Cheers Lee, I’ll probably pick one up for the time being until I cab be bothered to fit solar on the roof. I’ve fitted a 12v socket to the side on the driver’s seat so will tap into there, and it then gives me the option to top up the starter battery if needs be.
 
Renogy 100Watt Eclipse Lightweight solar suitcase ( RNG-KIT-STCSLW-100MB-10CC )

well sometimes i surprise myself. . . . . . it actually fits on the dashboard. !!

I've has this a couple of years now. . . . so lets take a look at it.


1589473914107.png

******************

1589521845595.png

*****************


this was released in the states a few years ago . . . . long story short, after many emails and a few fluff-ups i purchased one of these from Renogy Europe (Germany)

its the lightweight version of the older solid suitcase style.


****************************************


heres mine . . . a nice lightweight 100w kit,. great for camping and keeping the van battery topped up.

20200514_155705.jpg

it folds out like this . . .


20200514_155717.jpg


the spec sheet reads.

100w, VOC 23.6v, ISC 3.13A --- HOLD ON !!!! i never realised this before..... a 100W panel thats ONLY giving me 3.13A!!!, for 100W i should expect 6A ! - oh well.

EDIT: no it ok, it is a 6A / 100w . . . so typo in the spec sheet here, see bottom for test results..


20200514_155759.jpg


you get MC4 connectors and a cheap PWM controller . . . .

20200514_155819.jpg


plus a lead with battery clamps and a fuse, all connected up via a 50A anderson connector.


20200514_155823.jpg

here is the PWM controller . . .

20200514_160612.jpg


Sixe wise, this is the panel next to the 50W Bluefusion.


20200514_155956.jpg


so lets take it out to the van.. . .


rough sizing on the seat . . .


20200514_160100.jpg


sitting on dash . . .

20200514_160110.jpg


heres the surprising shot . . . . . folded out on the dash . . .


Dimensions : 53.98 × 53.98 × 1.06 cm / 21.25 × 21.5 × 0.42 in.


20200514_160134.jpg

heres some funky wide angle shots of the panel in situ . . .


20200514_160215.jpg

*

20200514_160236.jpg

**

20200514_160348.jpg

**


Back to reality . . . we have these pics . . .

20200514_160359.jpg


and heres a rough size comparison next to a folded BlueFusion and 100ah AGM battery . . .


20200514_160619.jpg


what do it think?

well its been a good panel . . . . i didn't realize until today that its 3A output is low compared to other 100W panels. (norm 6A per 100W)

its got MC4 connectors . . . so i can swap out the pwm controller for a Victron MPPT easy.

Renogy is a well and trusted known brand.

the supplied PWM controller is as with all kits . . . cheap.

but it folds up and stores away easy . . .


EDIT:

well im not so sure now, the book spec states . . .

50w imp @ 2.85A
100w imp @ 5.35A


but the panel sticker says . . .


100W @ voc:23.6 / imp @ 2.85A


so... i need to put the meter on it . . . . . all things are pointing to the fact that the sticker on the panel has a typo . and the 50W details are applied.

easy to test, just need a sunny day and the power meter:

TBC - test comming soon.


heres that last few hours AGM BM2 readout. . . . . . not bad for the last part of the solar day.

Screenshot_20200514-194403_Battery Monitor.jpgScreenshot_20200514-194449_Battery Monitor.jpg

edit:


for a size comparison. - closed,

1589543522362.png

and open . . . .


***************


TBC...


bit of sun today . . . .

so added a 40A load on this battery and boom . . . . . 5.3A

that proves that the panel is a proper 100w / 6A job and not 3A as listed.


..
 
Last edited:
Nice one Lee. Looking forward to mine arriving! :cool:

LOL . . . . yeh me too . . . .

120W BlueFusion kit incoming - watch this space =]


fyi, heres the above panel open (20 pic limit above)

1589543608282.png


EDIT:


bit of sun today . . . .

so added a 40A load on this battery and boom . . . . . 5.3A

that proves that the panel is a proper 100w / 6A job and not 3A as listed.


20200516_105814.jpg

.


20200516_105720.jpg

.

20200516_105740.jpg


****

Edit:


Slimline solar2 AGM

just to show that even with partial clouds the Renogy kit will still help add a charge . . .

20200516_090324.jpg

.


Screenshot_20200516-091404_Battery Monitor.jpg

.


Screenshot_20200516-091215_Battery Monitor.jpg
 
Last edited:
LOL . . . . yeh me too . . . .

120W BlueFusion kit incoming - watch this space =]
Jeeez. I've just been wondering what all your Solar gear would look like all laid out and in one photo :eek:

I keep thinking oh that seems a good solution for me then you post something else and I change my mind o_O

Now I cant decide between a panel attache permanently to my roof connected to the 1240D or one of these foldable ones.
 
Yeh, its kinda a nightmare . . . but i love it.

so far i think they will take up the whole garden.

lets list it and see panels i have to test: . . . . .

20w kit wish cack - x2 (40w)
50w accopower foldable kit
100w renogy frame suitcase kit.
100w renogy flexable suitcase kit.
160w renogy flexable panel.
150W Photonic univers panel semi-flex - x2 (300w)
110w Lensun flexable panel. - x2 (220w)
160w Photonic univers semi-flex panel
200w Lenusun fold kit.
50w BlueFusion foldable kit *NEW*
120W BlueFusion foldable kit *NEW*


so thats effectively @ 1500W total . . . NICE =]
 
Last edited:
Jeeez. I've just been wondering what all your Solar gear would look like all laid out and in one photo :eek:

I keep thinking oh that seems a good solution for me then you post something else and I change my mind o_O

Now I cant decide between a panel attache permanently to my roof connected to the 1240D or one of these foldable ones.
lol . . . yeh.

Roof panel is nice fit and forget solution that will help you out 24/7 and keep power in the batteries. (though fit vinyl wrap first and sikaflex to that)

you can then always add extra mobile panels as/when you need them . . . ie camping.


******************

These mobile solutions are great, but they are all MOBILE solutions.

meaning that you have to setup and put away every time you want to use/move the van.

so its great to have a temp dash solar . . . . but have to put it away.

its great to have a temp roof solar . . . . but have to put it away.

its great to have a temp floor solar . . . . but have to put it away.


all this will cause wear and tear on the panels, kit and socketrs etc . . . . . . . possible failures in the future?


******************


So if its long term solar you need/want - get a panel fitted on the roof.

if its fit-and-forget you want - get a panel fitted on the roof.

if you want to add more power just get a mobile panel . . .


if you dont want to stick or cut your roof - get a mobile panel.

if you cant get cables to a controller due to conversion - get a mobile panel.

if you just want solar for camping or the odd trip -get a mobile panel.


***********************


for any fitting method, 50w - 300w is best power range. (3A - 18A charge rate)

with

200W up (12A) or above, being the best power user choice

100w - 200w (6A - 12A) being the best all rounder to run loads and keep a battery topped up

50w (3a) being best for small loads and a battery maintainer

below 50W is only battery maintainer.


*********************************
 
Last edited:
lol . . . yeh.

Roof panel is nice fit and forget solution that will help you out 24/7 and keep power in the batteries. (though fit vinyl wrap first and sikaflex to that)

you can then always add extra mobile panels as/when you need them . . . ie camping.


******************

These mobile solutions are great, but they are all MOBILE solutions.

meaning that you have to setup and put away every time you want to use/move the van.

so its great to have a temp dash solar . . . . but have to put it away.

its great to have a temp roof solar . . . . but have to put it away.

its great to have a temp floor solar . . . . but have to put it away.


all this will cause wear and tear on the panels, kit and socketrs etc . . . . . . . possible failures in the future?


******************


So if its long term solar you need/want - get a panel fitted on the roof.

if its fit-and-forget you want - get a panel fitted on the roof.

if you want to add more power just get a mobile panel . . .


if you dont want to stick or cut your roof - get a mobile panel.

if you cant get cables to a controller due to conversion - get a mobile panel.

if you just want solar for camping or the odd trip -get a mobile panel.


***********************


for any fitting method, 50w - 300w is best power range. (3A - 18A charge rate)

with

200W (12A) or above, being the best power user choice

100w (6A) being the best all rounder to run loads and keep a battery topped up

50w (3a) being best for small loads and a battery maintainer

below 50W is only battery maintainer.


*********************************
Thanks for taking the time for this response.
As a rough guide what size panel would I need to run something like a mid size Dometic top load fridge and some led lights connected to a 120Ah leisure battery
 
Thanks for taking the time for this response.
As a rough guide what size panel would I need to run something like a mid size Dometic top load fridge and some led lights connected to a 120Ah leisure battery

Measure your loads / draw to get an accurate Ah reading of what your kit is drawing. then add some amps for battery charging.

so

100w - 200w (6A - 12A) being the best all rounder to run loads and keep a battery topped up

.


wasnt you going for the 160W Photnnc universe with the rear cable gland?


.


edit:

scrap that (i fitted those to the shed roof) it was this one . . . . 160w @ 8.4A


.
Solar panel specifications:

  • Peak power: 160W
  • Maximum power voltage: 20.2V
  • Maximum power current: 7.92A
  • Open circuit voltage: 23.9V
  • Short circuit current: 8.40A
  • Power allowance range: +/- 5%
  • Solar Panel dimensions: 1345 x 665 x 4 mm
  • Junction Box diameter: 30 mm
  • Weight: 5.70 kg
  • 1 x 3m high quality dual core solar cable attached (4mm cross section)
20190718_152535.jpg


20190718_152709.jpg
20190718_152813.jpg
 
Last edited:
Measure your loads / draw to get an accurate Ah reading of what your kit is drawing. then add some amps for battery charging.

so

100w - 200w (6A - 12A) being the best all rounder to run loads and keep a battery topped up

.


wasnt you going for the 160W Photnnc universe with the rear cable gland?


.


edit:

scrap that (i fitted those to the shed roof) it was this one . . . . 160w @ 8.4A


.
Solar panel specifications:

  • Peak power: 160W
  • Maximum power voltage: 20.2V
  • Maximum power current: 7.92A
  • Open circuit voltage: 23.9V
  • Short circuit current: 8.40A
  • Power allowance range: +/- 5%
  • Solar Panel dimensions: 1345 x 665 x 4 mm
  • Junction Box diameter: 30 mm
  • Weight: 5.70 kg
  • 1 x 3m high quality dual core solar cable attached (4mm cross section)
20190718_152535.jpg


20190718_152709.jpg
20190718_152813.jpg
Thanks again,
Yes that was the one that i was really looking at. However I've needed to sort some other things out first and Im still unsure about cutting a hole in my roof and also if there is enough room for the gland and how much strain there would be on the gland/cable due to the ply roof. (With the lack of camping opportunities available this year it's also seemed a bit less important).
 
Gotcha . . .

well that sounds like a perfect case for a mobile setup then. . . . . .

100w - 200w (6A - 12A) being the best all rounder to run loads and keep a battery topped up


***********************

last camping trip i had 100W and 110ah AGM . . . . which ended up flat.

my conclusion was for next time : 200w and 2xAGM (or 1x Lithium) . . . . . but suppose i am a power user.


so either start small @ 100w and build your kit up...


or just go for it and do it once @ 200W.


just remeber decent kit is around £2/w


and look at getting a MPPT to swap out any cheap PWM controller you get.

thanks again for a great reply.
I thought I didn’t need an MPPT so could plug the panel straight into the Redarc 1240 dc-dc converter.
 
thanks again for a great reply.
I thought I didn’t need an MPPT so could plug the panel straight into the Redarc 1240 dc-dc converter.
yes correct the Redarc bcdc1240d has a built in mppt controller.

but for any other applications . . . . . . . . . =]
 
Next Test. - The first proper solar panel i got.

Renogy Solar 100W framed suitcase. STCS-100D


100w
voc: 21.6v
isc: 2x2.78A ( 5.56A )


This one has a nice sturdy chunk to it . . . . which makes it large and heavy compared to the others.

but it has stands and storage all built in. . . . which is nice . . .

folded up, its about this big.


20200515_102850.jpg

then when opened out we have this . . .

20200515_102934.jpg


it has sturdy frame legs, and the solar controller (PWM) has its own mounting plate . . .


20200515_123931.jpg


spec wise the panel states . . .

20200515_123940.jpg


this one come with a Renogy Adventurer controller . . .

20200515_123950.jpg


20200515_123957.jpg

as well as some extras . .

20200515_124047.jpg

.


build quality is very good with a solid ALU frame all round . . and bump stops on the corners.

20200515_124027.jpg


and a decent handle and catches . . .


20200515_124137.jpg


size wise . . . next to the other Renogy.


20200515_124127.jpg

BM2:


Screenshot_20200515-124228_Battery Monitor.jpgScreenshot_20200515-124312_Battery Monitor.jpg


Edit:


next day, slight cloud coverage

frame. solar1 AGM.


20200516_090324.jpg

.


Screenshot_20200516-091132_Battery Monitor.jpg

.

Screenshot_20200516-091123_Battery Monitor.jpg
 
Last edited:
I’ll start by saying a big thank you to @Dellmassive for doing all the research, it has helped me make the decision on what panel would suit my needs.

After reading this thread last week, I ordered a Blue Fusion 50W portable panel. It arrived today :waving:

First thing I did was remove the cable with the battery clips from the controller. I replaced it with a 12V cigarette adapter after I cut off the socket end and tinned the cable ends. I really wanted to do a full on test but as it didn’t arrive until after 3PM there wasn’t really much of the day left....but I had a go.

Battery cable removed from controller here:
A32C1265-629C-4996-8D59-03C01F9DAB8B.jpeg

Cut socket off of 12v plug/socket extension and tinned the cable ends:
19313DA2-D407-4C0A-8103-52F4E85AD460.jpeg

56E34436-084B-4962-8C0E-84AAC439D855.jpeg

And connected to the controller to give me this:
67EF4B62-8FC8-4DF4-8C29-7B494DA4A6A0.jpeg

I still have the cable with the clips on it and can swap it back anytime i might need to.

For now this allows me to connect the panels to either my Starter battery or my Leisure battery as I have a 12v socket connected to both. The cable on the 12v lead is long enough to reach from the dash into the rear of the van to where my 12V Leisure socket is and it is also long enough to allow the panels to be placed on the roof and still connect to either of my 12v sockets. As I also have a CTEK 250SE I have the option to connect directly to this (without the controller) at some point in future should I ever need to do that.
For me this is a very versatile solution and should allow me to charge either battery as the main priority and using the CTEK, overflow from the starter into the leisure once the starter is charged (I want to test this tomorrow).

Priority for now is the Starter as the van isn’t being used much and the starter slowly drains.....
Despite there being little of the day left I thought I’d give it a go so I connected the 12v plug into the dash socket and set the battery type on the controller and left the panels on the dash for a few hours (it is still out there now as it happens).

Here is the output from the BM2 on the Starter battery. I connected it shortly after 4PM, It produced a decent charge around 4.30PM as the sun was out but as the sun faded so the charge has diminished. Nevertheless I’m confident it will do what I need it to .
5591A841-1A23-460A-A3BA-4278F7147561.jpeg

This is it laid out on the dash:
61B10E54-5615-4A58-B3FA-C69DF295046C.jpeg

Further updates tomorrow assuming decent weather ;)
 
Haha @Big.mac virtually identical to me! Mine arrived at 10am so I had a bit more sunlight! I fitted these insulated and polarised plugs on the original croc clips and a fused ciggie plug so I can swap quickly between the two.

B2A9F325-6A44-4FC3-925A-1C524080CEC5.jpeg
 
No idea why, but I seemed to post this in the wrong thread, so I’ll try again!

In order to try and extend my time ‘off grid’ I wanted a quick and simple mobile solar solution. I went for a 50w folding solar panel with regulator from Bluefusion. It’s a PWM regulator and has a USB out port.

It was listed at £92 on eBay, but they had a savings code, and it came in at £85. As per @Dellmassive , it’s normally about £2 per watt, so at £85, it was a good buy.

It’s amazingly small and light. Not a lot bigger than a couple of magazines stacked up.

It’s fitted with insulated croc clips, but I’ve changed this for a fused (fuse is IMPORTANT) cigarette plug so I can plug it into the sockets for the leisure or starter battery.

Fits nicely on the dash, or on the windscreen for maximum gain. I can actually fit my internal blind, and the panel will still see the sky.

You can see from the BM2 read out that the voltage spiked up to 13.9v about 10:30am (no load on the battery). I put the fridge on (72w compressor fridge) at about 10:45am and it was warm, so had to work hard. Voltage dipped to 12.6v under load. When the fridge was cool, the compressor turned off, and the voltage crept up to 13.v and back to 12.6v when the compressor was on.

Under good sunlight, it seemed to be keeping up with the fridge. I unplugged the solar panel at about 13:30, and left the fridge on, and you can see a downward trajectory on the graph as the battery drained.

I’ll get an ammeter on it at some point, but overall really pleased for a simple, cheap and quick solution.

PS, I know it desperately needs a wash!

5FECB754-6137-43DA-9D1F-72A5E811AB12.jpeg

39AF1D89-9B5D-475C-901A-1B22F92F0908.jpeg

1C8FF5F7-6351-40C4-B28A-DE668391F59C.jpeg

1FF4EA0E-4CF0-41B9-A6A2-2DB8DBA4A19E.png

2C75DF2A-C2D1-4077-B122-E322F6E0FE19.jpeg

BF5E3D10-BCA8-4053-8731-3DF9502392DB.png

311397E2-E315-42DC-92D1-5BC5C1B7A247.jpeg
 
Back
Top