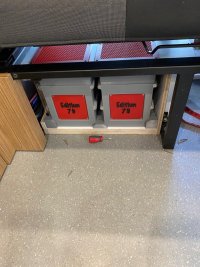
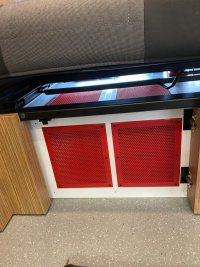
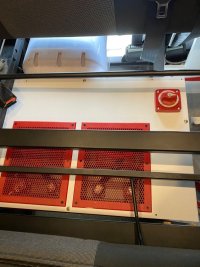
I don't see a lot of lithium battery builds here as most just buy a pre-made lithium battery as i have done in the past, but as i needed more capacity for longer trips i decided to commit on building a bigger battery.
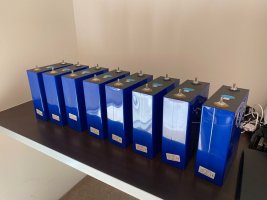
In November i ordered my Eve 304Ah Cells, which currently have 320Ah capacity from the testing, they finally turned up yesterday after a long wait at the freight forwarder here in Aus.
I ordered from Shenzen Luyuan Technology Co. LTD through Alibaba, The owner is Wan Amy, and is highly recommended in battery building circles, due to the fact they are Real grade A new cells straight from the factory with factory documented testing, another benefit is the packaging, 2 cells to a box fully foam padded, corner protection plates.
You will pay more for these cells, but Alibaba and Aliexpress have a lot of so called new cells, which are not new and of the capacity stated, also the packaging used is not suitable from some of these guys, you don't want old dented bloated cells with QCode's grinded off.
So i ordered 8 x 304Ah cells, as i'll be making 2 x 12v packs to give me redundancy out on the road.
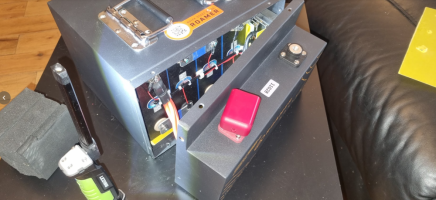
Each pack will have a JBD 200 amp 4S BMS with heater port to manage the cells with Bluetooth support, a bit of an overkill, but these BMS have a huge heatsink and heat is an issue here in Aus.
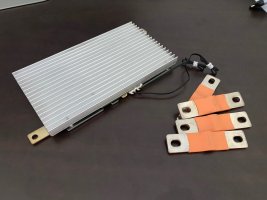
I decided to use flexible busbars (layered tinned copper strips), as it is being used in a mobile environment and they handle more amps than the stock busbars that i received with the cells
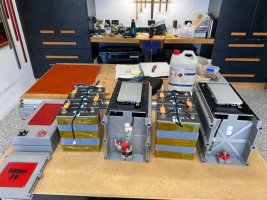
I've currently got the cells clamped together to top balance the cells to 3.65 volts to ensure they are completely charged, as a balanced pack is a more reliable pack.
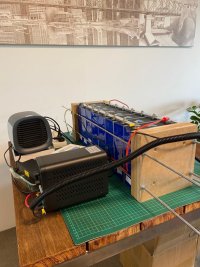
The only issue is that my two DC chargers are only putting in 5amps each on C.V, so it'll be charging for over a week before i can seperate them and make my packs, although i'll discharge them back down to 30% before doing so.
My wife wasn't happy that i dragged the outdoor table inside to use , but i'd rather charge them here than at the workshop, as due to isolation orders, i don't want these sitting on a charger at the workshop and unable to go out there and turn the charger off.
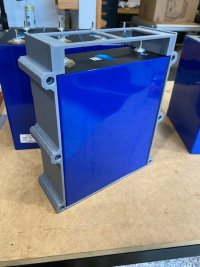
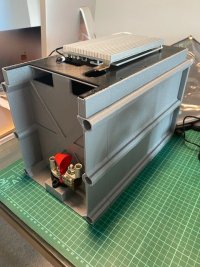
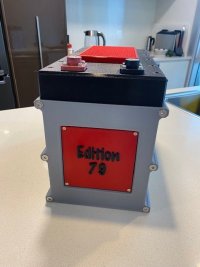
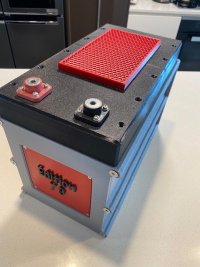
So, I was planning on building a holder for them out of steel or plywood to go into the existing battery area were my current 240ah lithium battery is sitting, but while i was waiting for my cells, i came across this that someone had 3D printed.
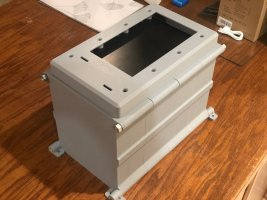
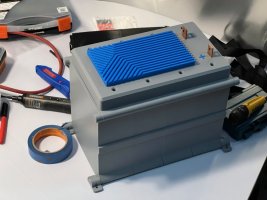
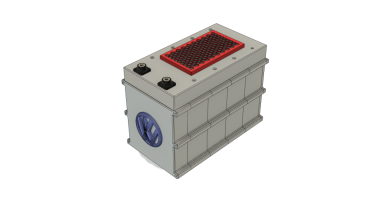
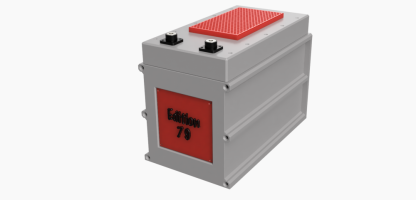
So, of course i decided that i really need to get a 3D printer for the workshop , so hopefully i'll see my Prusa Mk3s+ soon, having said that i'm still designing my own similar version on Fusion 360 as i want to use threaded studs as i use fuse blocks on my batteries and i need to keep the height low.
Now, i do imagine it will take me a while to design it in Fusion 360 as i only just started learning it two weeks ago, so i'm thinking i'll make a plywood enclosure first to test and use, until i can design what i want, and learn to master large 3D prints.
If anyone is interested in the above case to suit these Eve 304ah cells and this 200 amp BMS, i can can send you a link to the creator on GitHub, as he has loaded the STL and Fusion 360 files for open use.
Well thats all for now, i just have to wait for the top balance to be completed
In November i ordered my Eve 304Ah Cells, which currently have 320Ah capacity from the testing, they finally turned up yesterday after a long wait at the freight forwarder here in Aus.

I ordered from Shenzen Luyuan Technology Co. LTD through Alibaba, The owner is Wan Amy, and is highly recommended in battery building circles, due to the fact they are Real grade A new cells straight from the factory with factory documented testing, another benefit is the packaging, 2 cells to a box fully foam padded, corner protection plates.
You will pay more for these cells, but Alibaba and Aliexpress have a lot of so called new cells, which are not new and of the capacity stated, also the packaging used is not suitable from some of these guys, you don't want old dented bloated cells with QCode's grinded off.
So i ordered 8 x 304Ah cells, as i'll be making 2 x 12v packs to give me redundancy out on the road.
Each pack will have a JBD 200 amp 4S BMS with heater port to manage the cells with Bluetooth support, a bit of an overkill, but these BMS have a huge heatsink and heat is an issue here in Aus.

I decided to use flexible busbars (layered tinned copper strips), as it is being used in a mobile environment and they handle more amps than the stock busbars that i received with the cells
I've currently got the cells clamped together to top balance the cells to 3.65 volts to ensure they are completely charged, as a balanced pack is a more reliable pack.

The only issue is that my two DC chargers are only putting in 5amps each on C.V, so it'll be charging for over a week before i can seperate them and make my packs, although i'll discharge them back down to 30% before doing so.
My wife wasn't happy that i dragged the outdoor table inside to use
 , but i'd rather charge them here than at the workshop, as due to isolation orders, i don't want these sitting on a charger at the workshop and unable to go out there and turn the charger off.
So, I was planning on building a holder for them out of steel or plywood to go into the existing battery area were my current 240ah lithium battery is sitting, but while i was waiting for my cells, i came across this that someone had 3D printed.


So, of course i decided that i really need to get a 3D printer for the workshop
Now, i do imagine it will take me a while to design it in Fusion 360 as i only just started learning it two weeks ago, so i'm thinking i'll make a plywood enclosure first to test and use, until i can design what i want, and learn to master large 3D prints.
If anyone is interested in the above case to suit these Eve 304ah cells and this 200 amp BMS, i can can send you a link to the creator on GitHub, as he has loaded the STL and Fusion 360 files for open use.
Well thats all for now, i just have to wait for the top balance to be completed

