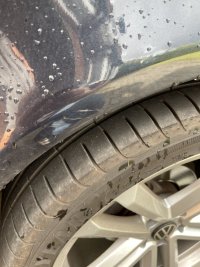
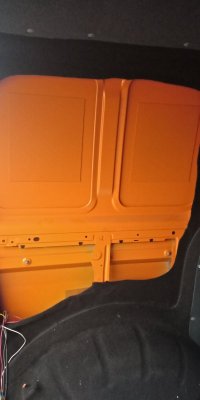
Open the slider and tailgate, you will see bolts at each end. Remove these and gently prise the cover off. Make sure you have about 7 of the plastic trim clips that hold it on as they will break.
You are using an out of date browser. It may not display this or other websites correctly.
You should upgrade or use an alternative browser.
You should upgrade or use an alternative browser.
Remove Rear Side Panel -sliding Door
- Thread starter SofaKing
- Start date
Perfect, thank you!Open the slider and tailgate, you will see bolts at each end. Remove these and gently prise the cover off. Make sure you have about 7 of the plastic trim clips that hold it on as they will break.
I can see the back of the threaded inserts on the inside of the panel so this makes so much more sense now.
I'll give it a go soon after ordering spare trim clips and take photos.
Be careful its fairly thin metal and easy to bend,Perfect, thank you!
I can see the back of the threaded inserts on the inside of the panel so this makes so much more sense now.
I'll give it a go soon after ordering spare trim clips and take photos.
Thank you for the heads up.Be careful its fairly thin metal and easy to bend,
I'm now actually tempted to just cut relatively thin strips of sound deadening and see if I can carefully applying a few bits to the inside and use a plastic tool to press it in place.
The tinny sound is so annoying so something needs to be done albeit without risking damaging the panel.
@Magpie1832 Fancy going first? ;-)

Remove Rear Side Panel -sliding Door
anyone that can describe how to remove panel AS shown in picture? Appreciated!
I can’t say I noticed any sound difference when closing the sliding door. Not as much as relubricating the rollers, anyhowI'm going through the process of adding sound deadening to my LWB Shuttle and I'm wondering what people have done in order to apply some to this panel:
View attachment 163922
It doesn't appear to be accessible from the inside and it's annoyingly tinny compared to the panels above and below that I've applied sound deadening to.
Can it be removed without damaging it?
Thanks,
Bunny
SwingerDonavan
New Member
Hello everyone,
I wonder if anyone can help with an issue that I have which relates closely to this:
I purchased a second-hand 2016 T6 and I'm having trouble with leakage from the clip holes on the rear side also (same as @bobbybasic's issue above).
I have replaced the broken clips with working clips which are holding off the water (for now).
My issue is that the previous owner must have accidentally bashed the bolt head which previously held the side panel into the body of the van and has burst the nut which it was screwed into. It looks like they even burst open the hole where the nut sat in order to receive the bolt. It seems they then tried to glue a new nut in its place and that fix has not lasted either. The panel has even bent where the nut should be inserted, so they have opted to screw in a self tapper and make a brand new hole into the body of the van and the side panel.
The self tapper isn't holding, it bursts off every fifth or sixth time that I close the sliding door.
I'm now worried that the panel is susceptible to peeling away from the side of the van., which would likely burst my new plastic clips (an therefore leave me with a leaky van again).
Has anyone got any suggestions about how I can permanently solve this?
I can see that in order to replace the factory bolt and nut I would need parts:
- N90897401 (https://www.ecstuning.com/b-genuine-volkswagen-audi-parts/hex-bolt-m5x16-priced-each/n90897401/)
- N10516801 (https://www.ecstuning.com/b-genuine-volkswagen-audi-parts/expanding-nut-priced-each/n10516801/)
But I'm not confident I know how to securely and permanently attach the nut to the body of the van and I suspect I may also need to bend this end part of the side panel back into a straight line in order for the bolt to pass through cleanly.
*Parts 17 and 18 from the official VW parts diagram
Thank you very much in advance!
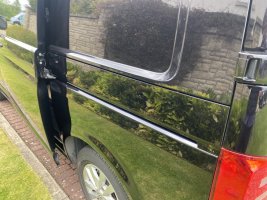
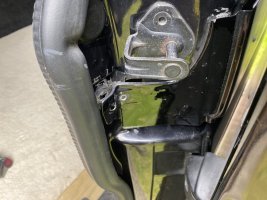
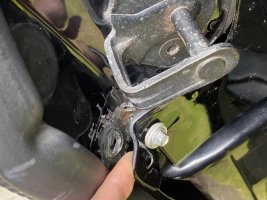
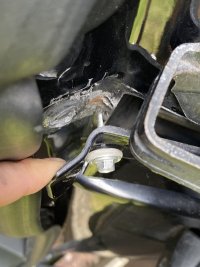
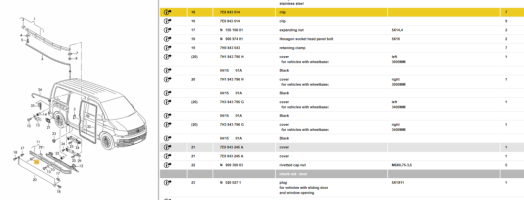


Is there space to install a larger thread size rivnut where the original bolt screwed in to? Drill out the old, fit a rivnut and then a low profile head bolt to hold it in place again
SwingerDonavan
New Member
I wasn't familiar with rivnuts until now, that looks like a good idea though! I'll give that a try and let you know how I get on, thank you!
I would suggest either a hex version to eliminate the chance of the rivnut turning at any point, if that's not practical (you'd need to file the hex flats in the hole to fit it in) a steel rivnut correctly installed with a generous amount of anti sieze to avoid any future problems getting the bolt out.
SwingerDonavan
New Member
Thanks again mate, and what would you apply the antiseize to? Just the thread of the bolt or the outside of the rivnut too?
Just the thread of the bolt, the idea is you want it to be easy to remove and not to weld itself to the rivnut and make the rivnut turn when you want the bolt to come out.
Seal with what? Can’t be too permanent in case the clips need to come out.If you can, seal them from the inside, I broke every clip taking that cover off to add sound deadening to it, the clips just shatter.
I used Bilt Hamber Dynax UB to cover the bits poking through on the inside, thick wax coating.
If I remember correctly there are a couple past the edge of the corner inside pillar panel at the rear, the thing to look out for is that if any water does get inside, it doesn't get any insulation wet and has a drain hole it can get to that's not blocked. The drains in the back corners are above the bottom of the well created by the panels so I filled this with two pack resin to the level of the drain holes while the van was tilted up so that when the van was level the slope made any water go towards the drain holes.
Similar threads
- Replies
- 8
- Views
- 711
- Replies
- 7
- Views
- 899
- Replies
- 12
- Views
- 659
- Replies
- 2
- Views
- 905

