[GUIDE] How to remove the front bumper on a VW Transporter T6

Andysmee

Previously the last of the TSI's
Moderator
VIP Member
T6 Legend

The above video by THQ is great and I followed it when doing the same job, but it's quite hard to have the video to hand at each step and so I forgot a step, so this is just a picture guide that you can use as you go along. Also, in spite of having a young van, these trim clips were a PITA, so this did not go as well as the video suggests:
PXL_20210130_160325801.jpg
 
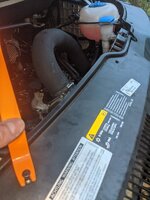
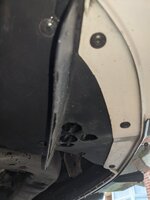
First, you need to release the wheel arch liner on both sides. Turn the wheels to to opposite side of the van that you want to do. Undo three torx screws in the forward half of the wheel arch and one trim clip, each side:
20210130_165829-COLLAGE.jpg
PXL_20210130_155314899.jpg
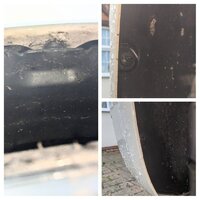
Then remove 2 torx screws each side from underneath the corners of the bumper, the ones behind the mud flap: (not all 5 screws as shown in the THQ video)
PXL_20210130_152906074.jpg
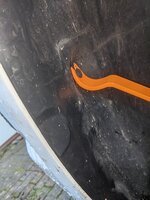
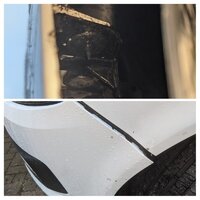
Then the real painful bit...pull back the wheel arch liner with one hand, whilst using your other two hands(!) to get a trim tool to prise the pin out of a trim clip:
20210130_170335-COLLAGE.jpg
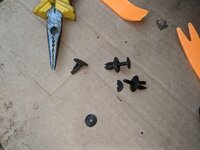
Yes, it went badly! But once I used long nose pliers to entirely destroy the trim clip, I could simply pull the bumper free at this join.
 
Last edited:
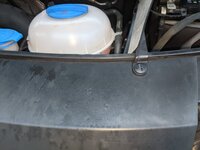
Then, after the same battle on the other side, I could simply undo the top grill retainers; one flat head screw to remove the battery compartment wall, and three trim clips that were thankfully more compliant:
PXL_20210130_161333853.jpg
PXL_20210130_161554717.jpg
Then came the really tricky bit....with frozen fingers, wiggling the entire bumper to get it off. I found that by pulling the bottom of the bumper, and pulling the top grill forward, a number of satisfying clacks resounded. EDIT: unfortunately the clacks were not good, and I snapped one clip. Maybe don't rock the bumper top-bottom!

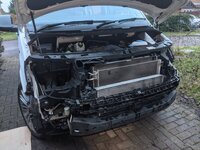
But, with another quick view of the video, and with my wife, we managed to pull it off. You have to pull where the body colour rib goes across the front of the bumper (non-startline) and it really comes away in one go.

I paused thinking that the radar sensor may have a wire attached, as I don't have fogs (which do), but the radar sensor is actually on the chassis, not part of the bumper.

I went on to remove my headlights, but I'll post that separately
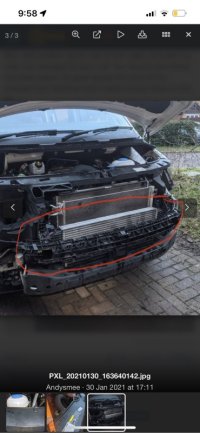
PXL_20210130_163640142.jpg
 
Last edited:
Did you just unplug your fog lights and leave them in the bumper? I’m going to be doing this next week as I’ve finally decided to go for some THQ lights.
Edit; sorry just reread you don’t have fogs.
 
Yes foglights (and parking sensors) stay in place, all the electrics on the bumper have there own loom(s)
After releasing the offside corner of the bumper you can pull the edge forward and see the plug(s) for bumper wiring and undo them before fully releasing the bumper
 
@Andysmee A very useful supplement to the THQ video, thank you.
I would like to add, for those with LED headlights and with the headlight washers integrated into the bumper, that there was no way I could get my fingers on the rear of the connector to disconnect from the van (as in the THQ video). The same connectors are used on the rear of the washers themselves and detach really easily, and the pipe is simply clipped to the bumper, so I left the complete pipe harness attached to the van and instead un-clipped it from the bumper. Of course the washer fluid then started to drain out of the pipe ends, so they need tying up temporarily.
 
Removed my bumper today, and followed this and the video, I’ll add that I soaked the clips with wd-40 and i reckon this made them easier to come apart with the trim removal tool. I also found I didn’t have to do the one on the arch liner, just took out the three T25 torx screws. What i then found helped is to jam a light (i used my iPhone torch!) between the arch liner trim and the bumper, which frees up both hands and also shines light so that you can see what you are doing with the clip.
 
Really helpful guide thank you @Andysmee . Used this yesterday, I’m conjunction with THQ video to fit some Travelin-lite V2s. Much easier than I expected it to be and very pleased with the results.
 
My t6 bumper seems to have 3 torques screws from just behind arch , up to headlight , struggling to remove them
 
My t6 bumper seems to have 3 torques screws from just behind arch , up to headlight , struggling to remove them
If you mean that there isn’t enough space to get a screwdriver in try turning the steering
 
My t6 bumper seems to have 3 torques screws from just behind arch , up to headlight , struggling to remove them
If the screws are turning but not coming out you might want to think about using a trim removal tool behind the torx head to lightly lever them out whilst unscrewing.
 
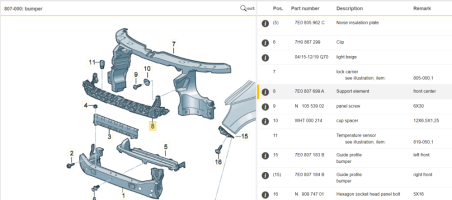
What’s the plastic part that protects the radiator that the bumper attaches to had a accident in mine and need to order a replacement

49F08754-854D-40D4-BE7B-D482ED6BC6D6.jpeg
 
So removing the bumper this aft and behind one arch liner was a plastic trim clip and on the other side was what looked like a rivet and a t25 screw.

Is it just a case of drilling it out? It looks very factory, not just a quick fix/bodge
 
Back
Top