Window Fitting - Assistance Required!

reyes

New Member
Hey all

Firstly, I'm new here, so hello to all!

Secondly, I was hoping my first message would be a celebration of some mods but though side bars and spoiler are all done and dusted, my attempted (and aborted) window installation has left me needing help.

Here's what I've done, and any assistance would be greatly appreciated:

  • Cut out section for driver's side front sliding window
  • Applied trim
    • This was a little fidgety because the trim from the supplier (I have 6 lots of it) is real narrow so advice I received was to tap the outer skin to narrow the gap between the external/internal skins therefore allowing the narrower trim to be applied - fair enough!
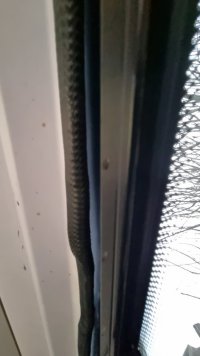
  • Dry fitted the window and observed I have a fairly large gap at the bottom; I also have a fairly large gap at the top based on the amount of daylight I see.
    • The top gap could possibly be obscured based on the sealant but it's clearly not very flush but is similar to this bottom of the window issue:
    • The bottom one has me a bit confused because there's three drainage/vent points at the bottom and that seems to be the point where the window is being pushed out (in the pics). This is where the joining beam has been removed and the gap between the two skins is minimal, so if I were to knock the outer skin any further it would seem a bit questionable, but based on the picture, if I don't, this seems to be what's pushing out given the profile.

Basically, I'm curious and grateful for any wisdom before I make any further moves.

Cheers guys.
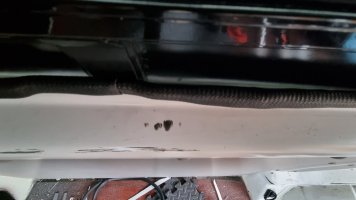
Bottom of Window.jpg

Top of Window.jpg
 
Hi Reyes, and welcome to the forum!
I wish i could help you out with your Window query, but It's not something i have had to do.
If no one has any answers for you, i would suggest getting help from a garage that specialises in Window fitting.
It may cost you but I'm sure you want it done right. :)
 
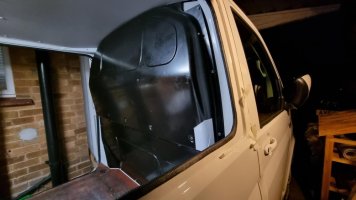
What does it look like from the outside? Can you add pics?

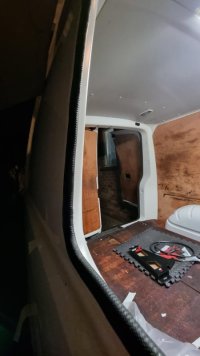
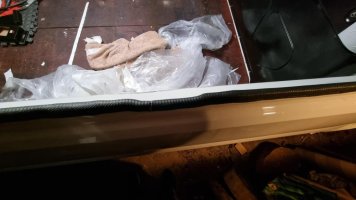
Hey Paddy, I hadn't taken any (sillily) so I've just popped out now to get some, so apologies it's a bit dark.

Is it as simple as just giving the area in the third pic a bit of a hit? I'm a bit cautious of it because that part of the external skin is already close to the internal one.

20230305_191137.jpg

20230305_191153.jpg

20230305_191202.jpg
 
Fitted my own windows last year (without a garage) and it started raining… nightmare of a job. Anyway, I believe you snake the trim on by bending it in a loop towards you opening up the trim onto the van skin, then tapping it flush as you go… I would peel the distorted bit back and then snake it back on tapping flush as you go. On a sliding window be careful not too block up the drain vent with adhesive and on a fixed panel leave a finger width gap at the bottom of the adhesive so condensation has somewhere to run away. Really not sure why the skins have been knocked together, which may explain a distorted fitment… anyway take a look at how the pro’s do (did) there is an excellent vid from Camper Glass (Transporter HQ). I will try and add a link to the vid:
 
When I install windows, I cut the old bonding out between the inner and outer skins , the tap the inner skin in , so reduces the gap, then re-bond the skins together.

I also use a large wide flat metal chisel and tap rubber mallet the 2 parts where the strengthening bar was , flat .. do not knock the outer skin inwards .
 
Fitted my own windows last year (without a garage) and it started raining… nightmare of a job. Anyway, I believe you snake the trim on by bending it in a loop towards you opening up the trim onto the van skin, then tapping it flush as you go… I would peel the distorted bit back and then snake it back on tapping flush as you go. On a sliding window be careful not too block up the drain vent with adhesive and on a fixed panel leave a finger width gap at the bottom of the adhesive so condensation has somewhere to run away. Really not sure why the skins have been knocked together, which may explain a distorted fitment… anyway take a look at how the pro’s do (did) there is an excellent vid from Camper Glass (Transporter HQ). I will try and add a link to the vid:
Thanks for the assistance Snowdawg...

So, the u-channel that's provided from the place I bought these windows is a one-size affair, which based on research this evening has made me recognise there's a larger trim other suppliers state you can use so that you don't have to knock the two skins together. As it is, apparently it's normal that the one-size-fits-all u-channel can also be used on side windows but requires the two skins being persuaded together.

The other aspect here is the fact that the profile in the picture is where the support beam is removed. In my van (T6), it isn't simply a flat line at the bottom but undulates out slightly which makes that section wider than the rest of the space between the two skins. When I've looked at other videos, I've only seen examples where there aren't those undulations in the internal skin. I'll take a look at that video you've provided as well though to see if offers any additional help!
 
When I install windows, I cut the old bonding out between the inner and outer skins , the tap the inner skin in , so reduces the gap, then re-bond the skins together.

I also use a large wide flat metal chisel and tap rubber mallet the 2 parts where the strengthening bar was , flat .. do not knock the outer skin inwards .
How do you mean Absolut5? I think you've just alluded to exactly what I just referenced in another message: the strengthening bar leaves larger gaps in its profile on the inside -- how are you flattening that with a chisel?
 
How do you mean Absolut5? I think you've just alluded to exactly what I just referenced in another message: the strengthening bar leaves larger gaps in its profile on the inside -- how are you flattening that with a chisel?
By putting the large chisel down between the 2 skins and tapping the inside flat, so it’s matches the rest of it..
 
By putting the large chisel down between the 2 skins and tapping the inside flat, so it’s matches the rest of it..
At risk of sounding like an idiot, do you mean to pop the bit the arrow points to out to make one consistent line on the top (internal skin)?
1678095918660.png
 
Back
Top