Like your style!Thanks dude, I only need 3, happy to put a tenner in the nearest kids charity box if that suits you? Or a virtual pint
Will PM you.
'Where The Clips Are' thread...
- Thread starter Grim Reaper
- Start date
Not sure if this is the right thread for this post, but can anyone advise on how to remove the two chrome trims on the T6.1 upper front grill and the plastic one on the lower grill without breaking clips? I would like to wrap mine for colour accent

Front Grille chrome removal
Looking for some advice regarding front grill. Recently purchased t6 high line black edition. The front grill is a bit to bling (chrome) for my liking. The badge I have found is an easy fix but the front grill also has a chrome strip. Is the clipped on or stuck on ? How can I go about removing...
Gloss Red Upper Grille 2 Piece Trim Inserts - VW T6 2015 - Vanstyle
If you do break the clips removing them, replacements are quite cheap.
Take some pics when you do it and add them onto here for future reference.
If you do break the clips removing them, replacements are quite cheap.
Take some pics when you do it and add them onto here for future reference.
@Grim Reaper thanks for the info. The main reason for asking the question is because my van is a 6.1 and I didn’t know whether there are differences from the 6. I cannot find aftermarket strips for the 6.1, apart from a chrome lower strip at £119!
i will be removing the front bumper soon to replace the fog light surrounds with gloss ones, I will post pics up of this when i have it off.Can anyone tell me if the bumper insert that fits here, above the fog light will just pull out or does it need to be unclipped after removing the whole front bumper?
View attachment 50990
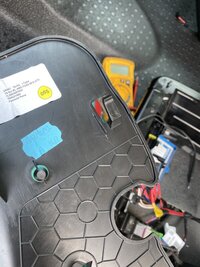
Thanks so much for this thread!! I'm in the process of taking down the cab headlining so I can sound proof it. Is there any more than just 2 screws in the ceiling light? I've taken out the light unit and unclipped the wires but I'm wondering if I need to actually remove the plastic suround to find more screws or will it come out still attached? I think I just need to loosen the a and b pillars now and it will come down? (Done the sun visors, glasses holder and roof grab handle screws already. Attached pic of light unit if that might be helpful to anyone else.

Sorry I don't know. Wasn't fitted to my Kombi, just the lower cover over the blowerHey @Jonah1972 do you know how to remove the rear HVAC ducting trim along the headlining?
View attachment 164352
alex.twist
New Member
Similar threads
- Replies
- 2
- Views
- 855
- Replies
- 2
- Views
- 417
- Replies
- 0
- Views
- 141


