You are using an out of date browser. It may not display this or other websites correctly.
You should upgrade or use an alternative browser.
You should upgrade or use an alternative browser.
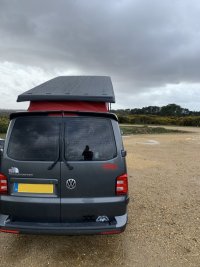
ToddiesT6 - Build Log
- Thread starter ToddiesT6
- Start date
-
- Tags
- build thread.
This weekend I hope to install the 2kw diesel heater as it’s still a little chilly in the evenings & I do like to be warm! (Wall flower I know) So bringing the work inside was the obvious choice & permitted by the big boss, but angle grinding after 9pm isn’t I’m informed  - More tinkering tomorrow then as I prep the sub-assembly & hope for good weather.
Whilst the planar heater video on YouTube is great, I have to say I really don’t like the use of ‘tech screws’ over ‘rivnuts’ & can’t understand the total lack of thread locker or torque settings.
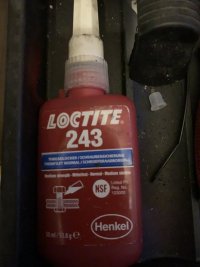
I shall mostly be using blue 243 & 5Nm (M5) or 2.6 (M4) then to ensure I don’t have to tighten things again in a few miles….


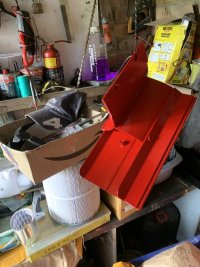
Another day, another delivery & another job to look forward to executing…..this time the fitting of a Fiamma 45s 300cm royal grey, black case awning.
Shame the brackets aren’t also black anodised & whilst I did think about home DIY anodising them, free time really is in short supply at the moment & so red primer & black top coat it is.
Good news is they fit well under the pop top even if I need to install a rear ‘rivnut’ as I’ve no OEM floating anchor nuts left in the gutter due to said pop top hinges.


Last edited:
Fellrunner13
Member
New to this thread but been through it all. Excellent work and very informative.
Delighted people are enjoying the thread - trying to find the balance to book keep progress & leave tips to help others (As it’s a lot cheaper to learn from my mistakes )New to this thread but been through it all. Excellent work and very informative.
Last edited:
Frustrating day today with the bad weather stopping almost all play (& the van being too big to fit down the side of the house despite clearing the area) - but at least I’m better prepared for the awning install when it does!
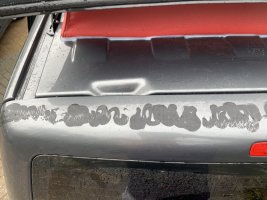
So the rear ‘rivnut’ is marked out (31mm offset in, 62mm rear from pop top bracket) & once yet another tool turns up via Amazon, I can crack on. Roof steel isn’t so thick, so I’ll be adding extra material via the rear grommet access before pinching up the nut.
Rear spoiler is also removed pending the Fiamma bike carrier install, but I’ll have to MacGyver it a little with GRP & body filler as they aren’t compatible from stock.


It’s a dry day hip hop hooray!
So on with the diesel heater install starting with the stand pipe fitment. I’ve run the van almost dry with 10miles left on the fuel gauge & likewise deliberately not topped up the add blue.
Up on ramps, plastic off & access to the tanks/pipes secured. Undo the fixings around the filler necks & removed the caps before prying the neck plastic off - refit the caps!
Remove the underbody plastics.
Disconnect the add blue supply pipes & if you can’t get the releases in, try my tie wrap trick!
You don’t have to but I choose to cut the fingers off a mechanic glove & tie warp in place to catch any excess (ditto for the fuel lines & electrical block connector) before pulling the entire add blue pipe assembly out.
Disconnect the central tank strap (13mm socket) & place the jack. Slacken off, then entirely remove the front & rear straps & lower the tank to the floor - without add blue pipes it’s a simple drop & nothing else is connected.
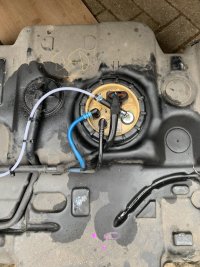
With tank on floor, pop up the red lock on electrical block from the fuel unit, pop off the fuel/return lines & you’ll be glad to have blocked on the other end of these pipes with glove fingers as this stops yet more diesel escaping.
Drive off the main retainer ring anti- clockwise with a wooden drift & lift the unit up. Rotate as you do to avoid damaging the float……and pour any excess diesel back in.
The big boss isn’t happy to loose the marigolds, but it does ensure nothing gets in to the tank when i’m doing the next steps.
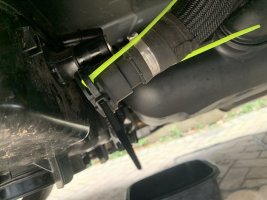
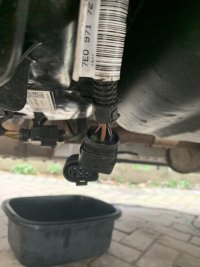
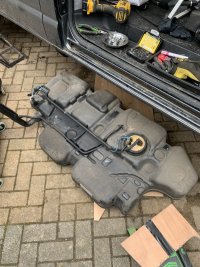
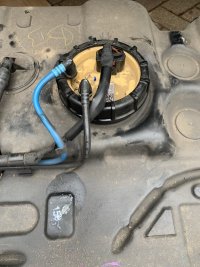


Last edited:
Despite some YouTube videos suggesting there’s a stub to ID where to drill, my 2018 unit was indeed different to what I expected to see. I located where to drill by illuminate from below with a torch before marking up to avoid the walls - Drilling was a 2mm pilot drill, then opened to 5mm & finally 9mm as it’s very thin - so you don’t go to size to quickly.
Since planar heaters stand pipe is a little odd (the lock nut goes on from above) I cut the free pipe length to 210mm as suggested, but couldn’t see how to place it within the bowel & new hole! So it’s dog legged to the outside & nipped up at the 2 o’clock position - this was later changed to 11 o’clock as the new fuel pipe didn’t like the resultant routing.
New Fuel pipe connected via the rubber interface pipe to the stand pipe & cable tied every 200mm to the original.
Refitting the tank is a reverse sequence, but easier as you’ve already worked out how to do it all!
Heater pipe routing is towards the front of the tank, between add blue & diesel tank, above heat shield & over exhaust - was going to p clip to frame, but double cable tied to loom instead.
And that was a wrap for today after the plastics were refitted with a little copper slip to finish.
4hrs total & not to bad a job for just a single person.


More tinkering today, but in glorious sunshine for a very welcome change as oh what a difference a day makes!
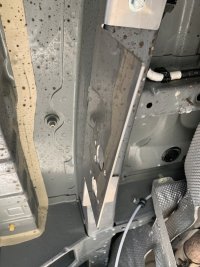
But first things first…Unless you’re crazy & enjoy the challenge of drilling holes at odd angles in hard to reach places, then use the pre-existing chassis holes & pop in a ‘rivnut’…….they are so much better than auto/tec-screws IMHO & clearly placed in the frame for exactly that purpose!
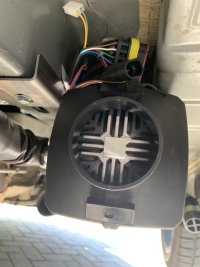
So main bracket located & 243 loctite blued bolts. Heater was next & on to the combusting inlet air (my only extra drilled frame hole) as low as possible to ensure it drains down should water ever get in.
Next was the fuel pump thats angled up this time (to help bleeding) & make note of the mass flow direction (the electrical block is on the exit side). Connected the tank fuel line once primed & secured by a ‘p-clip’ to avoid frame chaffing.
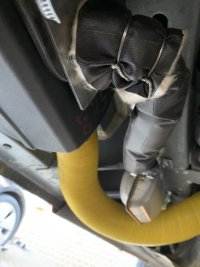
The combustion exhaust was connected next to the heater via exhaust paste & as supplied clip before routing it rearwards along the frame rail. The exhaust is long enough to exit at the rearmost heat shield cutout & again i used the as supplied port clip’s & frame ‘rivnut’ to avoid chatter.
Back in the cab with a 3mm pilot hole to mark the side step position (with a Iittle adjustment) & it was popped through before Galv spray to protect the metalwork & Sika EBT to secure the duct & the inlets was fitted.
With the electrical loom connected & routed, then cable tied ever 200mm the excess was stored atop of the heater as is normal……..and I’m out of time again. But beach run for evening sun and an alcohol free punk IPA was a nice way to end the day.


Last edited:
Fellrunner13
Member
Pure filth this thread!
Get on the tools and have a go, you’ll be amazed what you’ll be able to do for yourself & reach out for help. We are all learning.I’m feeling more and more inadequate the more I see of this thread, awesome
An ‘on time’ finish from the office today in order to finalise the last few steps of the heater install & so it was on to drilling out the floor for the heater air exhaust.
So having chosen the position, I double checked I wouldn’t hit anything from below (better to measure twice & cut once, then blast a hole & regret) - It worked out fine, so a quick deburr with the Dremel, cutting back of floor insulation, router recessing to accept the louvre vent & that was the air exhaust installed. Sika EBT to seal up & I moved to the wiring.
I’ve no leisure battery installed yet, so cables will be floating in the back, but routing from the heater was sorted by popping then up from below via the 40mm grommet under the drivers seat - A simple hole through once removed & then slipped back into position. Cables run I smegged the silicon over the hole/cables to plug the opening.
A little excess heat shield was lock wired around the heater exhaust port, plastics reinstalled & that’s the diesel heater done - till next month (when I’ve build the units) but for today, it’s on to the next job.


So I’m still waiting for the sikaflex 252 to fit the awning, but the bike carrier turned up & well - “I’ve go a problem” clearly as I just can’t stop tinkering 
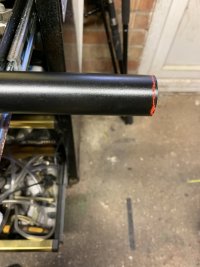
So a quick unbox on the lawn & few minutes spannerin around before I discovered Fiamma quality team need a kick up the arse as the reduced necking/end tube lengths didn’t allow the bolts to fit..:.perfect
The inevitability email conversation I’d be having about this & weeks of messing around convinced me to get the grinder out (before the 9pm curfew kicked in) & raz off 3mm from the tubes end. Job done & fitting to the van tomorrow.


Last edited:
Just a quick lunchtime job to report on today - fitting of the bike carrier to the barn doors.
Simple enough albeit lateral position is key it seams as moving the entire unit to the left, reduces the overall length the jaws need to span.
Be sure to reposition the rubber tube rings also as that too helps fitment.
Also it you pop off the knob covers, you can add a secondary ‘security’ nut to them with loctite 243 & prevent others for walking off with them
Overall it’s a simple one, but delighted to check it of the list as it free’s me up for some new cycling routes come the better weather.

Last edited:
Started on the units today - first things first & a lunch time dash the B&Q for the 12mm ply. Secondly, time to knock up a quick CAD model for the rough layout & finally out came the circular saw for the basic panel chop up.
I’ve yet to figure out the final drawer, shelf & hatch locations, affix the batons & figure out surface coating & colours, but it’s a good start & allows the electrics to be placed tomorrow.
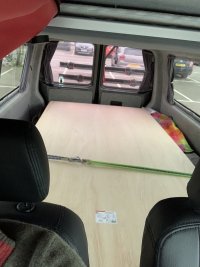
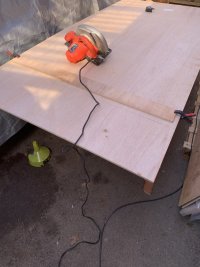


I’ve yet to figure out the final drawer, shelf & hatch locations, affix the batons & figure out surface coating & colours, but it’s a good start & allows the electrics to be placed tomorrow.


With the unit sizing/location confirmed, I’m finally able to mount the electronics back board ( rivnut replaces press trim fittings &12mm ply the 5mm hard board) & ‘functionally’ wire in the leisure battery, B2B, condition monitors plus diesel heater.
It’s not so pretty (yet) but other than an “error13” diesel heater code for no fuel on initial start up (needed a helping hand to prime first time) it’s all connected & working perfectly.
So solo test camp out tomorrow night to check it all out, bike ride around Oxfordshire to get back to some fitness & time to start enjoying the camper.
Now it’s time for a beer to celebrate!

Last edited:
Fellrunner13
Member
It would seem the rivnut is your friend in a conversion. Top job.
No real progress so far this week as I’ve been ill but feeling better now & at least the supplies have been flowing in.
Sika - 252 for the awning install - check
Tambour doors for the units - check
Bus bars & end terminals - check
Table ironmongery - no check as some plastic fittings were missing, but ‘ClearCut conversions’ were quick to address the omissions & another delivery is due.
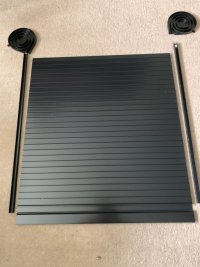


Sika - 252 for the awning install - check
Tambour doors for the units - check
Bus bars & end terminals - check
Table ironmongery - no check as some plastic fittings were missing, but ‘ClearCut conversions’ were quick to address the omissions & another delivery is due.


Similar threads
- Replies
- 57
- Views
- 5K


