Stockwell Camper - Van conversion

Stockwell Camper

Member
VIP Member
T6 Pro
I am a bit late starting this thread but better late than never! We bought ourselves a T6 in November with a plan to carry out a full camper conversion and have used this forum as a resource constantly so thought that maybe we could give something back by recording our conversion on here and maybe getting some help along the way!

We haven’t really carried out a project like this before, I am a mechanical engineer by trade and spend some time tinkering with classic motorcycles but most of the tasks we have carried out so far have been completely new and preceded by plenty of research.

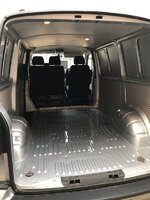
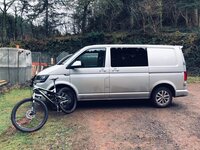
After lots of watching adverts and seeing the prices of these vans climb over the months we finally pulled the trigger and purchased a VW T6 Highline with the 102 Bhp engine in Reflex Silver with 58k on the clock;

BEEAA994-D2D7-4BFE-BFF1-6874CE7FC49C.jpeg

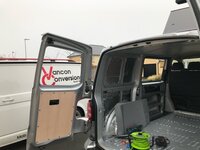
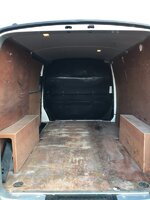
First weekend with the van and tearing straight in to it;
2098DDD1-2386-40A3-9BB2-D3D109D1C768.jpeg 7F0E7843-0351-43D4-A45D-6EA2D9E2A2D9.jpeg
 
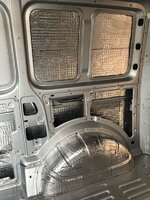
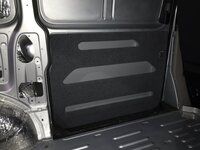
Straight in to sound deadening with Silent Coat;

9F25591C-EFBB-4934-AA54-95F31F04028B.jpeg

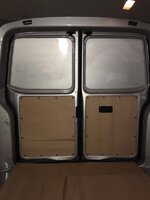
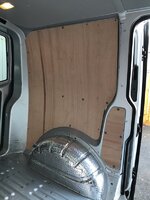
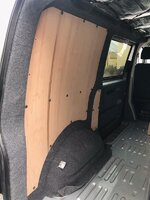
I decided cutting my own 3.6mm ply panels would be the best way to go rather than buying a pre cut set;

E39ED9D8-3136-4741-B1A5-EADFFBB520F5.jpeg 6BDD4532-48F6-4038-8C0E-F799508AC4BF.jpeg

We also carpeted and fit a Kiravans doorstore, not bad for a first swing at carpeting;

22E8699B-A6D4-4AF0-9A04-E0421D075ABF.jpeg
 
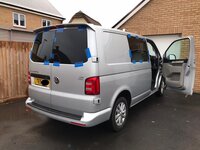
Decided to pay someone ale to put windows in, weighing up the cost of buying the windows and attempting to fit them myself against paying for a local converter to come and do it on my driveway in a couple of hours seemed a no brainer in the end;

39BB1294-B2A1-45BF-9107-F378CB2D8116.jpeg D73DF794-FF20-4365-A020-BFA2EC72F004.jpeg

Really happy with the transformation to the van on this day!

Whipped the bulkhead retainers out, used an angle grinder to cut the brackets and then ground them flat and painted with silver hammerite paint to protect the metalwork;

D3000A10-81A7-405D-966A-C26E693E6316.jpeg
 
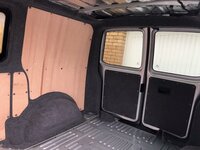
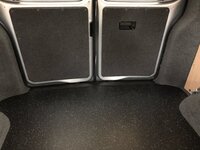
After a full weekend at it we carpeted both sides of the van in graphite 4 way stretch carpet, really happy with how it turned out;

D20BEBAB-2F5F-4F1E-914B-3E78F0F44414.jpeg 73561DD5-E84F-4C55-85DA-DF1D80785E7A.jpeg

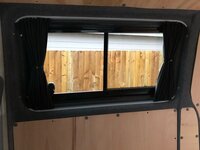
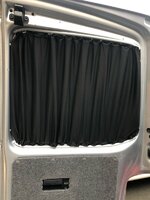
We fitted blackout curtains all round;

AA98E67A-7F90-4D99-BB3B-2C8EA7738622.jpeg 0BE5D0F2-D405-42F1-8B61-A518A1C0E8EB.jpeg

We found that the side curtains on the slider and opposite the slider fitted really well but the barn door curtains were not so good, they do stop the light pretty well and fit okay just not quite as clean as the others as the rail doesn’t follow the curve of the window as well.

Managed to use the van as a van whilst I can, don’t tell the Mrs :)

003EA87B-4D5F-4DD7-8BFD-839B3AB3231B.jpeg
 
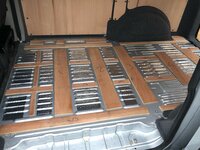
I cut up the old 9mm ply floor to make some spacer battens and used Sikaflex to fix these to the floor, we had some Silent Coat left so used this between the battens it seemed to make a noticeable difference to the “knock test”;

CB6B48B7-894E-4B8C-9EED-E2A10CC1FD53.jpeg

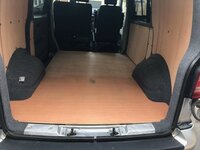
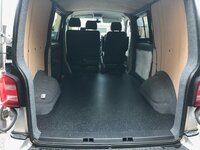
Pre cut 12mm ply floor needed a bit of trimming because of the insulation and carpet on the wheel arches but was a good fit;

DADBA62F-E889-4160-8DC2-0FE2C89FC7BF.jpeg

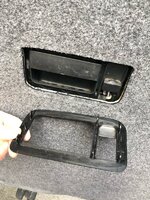
Anyone have any tips how to get the barn door handle surround to fit properly now we have carpeted;

683E0280-4BD0-47CD-92FC-FE358B90EABE.jpeg
 
I cut up the old 9mm ply floor to make some spacer battens and used Sikaflex to fix these to the floor, we had some Silent Coat left so used this between the battens it seemed to make a noticeable difference to the “knock test”;

View attachment 100706

Pre cut 12mm ply floor needed a bit of trimming because of the insulation and carpet on the wheel arches but was a good fit;

View attachment 100708

Anyone have any tips how to get the barn door handle surround to fit properly now we have carpeted;

View attachment 100709
Love the fact that you’ve done all that amazing work and struggling with a bit of plastic trim
 
Thanks Rick :p! Just wondered if there was a trade secret, we will try brute force going forwards.

Will add more to this thread in the coming days to bring it up to speed with where we are at in the process

Cheers
 
I cut up the old 9mm ply floor to make some spacer battens and used Sikaflex to fix these to the floor, we had some Silent Coat left so used this between the battens it seemed to make a noticeable difference to the “knock test”;

View attachment 100706

Pre cut 12mm ply floor needed a bit of trimming because of the insulation and carpet on the wheel arches but was a good fit;

View attachment 100708

Anyone have any tips how to get the barn door handle surround to fit properly now we have carpeted;

View attachment 100709
if pushing hard doesn't help then just carefully shave a little bit of the plastic off the retaining clip part with a craft knife, this is what I had to do and it made a difference
 
Skipping ahead a couple of steps as I am working on the B2B charge install this weekend and was looking for advice on a couple of points.

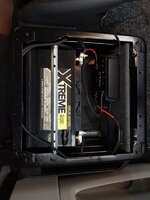
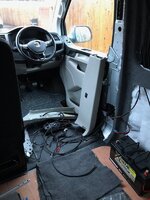
I’ve wired in my CTEK250 (thanks TravelVolts) and seem to have everything work correctly and looking neat under the drivers seat (will be rerouting the earth cable seen below), checked and I am getting 15v at the battery with the engine running and the CTEK amber lights go off when I turn off the ignition so all seems well.

1F1138A8-FA4D-4562-9145-B73A3C4C3360.jpeg

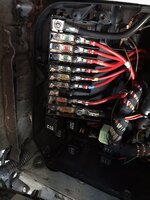
First question I have is, I have used an existing power feed from the main battery that was under my passenger seat and rerouted it here, on inspection I believe it is connected to a 50A fuse in the E Box, is it important that I change this to a 30A fuse? I have used 10mm2 cable throughout so this is spec’d higher than the fuse.

C7F547B4-D1AB-4ABE-B80D-0250FDF8632A.jpeg

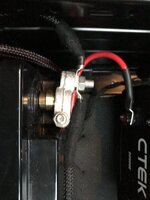
My other question is on my leisure battery setup my negative terminal does not fit right on to the battery post and is maybe on 2/3rds on, is this likely to be an issue/should I change the battery connector for a better fit? Thanks :)

613AD14F-A37E-43D2-A75E-8C8D90272872.jpeg
 
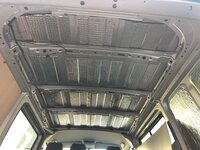
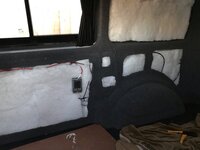
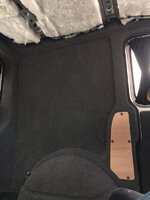
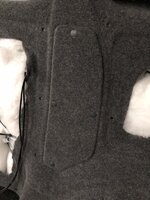
We sound deadened and insulated the roof in the same way as the other panels, we have glued up some of the plastic B&Q recycled bottles insulation but we aren’t sure yet if this is too thick we will see when it c9mes to fitting the roof panels up after carpeting them.

0663147A-9998-4E66-B694-5761ACE18242.jpeg
 
  • Like
Reactions: CAB
This is a fascinating thread.....
We've had two 'proper' motorhomes, then a T6 and then a Peugeot PVC , which I've enjoyed doing some bits and pieces to, don't think I have the confidence to do the full works but really miss the T6 and hankering after another... we've worked out we really only need EHU for a 12v CPAP device (its a breathing thing for sleep apnea) and space for a wide bed, we pretty much live in the awning otherwise so watching this conversion with real interest, looks like a great job so far, nice one!
 
Thanks snowdrop really nice to hear someone is following along, I did a lot of research during the conversion process and have had to make some decisions along the way so I hope capturing them here will help someone else.

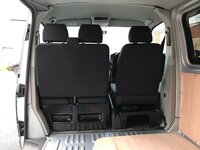
Currently the van is looking like this, we are holding off on carpeting any of the panels until we are sure where all the electric components are going to be situated. Kitchen units now on back order so a bit of a wait for those, plan is to get a first fix electrics install done in the mean time and get the roof lining carpeted and installed with down lighters.

CF555EE2-F660-4E0D-ADE6-4A37CE9359C0.jpeg

E4FD1171-D333-4249-A043-9A01F617A02D.jpeg
 
Interesting thread as I'm just thinking about converting my van (by the way it's identical to yours with same mileage - I've had it since new almost) and new van won't be here till Aug/Sept!
I'm just looking at the bewildering array of options and prices - would you be able to share your overall budget and spec please? I'm planning on doing most of the work myself also apart from the pop top but only just started looking at these. Seems a delay to have one fitted?
Anyway great job so far!
 
Thank you all for the positive feedback it is encouraging to hear people are following along.

We put a bit of a budget together when we first purchased the van however we are on track to go over that, we underestimated the cost of some of the smaller items and this as added up, things such as ensuring we insulated properly and didn’t scrimp on the materials used. All in we are probably looking at around £7,500 for the conversion and that is with us doing all of the work except for fitting the windows.

That budget price doesn’t include a pop top (we hired a van for a week and were not sold on spending the extra cash at this stage) or a diesel heater (pretty sure we will add one at a later date), we have ordered an Evo Motion Design kitchen which was the biggest expense yet and intend on fitting a Smart bed as didn’t get on with the RIB in the van we hired.

We have been carrying on some of the work with the electrical install, firstly resolved the issues I asked about above. I put a 30A in-line fuse on the feed to the CTEK B2B charger as recommended by Travelvolts, I also replaced the nag time battery terminal with one that fits better.

Ran a main feed cable, 10mm2 with a 50A breaker, as well as a pos and neg cable for the compressor fridge through the B pillar, I used nylon sleeving a fabric loom tape to protect the cables through the run;

9B24B585-DF25-4B2C-9C1E-D3CA8C3F269C.jpeg

Mounted the 12v fuse box temporarily so that I can cut cables to length, earthed the fuse box using the factory earth point on the driver side D-pillar. The cables again were sheathed in nylon cable protection and run directly behind the C-pillar as there is a good size gap here, this doesn’t seem to be documented that clearly anywhere as an easy cable route;

204F2521-B010-4615-8AA1-33DF66D9933B.jpeg
 
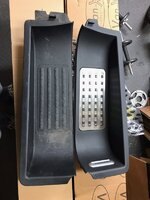
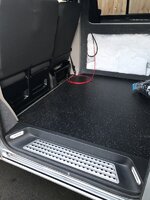
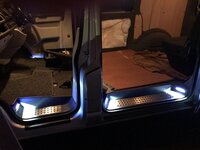
We needed a new side step to incorporate the thicker ply floor and as our front cab steps were tired looking as well we decided to purchase a complete set from Van-X and are really pleased with the quality. We have wired these in to the existing factory roof lights in the back of the van which we intend to relocate, this way the step lights come on when unlocking/opening the doors and fade off when locking the van. Fairly simple install, we tapped in to the existing wire loom, cutting two of the 3 wires that go to the factory lights (not the brown as this is permanent earth) and then ran the cables to the steps;

F4596EB4-83FA-4274-8F2E-9FFF5B90AA75.jpeg

E8C4FC38-0A7A-45EB-BF80-896947CAB577.jpeg

9FF317FB-8A57-442D-BF8C-EBBDE4DCE5ED.jpeg

So happy with the result, steps look really trick and they are great quality. Good introduction for us to the electrical install in our van.
 
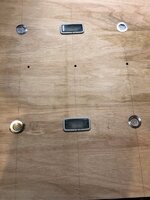
We have had the rest of our electrical components turn up so just splitting this part of the project in to smaller steps so that we can digest it as we go. We cut the holes in our headlining for our down lighters and new spots for our factory lights;

71F3A7D4-485F-43E4-8BB5-D184EF15E601.jpeg

The pain for us is we cannot carpet and fit the headlining as we know that we will need to bond some wooden battens to the roof of the van to support the light shelf and overhead locker from Evo Designs however we don’t know where these will need to go, I will make sure to add that info to this thread to help people in the future!
 
Carpeted and fit two of our DIY ply panels today, getting the panel clips in with the added thickness of the carpet is proving to be difficult! These are the only two panels we are sure won’t need any of the electrical components installed on them so shouldn’t need to come back down again

16117B18-880E-4767-8372-8F6E4BBD7783.jpeg

548607F3-723A-4B25-B10C-243E48C9B438.jpeg
 
Back
Top