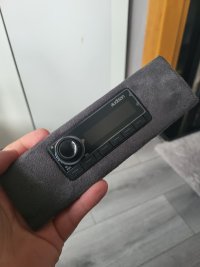
My attempt at a high end audio install

Sabaxter

T6
T6 Pro
So I've always loved my audio and most of my cars have had some form or audio upgrades
Some good and some not so good

So the t6 love the van but damn vw could put some effort in couldn't they

The van has now 90% been deafened, insulated and had acoustic tiles applied in various locations

I decided with this build I wS going high end but as cheap as possible this waiting for bargains online

So far here's what I have to go in:

Audison ap1d moni amp (used)
Audison voce 12" subwoofer (ex display)

Audison ap8.9 forza (used)
Audison voce 6.5 component speakers (used)
Audison voce 6.5 coaxial (ex display)

Audison connexions 4awg wiring kit (new £130!!!! For cable!)
Audison DRC controller (new)

So I think overall I reckon I'm in about 1700 quid which is almost half the rrp!

I've also spoken to the audison distributor via a supplier and he's gonna get some audison emblems made up for me to apply to the door pillar tweeter covers, fingers crossed he comes through

Now I've not done an install for years never-ending with such good gear

Need to buy:
Speaker pods for the rear sk feel free to add links and your own solutions

Also 12 inch woofer box, hopefully one that sits near the panels like the 20inch ones, I may have to do a custom but don't really trust myself to make a good sub box

Head unit will remain standard for now foes anyone know if the factory units have an rca out?

Anyone else running the audison amps?

Any hints tips?
 
You don't need RCA out iirc on the bit amps you can go hi in and let the bit amp do the rest. What headunit you running.

I've just finished making our 3D printed ones suitable for T6 if you're interested
 
  • Like
Reactions: mmi
You don't need RCA out iirc on the bit amps you can go hi in and let the bit amp do the rest. What headunit you running.

I've just finished making our 3D printed ones suitable for T6 if you're interested
Get some pictures up pal!
 
No need for a cheap rca preout the amps will take direct speaker level straight from the headunit, less chance of noise pickup
 
Following on from my last comment. Have any of you got the ability via friends/family to see how close the rear of the mercedes Viano is to the transporter?

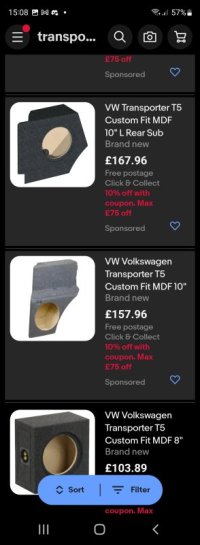
Basically I want a 12 inch sub I the van near the wheel arch I'm aware ebay stock these enclosures for 10 inch woofers
Screenshot_20220725-150809_eBay.jpg
However they are only 15l volume and only accommodate a 10inch woofer

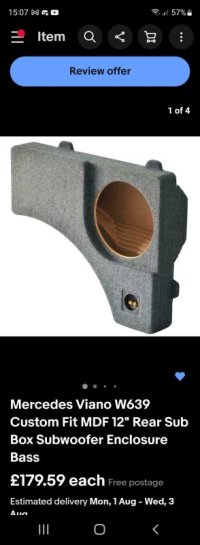
However there is this option which is for the mercedes Vito which is 20l volume and for a 12 inch woofer basically the exact space as recommended by the manufacturer.
Screenshot_20220725-150704_eBay.jpg

I'm now wondering how similar the actual metalwork is between the two
 
Last edited:
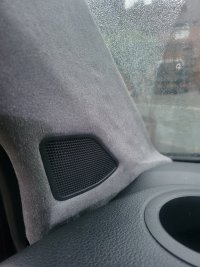
So this evening I thought I would tackle one of the a pillars to see what I could achieve.
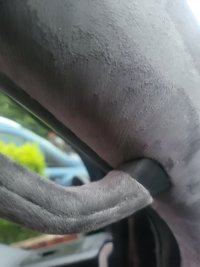
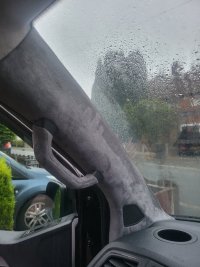
Pillar was wrapped in faux suede from vandalised, speaker grill was dusted over in a matt black.
I removed the grab handle and the a pillar itself.....Nice and simple
Then i removed the old tweeter, snipped off with a razor blade on the 3 mounting points.
Next was to grind the plastic welds off the retainer and voila grill and retainer out.

Ran to the shed and dusted the grill with matt black paint

Sprayed some fabric with high temp adhesive and the same again on the a pillar panel, slapped the material on, ran my hand over, yeah it was that simple. Trimmed all access material to +10mm dusted with glue and tacked it down, slapped the grill in and used an industrial aerosol activated glue to reset the grill and retainer In place

Got hold of my audison voce tweeter and turd it didn't fit, looked at it and the bottom. Of the grill had a plastic trim so that got pinged off, very scary doing this to expensive speakers

Finally it fit the original version mount plate, applied a ring of my special glue and placed the tweeter. Left to set and reinstalled

Very happy with the outcome however covering the grab handle is a b**ch so the seam isn't 100% which annoys me a little however I'll let the pics do the talking

May redo the grab handle in the future, standard minus grab handle20220725_204854.jpg

My attempt

20220725_205003.jpg
20220725_204847.jpg20220725_204840.jpg
 
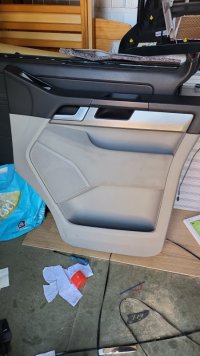
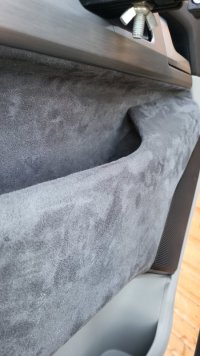
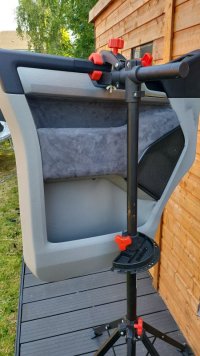
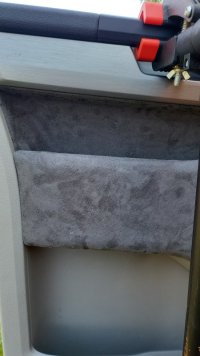
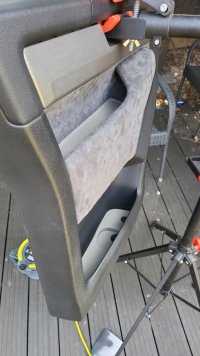
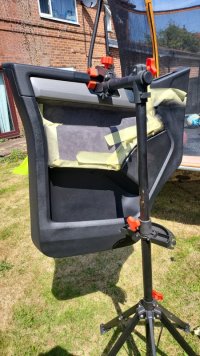
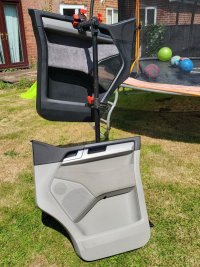
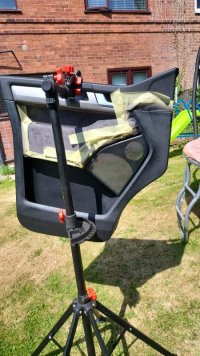
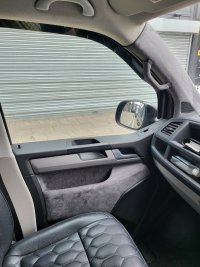
Also im still only half way through the door card retries, managed to bag some california door cards in the bay just down the road from me.

Same sort of process, im a diyer so likely done in the wrong order to the pros but they will male a massive difference to the interior:
Standard cali door card with brushed steel trim IMG-20220718-WA0004.jpeg
IMG-20220718-WA0010.jpegIMG-20220718-WA0006.jpeg
IMG-20220718-WA0008.jpeg
IMG-20220718-WA0017.jpegIMG-20220718-WA0012.jpegIMG-20220718-WA0016.jpg

IMG-20220718-WA0014.jpeg
 
Okay so a small amount of progress
Both a pillars now fitted and using the audison voce speakers

I've tapped into the standard loom for the time being however I've ran the cables to the doors so when the time comes to fir the amp, its a case of doorcard off and wire in the feed then they will be running fully amped

Behind each pillar has had sound deadening and acoustic foam as my aim Is to create a really quiet environment for when the music is off yet allow me to enjoy music

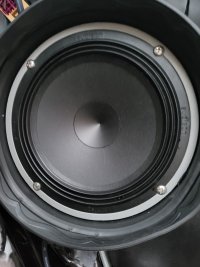
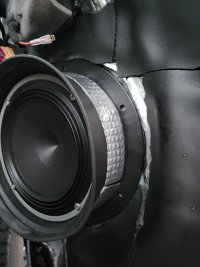
Here's a pic of the voce 20220801_204550.jpg

And here it is in situ, please note ebay speaker adaptors do not fit correctly unfortunately I was left to drill and use short self tappers,
Deadening was applied to the rings to prevent rattle, I then used the silicone covers as they are in a moist environment so hopefully this will offer protection as well as eliminating vibration 20220801_204552.jpg

And the passenger doorcard is finally on, still not done drivers side due to kids being off so my only free day is otherwise engaged.

20220801_164405.jpg


So all in all the cab is coming along, the audison controller is going to be mounted on the roof console so it's away from sticky fingers

Cable for the controller has been ran up the a pillar and across the roofline as I'm hoping I'll be able to partially strip the cab.

Running cable to the doors and tweeters so far has been really easy, I've used gold plated spade connectors incase I ever remove the speakers etc.

Unfortunately the postie has lost my rear speaker pods so I need to wait now.

Off to the lakes at the weekend so the project is on hold however er the components alone make a huge difference!
 
Finally got a tad more done on the vans audio system. As usual I'm superslow and a little bit ocd!

So since being at the lakes we've not really moved sp firstly I threw a bucket over her today and she looks ace again.

Purchased a bargain off Facebook in the form of a set of t6 drl lights brand new in the box for £55 posted! Hopefully they will arrive soon.

Awaiting my 3d printed rear speaker pods. Ordered a while ago but the postie lost them. Gentleman has knocked me another set up now I'm home and is due to post them out so should be able to have a tinker next weekend.

Tonight decided I need to run power for the audison amps. My usual self wanted to follow factory channels for routing, so out with the seats and cab floor. Several hours later its hoovered, degreased, 60% sound deadened and power, aux, remote, fl and fr speaker cables and drc controller cables all ran to under rhe drivers seat.

Now then Do i add a layer of 8mm insulation over the deadening or will this cause the cab mat to not lay right?

Also I've seen a cab carpet available nearby with velle steps he's after £350 which seems a bit steep. People who have the carpet does it make a big difference to the road noise??

I promise I'll get a few pics tomorrow
 
  • Like
Reactions: CAB
Another piece of the puzzle arrived
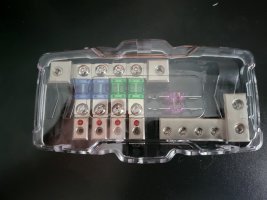
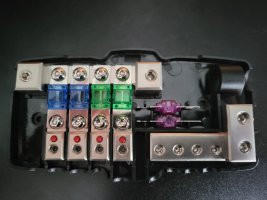
The fused distribution block

The setup has both ground and power connections integrated with 2 inputs for upto 0awg for each polarity and 4 outputs on each in I believe 4awg
Furthermore the fuses come supplied with spares as well!
Even better there's led indicators on the 4 power terminals so if a fault was to occur the led will illuminate thus making trouble shooting easier

This will allow me to power both amps as well as having spare supplies and ground ports so also a bit of futureproofing.

May grab another for when I decide to do a solar and split charge system etc.
Here's a pic of the beast
20220822_182737.jpg20220822_182745.jpg
 
Back
Top