My son has severe cerabral palsy and as the van is primarily for his use. I wanted to make travelling a sensory experience for him. I remember seeing a rolls Royce on Top Gear that used fibre optics and decided that's what I wanted for him.
After watching various YouTube videos I decided to give it a go.
There are complete kits out there but buying the individual components suited my plans better
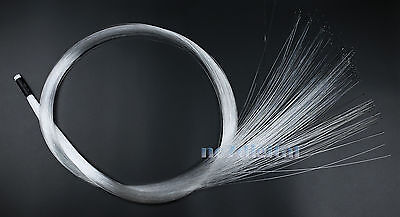
Firstly the fibre optic cable. Lots of different choices here...mostly thickness, quantity and length. As my rear roof lining is it 2 pieces I bought 1 optic loom 4m long (front panel) and the other 3m. I opted for all strands .75mm and 280 strands for both looms.
I got mine here...
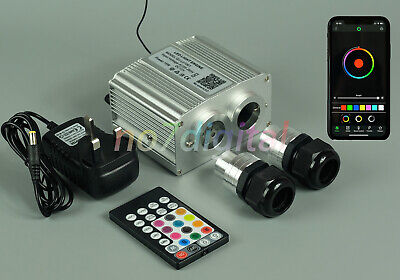
Next is the light source, again loads to choose from. Most impressive light source have a "twinkle" effect. This means at times some optics are off completely. This is actually simply controlled by a rotating disk with holes in that sits in front of the leds. I opted for a twin output one.
This is the smallest one I found and fits nicely inside the rear quarter panel. This was then wired into a small fuse box I installed and covered with a USB port by the rear bench area.
Then comes to time consuming part. Once the roof lining was removed I marked out where I wanted each of the 280 (per panel) optics. Next using a 1mm drill bit I drilled through each mark, feed 1 strand through and hot glue gunned it in place. Do not use superglue, as I first did, as it makes the optic brittle and easily snaps off.
Get comfortable cos this takes around 3 hours each panel
Once all the individual strands are through and glued, it's simply a case of carefully fitting the lining back and feeding the loom along the side of the roof and down the rear pillar to the light source. Finally trim and excess with nail clippers or fine side cutters.


After watching various YouTube videos I decided to give it a go.
There are complete kits out there but buying the individual components suited my plans better
Firstly the fibre optic cable. Lots of different choices here...mostly thickness, quantity and length. As my rear roof lining is it 2 pieces I bought 1 optic loom 4m long (front panel) and the other 3m. I opted for all strands .75mm and 280 strands for both looms.
I got mine here...
Top PMMA optical fiber cable clear end-glow fiber optics for stars light deco | eBay
Find many great new & used options and get the best deals for Top PMMA optical fiber cable clear end-glow fiber optics for stars light deco at the best online prices at eBay! Free delivery for many products.
www.ebay.co.uk
Next is the light source, again loads to choose from. Most impressive light source have a "twinkle" effect. This means at times some optics are off completely. This is actually simply controlled by a rotating disk with holes in that sits in front of the leds. I opted for a twin output one.
For twinkle star ceiling fiber optic light led light engine APP+remote light box | eBay
Find many great new & used options and get the best deals for For twinkle star ceiling fiber optic light led light engine APP+remote light box at the best online prices at eBay! Free delivery for many products.
www.ebay.co.uk
This is the smallest one I found and fits nicely inside the rear quarter panel. This was then wired into a small fuse box I installed and covered with a USB port by the rear bench area.
Then comes to time consuming part. Once the roof lining was removed I marked out where I wanted each of the 280 (per panel) optics. Next using a 1mm drill bit I drilled through each mark, feed 1 strand through and hot glue gunned it in place. Do not use superglue, as I first did, as it makes the optic brittle and easily snaps off.
Get comfortable cos this takes around 3 hours each panel
Once all the individual strands are through and glued, it's simply a case of carefully fitting the lining back and feeding the loom along the side of the roof and down the rear pillar to the light source. Finally trim and excess with nail clippers or fine side cutters.
")

