So today I fitted a bravo snorkel to a 2017 4motion bi turbo.
As there is nack all info anywhere as to how to do it I thought I would share some handy tip.
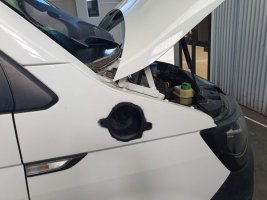
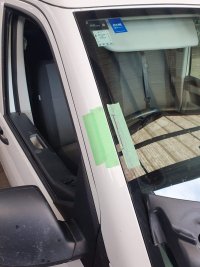
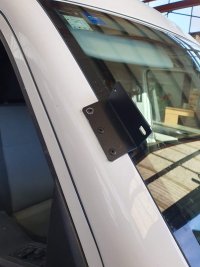
Fitting the actual snorkel is quite easy, put template on wing, get the hole saw and go for it. I just marked up where the support bracket was to go on the windscreen pillar then just drilled centre hole and riveted so I could check it was all good then drilled 2nd 2 holes, I put a bit of bonding glue underneath it before final 2 rivets.
So now it jets a bit more interesting.
You need to take off the wipers, take the 3 bolts out of the wiper mechanism and move that out of the way.
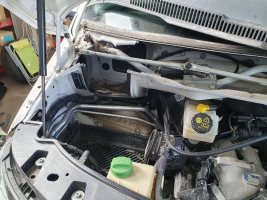
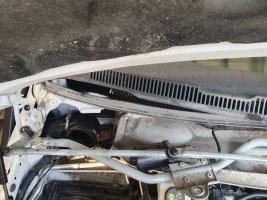
The template for the inner moulding is pretty ok but I found bolt holes didn’t quite match up so I just had to elongate a coupe, I put a bit of silicone on the joint then bolted it to together.
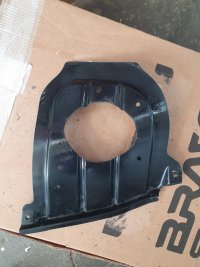
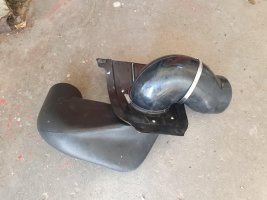
To get this in you need to take the airbox out, including the bottom part, to get this out you just undo the bolt you can see at the bottom, then pull box towards you, its on like a rubber prong so just give it a good pull and a wiggle, there is also one by the wing, once the back one is out it just slides off the side one, you also have to wiggle the air intake pipe off the bottom.
Once you have this out take the original air intake pipe off, its just fastened on with a panel clip type fastener, pop this out then you can pull the air intake up.
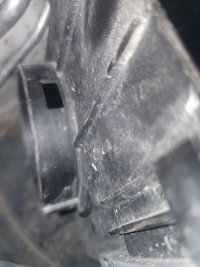
Now you need to do a bit ‘creating’ you will see that there are a couple of square holes that locate the original air intake pipe and you sort of need to fill these otherwise its gona leak, so what I did was cut the ring off the original intake pipe, sanded the flange a little bit then pushed that back in so now it’s a nice sealed flange.
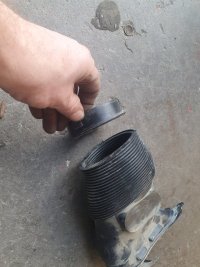
I will just skip a little bit now and tell you of the one big problem I hit before you get too far.
You might not have this problem if you don’t have the biturbo as the airbox might be lower?
I had everything back together all I had to do was put the lid back on the airbox, but the top back RH corner was touching the plastic snorkel moulding, and try as I might I couldn’t get the airbox to locate and lock down – many expletives were uttered and head scratching, but to cut a long story short I had to dismantle it all…..
So here is what I did.
The rubber mount where the lower airbox bolts down you cut about 5mm off that to sort of tilt the airbox fwd,
I also pulled the rubber mount off the wing end of box, again so I could pull bottom box slightly forward and this time it located ok, it did go together quite easily then, so I wondered after if I needed to cut the bush down at the front? I do have a slightly wobbly airbox now and it doesn’t have the wing support in. have a bit of a test fit here before you start connecting it all up.
the other thing is you have to rotate the air sensor a bit as the new pipe is in the way, when I clipped the connector back on the wire was pretty tight so whilst you can access it, maybe just take the wire out of the bulkhead clip so you can pull connector fwd 5-10mm.
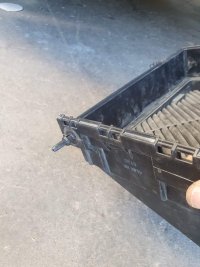
So going back to the fitting.
On the rubber 90deg connector that goes between wing and bulkhead, I trimmed out a bit on the bulkhead end so it would push further onto the seal.
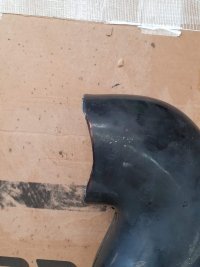
put your clamps on to the 2 ends of this pipe, and push it in place then fasten the bulkhead plate back on. Now its just a bit of fiddling getting the 2 jubilee clips on either end and tighten up.
Next I put the bottom air box back in place, (don’t bolt it down yet) filter in and the top on – again more wiggling…
Now I could push it back and bolt the front down,
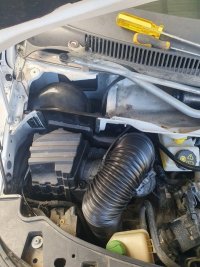
Next fasten the new pipe onto bottom of air box and bring it up to meet the other end, here you will see that the air flow meter is in the was so you can just rotate this through 90deg so connector clips in, I could have done with another 5mm of slack on wire but I wasn’t gong to dismantle it all again – hence why I said to get a bit of slack whilst you can easily access the bulk head clip
Fitting the actual snorkel is quite easy, put template on wing, get the hole saw and go for it. I just marked up where the support bracket was to go on the windscreen pillar then just drilled centre hole and riveted so I could check it was all good then drilled 2nd 2 holes, I put a bit of bonding glue underneath it before final 2 rivets.
If for some reason you planned on changing your headlights, having the drivers headlight out would make it all a lot easier.
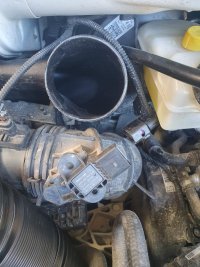
As there is nack all info anywhere as to how to do it I thought I would share some handy tip.
Fitting the actual snorkel is quite easy, put template on wing, get the hole saw and go for it. I just marked up where the support bracket was to go on the windscreen pillar then just drilled centre hole and riveted so I could check it was all good then drilled 2nd 2 holes, I put a bit of bonding glue underneath it before final 2 rivets.


So now it jets a bit more interesting.
You need to take off the wipers, take the 3 bolts out of the wiper mechanism and move that out of the way.


The template for the inner moulding is pretty ok but I found bolt holes didn’t quite match up so I just had to elongate a coupe, I put a bit of silicone on the joint then bolted it to together.


To get this in you need to take the airbox out, including the bottom part, to get this out you just undo the bolt you can see at the bottom, then pull box towards you, its on like a rubber prong so just give it a good pull and a wiggle, there is also one by the wing, once the back one is out it just slides off the side one, you also have to wiggle the air intake pipe off the bottom.
Once you have this out take the original air intake pipe off, its just fastened on with a panel clip type fastener, pop this out then you can pull the air intake up.
Now you need to do a bit ‘creating’ you will see that there are a couple of square holes that locate the original air intake pipe and you sort of need to fill these otherwise its gona leak, so what I did was cut the ring off the original intake pipe, sanded the flange a little bit then pushed that back in so now it’s a nice sealed flange.


I will just skip a little bit now and tell you of the one big problem I hit before you get too far.
You might not have this problem if you don’t have the biturbo as the airbox might be lower?
I had everything back together all I had to do was put the lid back on the airbox, but the top back RH corner was touching the plastic snorkel moulding, and try as I might I couldn’t get the airbox to locate and lock down – many expletives were uttered and head scratching, but to cut a long story short I had to dismantle it all…..
So here is what I did.
The rubber mount where the lower airbox bolts down you cut about 5mm off that to sort of tilt the airbox fwd,
I also pulled the rubber mount off the wing end of box, again so I could pull bottom box slightly forward and this time it located ok, it did go together quite easily then, so I wondered after if I needed to cut the bush down at the front? I do have a slightly wobbly airbox now and it doesn’t have the wing support in. have a bit of a test fit here before you start connecting it all up.
the other thing is you have to rotate the air sensor a bit as the new pipe is in the way, when I clipped the connector back on the wire was pretty tight so whilst you can access it, maybe just take the wire out of the bulkhead clip so you can pull connector fwd 5-10mm.

So going back to the fitting.
On the rubber 90deg connector that goes between wing and bulkhead, I trimmed out a bit on the bulkhead end so it would push further onto the seal.

put your clamps on to the 2 ends of this pipe, and push it in place then fasten the bulkhead plate back on. Now its just a bit of fiddling getting the 2 jubilee clips on either end and tighten up.
Next I put the bottom air box back in place, (don’t bolt it down yet) filter in and the top on – again more wiggling…
Now I could push it back and bolt the front down,
Next fasten the new pipe onto bottom of air box and bring it up to meet the other end, here you will see that the air flow meter is in the was so you can just rotate this through 90deg so connector clips in, I could have done with another 5mm of slack on wire but I wasn’t gong to dismantle it all again – hence why I said to get a bit of slack whilst you can easily access the bulk head clip
Fitting the actual snorkel is quite easy, put template on wing, get the hole saw and go for it. I just marked up where the support bracket was to go on the windscreen pillar then just drilled centre hole and riveted so I could check it was all good then drilled 2nd 2 holes, I put a bit of bonding glue underneath it before final 2 rivets.
If for some reason you planned on changing your headlights, having the drivers headlight out would make it all a lot easier.


