Deaky’s Kombi to Camper journey

Either is fine used in the correct way
RCD = earth fault device (no overcurrent)
MCB = overcurrent device (no earth fault)
RCBO = earth fault and overcurrent device (but most are only single pole)

The standard is usually an RCD as a main switch (so the board can be isolated) with a couple MCBs for the circuits
If you want to use RCBOs you will need to get a main switch and ideally double pole RCBOs
 
They are double pole RCBO’s
 
Hi @Dazwoods. The footwell lights and the glovebox light both connect to the courtesy light circuit. Look at the connector blocks pictured below

View attachment 94833

in one of the blocks, I think it’s the beige coloured one you can see, look for 3 wires, red/black (timed +ve), brown/red (switched -ve) and brown (permanent -ve). There are the courtesy light circuit

Connect the footwell light to red/black and brown/red they’ll come on when you open the door

connect the glovebox light to red/black and brown. There should be a switch on the side of the glovebox that turns the light on when you open it.
Hi @Deaky, the photo you have uploaded here showing the coloured plugs behind the passenger side of the dash. Do you happen to know where they run to? I have lost the illumination to my window switches, and I know the grey/blue wire in there has no power, but is physically linked to the switches.

Many thanks!
It runs back to a common connection point in the main wiring harness then onto the instrument light regulator if you have one or back to the BCM if you don’t.

You should be able to get that info from the convenience systems wiring diagrams in the downloads section but you’ll need VIP membership

is it just the window switches not illuminating or all the dash switches?
 
Either is fine used in the correct way
RCD = earth fault device (no overcurrent)
MCB = overcurrent device (no earth fault)
RCBO = earth fault and overcurrent device (but most are only single pole)

The standard is usually an RCD as a main switch (so the board can be isolated) with a couple MCBs for the circuits
If you want to use RCBOs you will need to get a main switch and ideally double pole RCBOs
Thanks both!

Final question… if I go for the RCBO route, can I use an RCD as the ‘switch’? Just so it’s all contained nicely in one enclosure is the goal.
 
You dont need more than one earth fault device, you would use one or the other, having both seems a waste of money
RCD main switch with a couple MCBs or a normal main switch with a couple double pole RCBOs, either way its exactly the same size and takes up the same amount of space
 
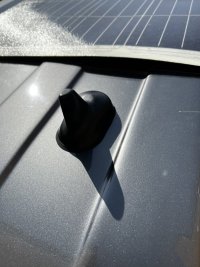
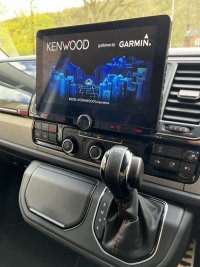
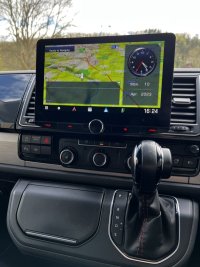
Spent the weekend fitting a new head unit and camera as DAB inception is appalling on my van I too the opportunity to fit a shark fin antenna.

B249D2E9-2225-4DFD-8F34-FF1DD5131D6C.jpeg
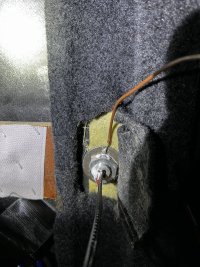
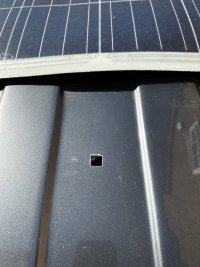
its scary making holes in your roof (no leaky HiLo jokes @Peatey). The retaining washer that came with the antenna had 4 sharp hooks for making contact with a metal roof, I didn’t fancy it wearing its way through the fibreglass so I used a nit and washer and grounded the washer

F5C52135-0BD0-4308-BEEE-934420FBAE11.jpeg
bit of sika to seal the hole and the shark fin was on.

D16FCA4F-8F8C-47F5-B2A4-C0950C5906DF.jpeg

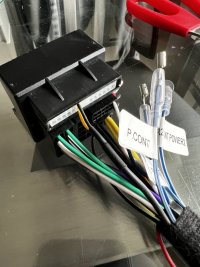
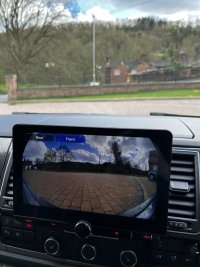
The kit supplied by @Absolut5 came with everything I needed, the VW/Kenwood loom plugs straight into the quadloc and the canbus module retains the parking sensors and OEM reverse camera

CBD1721C-9D94-4420-BF64-6007FC79E763.jpeg

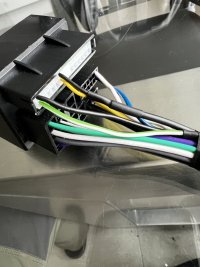
I added a couple more pins to retain the OEM microphone too

BDB0BB63-D892-44B4-B743-38BC816C16B5.jpeg

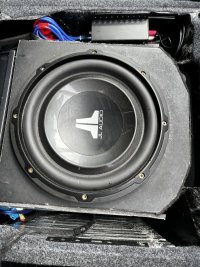
Next I removed the clean sweep hi level to low level converter that took the speaker outputs from my old head unit and converted them to low level for the DSP. New head unit has RCA outputs so it’s no longer required. Not a lot of space under the drivers seat.

8E3AFF36-DF6A-4430-83C4-91E979920B16.jpeg

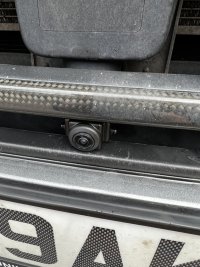
Next was the HD forward facing camera, it fits nicely under the radar box

CD735D9F-6EB9-44E8-A83D-EE544A283079.jpeg

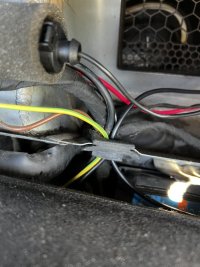
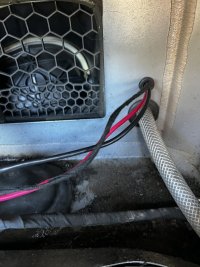
the cable routed up to the plenum chamber and through the big rubber grommet. Not much space left through here now.

0BE0A24B-4DBF-48A5-9D63-37649D5DBB5B.jpeg

Then through an extra hole I’d previously drilled.
DC8ED483-80F2-454D-A771-BA807E8F63E3.jpeg

Last thing left was to put the unit in and connect everything up.

0C3369A9-8B0B-43C2-99E8-D115B919B815.jpeg

27B60109-BBFA-45E4-A92F-CAB70E742ACD.jpeg

009B6FBA-6651-4DD7-98E4-84AB6D926B61.jpeg

pleased with it so far, front camera engages automatically when you go from reverse to forwards. Just need to sort the USB retention in the dash then fit a camera in each mirror. I might swap out my OEM reverse camera for another Kenwood HD. Thanks to @Absolut5 for supplying everything I needed and answering my list of questions before hand.
 
Spent the weekend fitting a new head unit and camera as DAB inception is appalling on my van I too the opportunity to fit a shark fin antenna.

View attachment 195371
its scary making holes in your roof (no leaky HiLo jokes @Peatey). The retaining washer that came with the antenna had 4 sharp hooks for making contact with a metal roof, I didn’t fancy it wearing its way through the fibreglass so I used a nit and washer and grounded the washer

View attachment 195372
bit of sika to seal the hole and the shark fin was on.

View attachment 195373

The kit supplied by @Absolut5 came with everything I needed, the VW/Kenwood loom plugs straight into the quadloc and the canbus module retains the parking sensors and OEM reverse camera

View attachment 195374

I added a couple more pins to retain the OEM microphone too

View attachment 195375

Next I removed the clean sweep hi level to low level converter that took the speaker outputs from my old head unit and converted them to low level for the DSP. New head unit has RCA outputs so it’s no longer required. Not a lot of space under the drivers seat.

View attachment 195376

Next was the HD forward facing camera, it fits nicely under the radar box

View attachment 195377

the cable routed up to the plenum chamber and through the big rubber grommet. Not much space left through here now.

View attachment 195379

Then through an extra hole I’d previously drilled.
View attachment 195378

Last thing left was to put the unit in and connect everything up.

View attachment 195380

View attachment 195381

View attachment 195382

pleased with it so far, front camera engages automatically when you go from reverse to forwards. Just need to sort the USB retention in the dash then fit a camera in each mirror. I might swap out my OEM reverse camera for another Kenwood HD. Thanks to @Absolut5 for supplying everything I needed and answering my list of questions before hand.
many thanks for using us mate, really appreciate it.

Hows the mic working ?
 
Spent the weekend fitting a new head unit and camera as DAB inception is appalling on my van I too the opportunity to fit a shark fin antenna.

d16fca4f-8f8c-47f5-b2a4-c0950c5906df-jpeg.195373
What’s the reception like now, @Deaky ?
I ask as I was considering a windscreen aerial..
 
many thanks for using us mate, really appreciate it.

Hows the mic working ?
Just a follow up, mic works perfectly. Made a couple of calls with no problems. Next project is full USB hub retention :p , gonna PM you about some more cameras :thumbsup:
 
I’m back after a few days away visiting Oli at @BognorMotors

After a few advisories on my MOT I decided it was time to give a little TLC to the old gel :cry:

so after a few conversations and guidance from Oli it was off to Bognor Regis staying a couple of nights in Chichester while @BognorMotors worked their magic.

The van went in for

Revo Stage 1 remap
TVS gearbox software update
Revo callipers and disks on the front
New front rear suspension bushes
Painted callipers and drilled disks on the rear
New wheels and tyres all round
Hunter alignment

Due to the turbo on my van making a few weird noises with the stage 1 map on, Oli advised that I shouldn’t proceed with the map and monitor the turbo. Great advice, I’m sure plenty of other places would have whacked it on and taken my money. Everything else went as sweet as a nut, a few WhatsApp photos of the height with adjustments until I was happy and the job was done. I’m over the moon with it, I’ll be back to Bognor soon to get the turbo sorted and the remap done. It will also give me chance to try out a local Thai that Oli recommend. I even found a bar selling Orval and Rodenbach Belgian beer :inlove:

View attachment 134459View attachment 134460View attachment 134461View attachment 134462View attachment 134463View attachment 134464View attachment 134465View attachment 134466View attachment 134467View attachment 134468
Hi @Deaky, do you know the offset of the wheels by any chance? It’s a lovely stance on the wheels.
 
Hi @Deaky, do you know the offset of the wheels by any chance? It’s a lovely stance on the wheels.
Hi mate, I don't know. I seem to remember 42 but don't quote me on it. Fronts are 9J now with 245/45/R20 and Rears are 10.5J 265/40/R20. 5mm spacers all round cause the rears and front's were just catching and I had an arsey MOT tester.
 
Hi mate, I don't know. I seem to remember 42 but don't quote me on it. Fronts are 9J now with 245/45/R20 and Rears are 10.5J 265/40/R20. 5mm spacers all round cause the rears and front's were just catching and I had an arsey MOT tester.
Haha those pesky MOT testers. They look awesome though. Cheers.
 
Spent the weekend fitting a new head unit and camera as DAB inception is appalling on my van I too the opportunity to fit a shark fin antenna.

View attachment 195371
its scary making holes in your roof (no leaky HiLo jokes @Peatey). The retaining washer that came with the antenna had 4 sharp hooks for making contact with a metal roof, I didn’t fancy it wearing its way through the fibreglass so I used a nit and washer and grounded the washer

View attachment 195372
bit of sika to seal the hole and the shark fin was on.

View attachment 195373
My Hi-Lo Roof installers were too scared to fit this aerial when doing my roof, so i have that fun to do myself, great to see you've already done it, i'll grab my drill
 
Back
Top