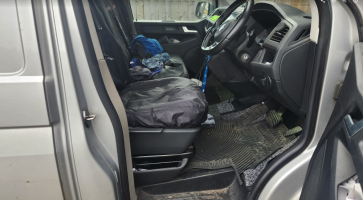
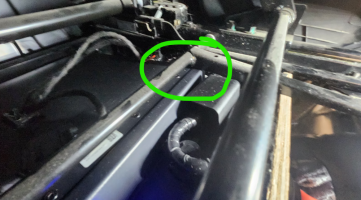
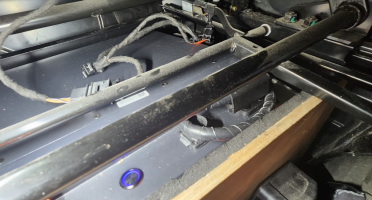
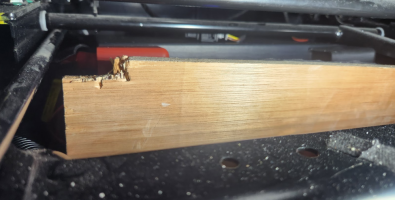
@roadtripper thanks for the heads up.Somewhere around 1/3 charge is the ideal zone for long term storage of Lithium chemistry
I'm really liking the look of the 105ah - especially the pictures of installs showing you can tuck it and a DC-DC charger in the space of a normal AGM 100ah under a seat.
You are using an out of date browser. It may not display this or other websites correctly.
You should upgrade or use an alternative browser.
You should upgrade or use an alternative browser.
Fogstar Drift 12v 230Ah Seatbase battery -- "How I Done It" --
- Thread starter Dellmassive
- Start date
Forgive me what do you mean by toggle?Yes.
Sames as the Roamer.
Just toggle the charging button on the app.
Works like a toggle switch, just tap it to change it's state. You'll see the little disk virtual switch flip to the other side and "ON" will turn to "OFF"Forgive me what do you mean by toggle?
I had a look at my OEM swivel they dont seem any lower than normal seats when on 'drive' position. But I do see that fogstar does protrude a bit higher than the seat base.Top info as always!
You say it fits snuggly under a swivel seat but the review on the website says it doesn’t fit under vw swivel seat. Have you got an oem swivel? If so does it fit?
@Dellmassive do you have any pics with the seat refitted to show how much space there is?
Also what is the Roamer like in comparison to the Fogstar regarding the amount that is higher than the seat base.
If you had neither of these, and were just looking for one, which would you choose?
ALso I think one of these fuses would help with the bolt length on the positve terminal:
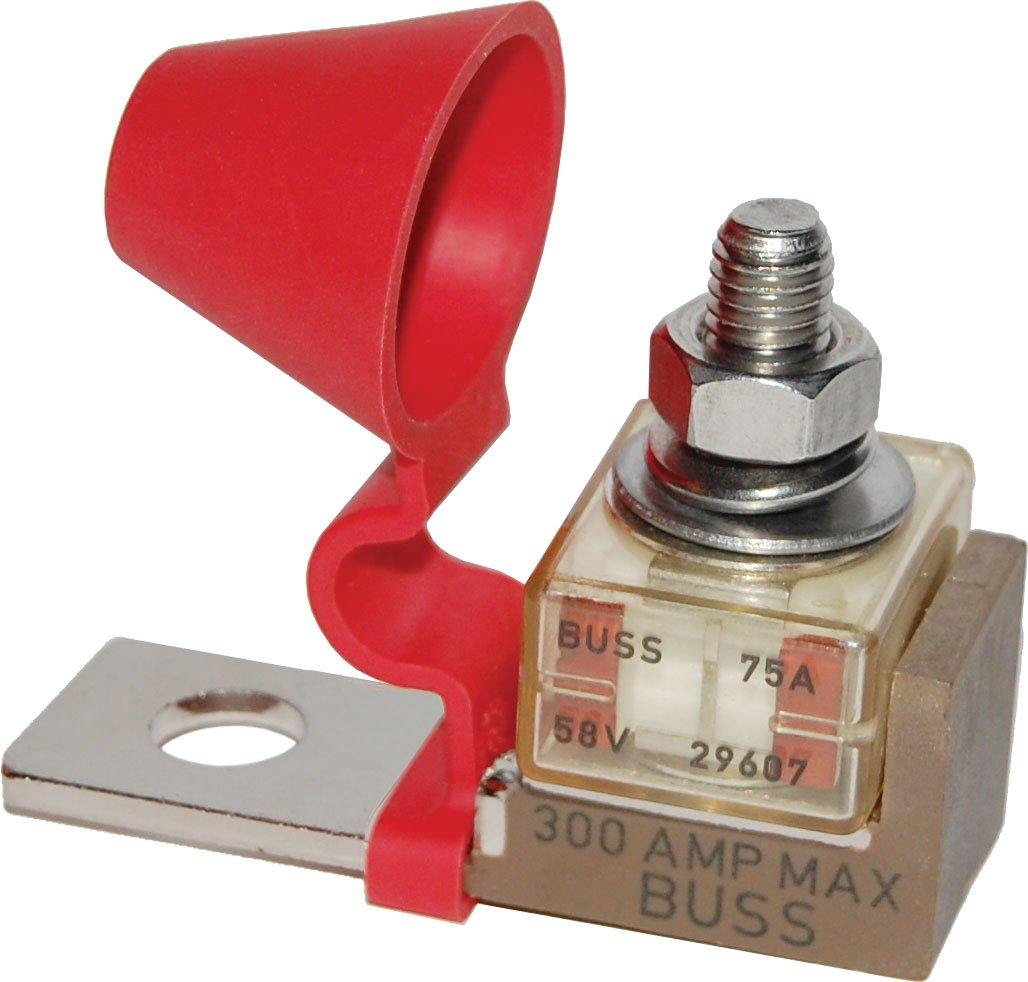
Blue Sea 5191 BS5191 Fuse Block TERMINAL 30-300A
MRBF Terminal Fuse Block - 30 to 300A BS5191 Blue Sea 5191 Compact, high-amp fuse—appropriate for DC Main, inverter, windlass, and bow thruster circuit protection Provides high current protection in tight space constraints Ignition protected when used with Blue Sea Systems' MRBF Terminal Fuse...
Last edited:
One of the posts above shows the two batteries side by side to show the size differences:Also what is the Roamer like in comparison to the Fogstar regarding the amount that is higher than the seat base.

FOGSTAR Drift 12v 230Ah Seatbase battery -- "How I Done It" --
FOGSTAR Drift 12v 230Ah Seatbase battery -- "How I Done It" -- check out the latest @Dellmassive Lifepo4 battery install & test ++++ https://www.fogstar.co.uk/collections/lithium-leisure-battery/products/seat-base-lithium-leisure-battery-fogstar-drift-12v-230ah?variant=41423843196987 ++++...
toggle - switch the feature on/offForgive me what do you mean by toggle?
"switch from one effect, feature, or state to another by using a toggle.
"the play/pause button toggles between those functions""
the Fogstar is fitted in the Silver work van - that does not have swivels.Top info as always!
You say it fits snuggly under a swivel seat but the review on the website says it doesn’t fit under vw swivel seat. Have you got an oem swivel? If so does it fit?
i have RIB swivels in the bus, but haven't fitted a battery yet....
KIRAVANS sells a spacer bar that raises the seat swivel plate up a bit to clear the hand break . . . id imagine that would work if there was an issue clearing the battery.
I had a look at my OEM swivel they dont seem any lower than normal seats when on 'drive' position. But I do see that fogstar does protrude a bit higher than the seat base.
@Dellmassive do you have any pics with the seat refitted to show how much space there is?
Also what is the Roamer like in comparison to the Fogstar regarding the amount that is higher than the seat base.
If you had neither of these, and were just looking for one, which would you choose?
ALso I think one of these fuses would help with the bolt length on the positve terminal:

Blue Sea 5191 BS5191 Fuse Block TERMINAL 30-300A
MRBF Terminal Fuse Block - 30 to 300A BS5191 Blue Sea 5191 Compact, high-amp fuse—appropriate for DC Main, inverter, windlass, and bow thruster circuit protection Provides high current protection in tight space constraints Ignition protected when used with Blue Sea Systems' MRBF Terminal Fuse...vanjunkies.co.uk
FWIW, i have the carpet in the front.
I've seen people cut out the carpet, and remove the chassis ground stud under the seat to allow the battery to sit lower.
the plan is to possible fit the ROAMER in the bus. ( if i dont go for a Clayton, which i prob wont as its cost prohibitive atm)

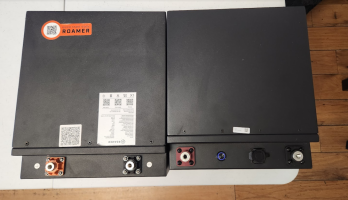

Thansk. So, I take it, out of the 2, you prefer the Roamer as thats the one you will fit in the "bus" which I am assuming is the camper rather than work van.FWIW, i have the carpet in the front.
I've seen people cut out the carpet, and remove the chassis ground stud under the seat to allow the battery to sit lower.
the plan is to possible fit the ROAMER in the bus. ( if i dont go for a Clayton, which i prob wont as its cost prohibitive atm)
View attachment 222994View attachment 222995View attachment 222996
I also like the Clayton, but its 100Ah only at the moment and agree its cost prohibitive (an not BT), plus due to size I am struggling to think of a position where it will go.
At this point I'm mildly surprised you haven't approached Clayton for a 6 month review sample...if i dont go for a Clayton, which i prob wont as its cost prohibitive atm
yes, that would be nice. . . . if anyone knows they Clayton boys, tell them id happily test one out for them.At this point I'm mildly surprised you haven't approached Clayton for a 6 month review sample...
So is it the earth stud or carpet or something that’s marking the front sit high? Could it be installed level if everything is cleared below? As the roamer is slightly longer I’m guessing the issue is worse for that one and then these seat base batteries essentially don’t fit in a seat base, which is weird!


i think its the earth stud, and also i have 20mm copex tubing that links the seatbases to gethere.
so i have the beefy cable runs under . .
credit to @Deaky for this pic. . . this is his van from his thread.
before:
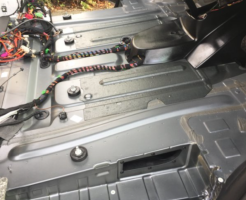
after:

...
the green is the stud that can be cut off. - i think the battery is sitting on that.
the blue is the seatbax box profile,
the red is the seatbase studs and spacers - i think the battery is sitting of the inner edge of the spacer blocks
the yellow is my cable route for the fat POS cable.
+++++
this is my van with the carpet still in.
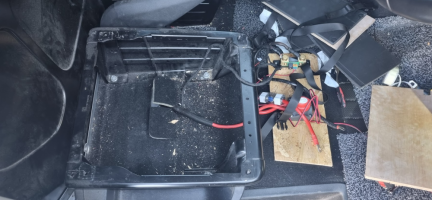
i did have the 100A Renogy before . . .
this was how the first ROAMER fit . .

.
so i have the beefy cable runs under . .
credit to @Deaky for this pic. . . this is his van from his thread.
before:

after:

...
the green is the stud that can be cut off. - i think the battery is sitting on that.
the blue is the seatbax box profile,
the red is the seatbase studs and spacers - i think the battery is sitting of the inner edge of the spacer blocks
the yellow is my cable route for the fat POS cable.
+++++
this is my van with the carpet still in.

i did have the 100A Renogy before . . .

this was how the first ROAMER fit . .


.
When I fitted my Roamer 230SB I did cut down the length of the earth stud slightly and removed the dome nut, leaving the plastic spacer.
The main reason I did that was that I didn’t want the battery sitting on a small point load and wanted the load spread across the whole battery, but I think the Roamer might foul if it wasn’t cut down. I also left the rubber flooring in situ as Roamer specifically say that the battery should be insulated from the van body work.
I reckon that the small extra height of the Fogstar might be problematic with a swivel; was one of the reasons I didn’t go with them.
There isn't much clearance with a factory swivel.
thank you, it's what I thought was meant I asked becuase when I tried I couldn't make my roamer SB gen 2 " charge on" toggle off/on.........like I thought @Dellmassive ( was implying by tapping it..............hence the somewhat silly Q .although there is never a silly QWorks like a toggle switch, just tap it to change it's state. You'll see the little disk virtual switch flip to the other side and "ON" will turn to "OFF"
thanks both

Bud I don't have a T6 my bus is a 2006 T5.so I'm unsure if there is a difference in seat base dimensions.........I also own a gen 2 roamer SB battery..not a fogstar..........you needed to know all that because I investigated a cube fuse.physically bought one. In my case becuase it seemed such a space saver over a mega fuse. I have added height in my set up as I have an RIB seat swivle( extra height to clear handbrake on turning)I had a look at my OEM swivel they dont seem any lower than normal seats when on 'drive' position. But I do see that fogstar does protrude a bit higher than the seat base.
@Dellmassive do you have any pics with the seat refitted to show how much space there is?
Also what is the Roamer like in comparison to the Fogstar regarding the amount that is higher than the seat base.
If you had neither of these, and were just looking for one, which would you choose?
ALso I think one of these fuses would help with the bolt length on the positve terminal:

Blue Sea 5191 BS5191 Fuse Block TERMINAL 30-300A
MRBF Terminal Fuse Block - 30 to 300A BS5191 Blue Sea 5191 Compact, high-amp fuse—appropriate for DC Main, inverter, windlass, and bow thruster circuit protection Provides high current protection in tight space constraints Ignition protected when used with Blue Sea Systems' MRBF Terminal Fuse...vanjunkies.co.uk
On mounting the cube I found the top ( of the +ve terminal uncomfortably close to the RIB ( solid steel). With only a thin rubber cover between that terminal and metal I rethought and went back to roamers cool cover. So basically really measure before buying your cube fuse.
I am not a sparky.......but basically I have just 2 wires on the pos one is very thin the smart shunt's ( BMV 712) pos ( forgive me if I'm wrong sure it's the shunt i'm shattered) the other huge 40mm2 leading to a positive bus via 250A mega fuse and main isolator
Basically what I'm trying to get out even if my specifics on the little wire are wrong is are you not better off running most of the cables to a positive bus bar and then not having to worry on the length of thread available, on your pos batt terminal?
PS One can save space by using a pos bus with mega/ midi fuses like this
 _S2I2480 by Stuart Philpott, on Flickr
if you look in this second image you can just see that fuse box come pos bus( with cover on) top of pic mounted to the side of my drivers SB with the roamer batt. Ha on the other side same SB is my 100 /20 MPPT ( by god it's snug in there)
 _S2I2528 by Stuart Philpott, on Flickr
Slightly left field but it really helped me when putting the above together I made a mm accurate thin ply wooden box exact size of the batttery..............that box really enabled me not only with my mad battery holder but also planning where all the gizmo's would go.......also alot easier to pull in and out than 20KG or so
Buddy soz this is slightly off : different T model, different battery model , but maybe it will help...it's amazing what you can actually get under 2 single seat bases
Ha and final tip whist wafflin'

Ahh well me leccy works even if me toggle don't
+1 on the rubber edging. In fact @Soundz it was from reading your post that I bought some before doing my install.
I purchased mine from
 themetalhouse.co.uk
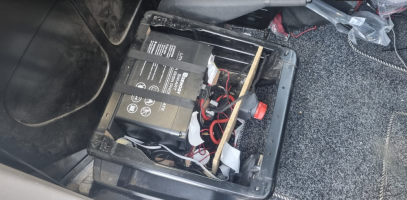
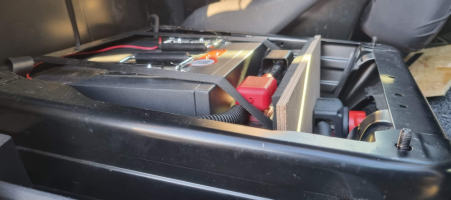
Gen 3 Install. Have changed it slightly since the 1st photo. Main supply cable after the mega fuse now goes to an isolator under the front of the seat before routing to the drivers seat in conduit , rather than going straight out.
Also made a mock up of the battery which really helped, but mine was only made from cereal boxes!!
Added conduit anywhere where I thought any contact might possibly occur.
Battery is right up against the rear of the seat base (against the rubber edging) and held down at the rear by a full width wooden baton with a foam strip on the underside. At the front it’s held nice and snug by another shaped and angled bracket going across the front of the battery to the front of the seat upon which the mega fuse is secured.
Working out how to move and secure all the OEM connectors, relays and fuses is what took the most time.


I purchased mine from
Small Edge Trim for Sharpe Edges - The Metal House
Our small edge trim is ideal for protecting the edges of panels and parts. Easy to fit, highly flexible and available in a range of colours. Cut to length.
 themetalhouse.co.uk
Gen 3 Install. Have changed it slightly since the 1st photo. Main supply cable after the mega fuse now goes to an isolator under the front of the seat before routing to the drivers seat in conduit , rather than going straight out.
Also made a mock up of the battery which really helped, but mine was only made from cereal boxes!!
Added conduit anywhere where I thought any contact might possibly occur.
Battery is right up against the rear of the seat base (against the rubber edging) and held down at the rear by a full width wooden baton with a foam strip on the underside. At the front it’s held nice and snug by another shaped and angled bracket going across the front of the battery to the front of the seat upon which the mega fuse is secured.
Working out how to move and secure all the OEM connectors, relays and fuses is what took the most time.


Similar threads
- Replies
- 8
- Views
- 523
- Replies
- 91
- Views
- 8K

