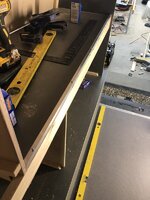
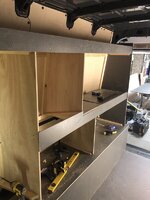
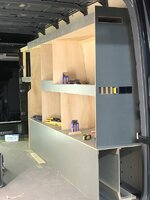
Build Thread: New Crafter for work

Jack T

Senior Member
T6 Guru
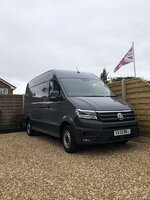
Well today my new Crafter arrived after a 6 month wait for a factory order. :)

CC9859C3-5421-4DF8-A970-22376E8882E4.jpeg

Really pleased, feels like a big T6 to drive. Nice when going from T6 camper to this and back again as everything is in similar positions.
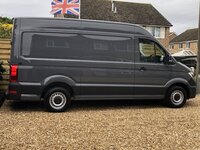
719987DD-56A9-47F3-B89C-D91175FAF58E.jpeg

This one is for work as I’m an Electrician but would make a great camper! I will be making quite a few changes and fitting it out over the next few weeks. If anyone is interested I will put up some pics as I go.
 
Has that got factory LEDs @Jack T ?

Yes factory LED’s this was the first option when I ordered it! Can’t get LED rears though.

It’s as follows:

177 fwd trendline (highline no longer available)
Would have loved 4mo but didn’t want to lose head height in the back.
Leds
Fogs
Heated screen
Captains seats heated/electric lumbar
Overhead storage
Full factory rear lining
Pure grey (custom but cheaper than indium)
AC
Cruise
Pdc front and rear
Rear camera
Detachable towbar

I like to keep a work van for 8-10 years so wanted to get it right.

Just what we are after as a work van, looks ace
 
They drive as well as a transporter. We run quite a few and it’s never a chore to drive big distances.
 
I love mine, as you say it’s just like a big T6.
Your van looks the mutt’s nuts, I love the colour and the lights . Very cool
 
So I have made a start on the fit out whilst still working so slow progress. I have a 6.1 on hire for a few more weeks so not having to use the crafter whilst sorting the back out.

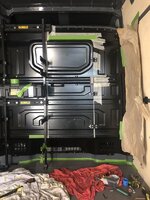
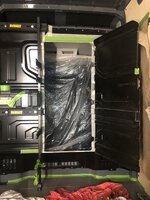
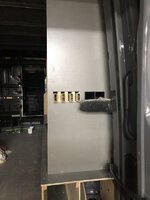
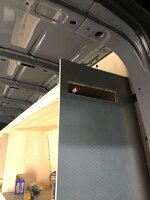
Bulkhead area first. I knew I wanted a cut out as done in my previous vans this size. This is for longer ladders and timber etc. My old one was higher and a bit awkward with having 3 seats. But this time I ordered captains so planned a walk through door. Along with storage to the left and right.

So figured out my Dewalt racking position as this is the system I use generally and will continue in other areas. This left just enough space for a door.

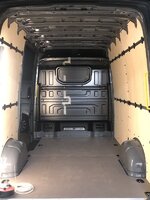
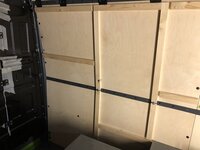
Started with this, note the factory ply lining, it is really nice cnc’ed birch ply, much better than after market i have had previously imho.

A837CD79-46CB-435F-92B5-162F15351975.jpeg

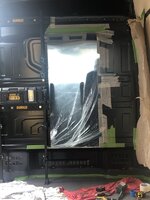
So next much sheeting, jig saw, grinder etc. Not nerve racking on a new van!

C585F1E4-F479-43C9-B39D-20A63C1F4C06.jpeg

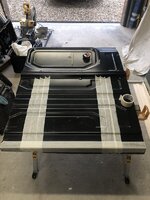
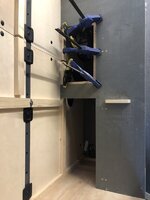
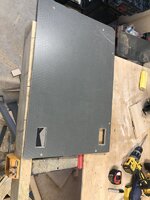
Hole cut and rack trial fitted. Next up to make a door. I had picked up another crafter bulkhead for free so a plan was formed. Using the other bulkhead allows me an overlap but a perfect fit to the contours with minimal effort.

Marked up, made a rough cut ready for an accurate measurement.

71E1DBB9-74B2-4082-BC5F-99942150DF56.jpeg

Then all cut and hinged up with plastic hinges/rivnuts. The door will get re powder coated and have edging strip around allcut edges eventually.

Racking sits nice and also gives some rigidity back to the panel.

One job down! On to the next thing! This allows around 4.3m load capacity which is ideal for my needs.

9E1BECE4-7F4F-410E-B4F8-9478785BE1EA.jpeg

56099E68-1C73-482B-9701-676C5913ABF7.jpeg
 
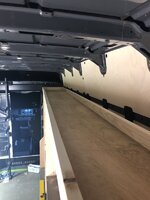
Made a start on the racking. I always keep ladders in my van as I prefer it to a roof rack. Last van I kept ladders on top of the racking ratcheted on. This time I’m going for the opposite.

So using timbers fixed from the rear of the plywood panels and rivnuts, hex holes all over the body handy for this. I started laying out where I wanted everything. This is to house mainly Dewalt toughsystem boxes.

3D242093-BD45-4932-AD9B-C61C206F527E.jpeg

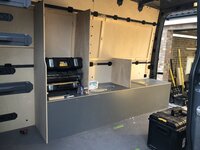
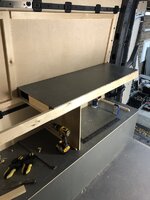
So started to build up the units so to speak. I have used a mixture of hardwood ply and hex phonetic ply to match the factory floor. Hopefully it should wear well.

E4F328A4-A7EE-43A6-9202-F048C305403D.jpeg

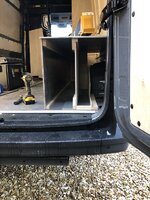
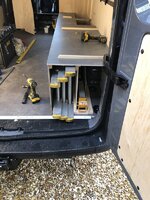
So section done for ladders and saw horses additional storage will go in to the right too. Ladders slide in nicely, no straps etc required. I used an extra piece of ply on the floor so the ladders don’t drag across the threshold.

35F9C2F8-390E-4EF1-A675-42D9DD79429D.jpeg

04DB9303-C1F9-44AE-BE4D-35426DB8886E.jpeg

The gap to the right of the ladders in front of the arch will house a leisure battery, B2B charger etc. Access from above.

03A0708C-C655-4D3D-9CA8-8570435B2531.jpeg

So moving along making storage anywhere possible making best use of the space.

2D6CA1B0-0628-4AF3-8633-7D130EE3DB5B.jpeg

3EB156B4-88CD-4BB6-9A1C-DC0C65E837EB.jpeg

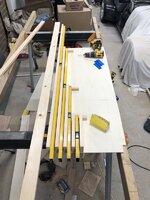
And in position, drain pipes will house long items such a sweeping brush (yes I am an electrician but I do own one!)

Top on to form the shelf.

2F5B707D-4499-4113-B8BD-C4DE5C67A77B.jpeg

That’s it for now but it’s moving along a bit faster. If this hasn’t bored you then well done! My van is like my office so important to me as I spend a lot of time in it. :thumbsup:

Hopefully get it a lot further over the weekend.
 
Ok will carry on then! :D

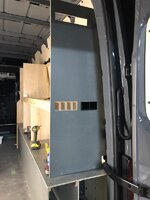
Did a bit this evening. First up, end panel to scribe and fit around storage. This was pretty time consuming, pleased with the result though.

8132FA65-9935-4483-A9DE-E4933BDE7A53.jpeg

From the opposite side, storage then hidden by the shelf.

78191966-56C6-4EDB-9F3E-8B5125BAAE25.jpeg

CACE42F2-94EC-42CA-A8CB-86283343E6D0.jpeg

You get the idea

C90BD41F-FD46-45B5-8B18-E9ABFB386AF3.jpeg

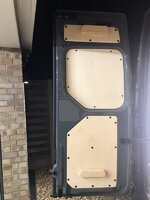
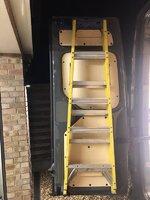
Done the steps as well, always put these on the back door as it makes good use of the space. Knocked up some brackets and used some grip tape to protect the paintwork.

68382ADC-668A-42BE-9D9A-80CBA2795C64.jpeg

51D0B3CF-C007-4FAB-B5F8-03778DE73294.jpeg

Steady progress!
 
Impressive! Having everything accessible and tidy makes a huge difference to your working day, it's great to see your ideas and solutions! :thumbsup:
 
Thanks for the comments! I’m pleased with how it’s coming together.

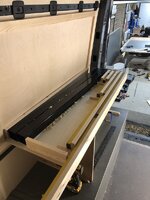
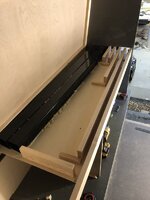
So the top letter box part on the rear panel is for 3m lengths of conduit etc. Only for small day to day stuff, anything bigger like dado will just load as normal. I created a false section again and plan to get some Euro style boxes to go on top.

81D72ECB-4E73-4A15-9EFE-F6A71FB5E4DB.jpeg

34F89DA8-D3C1-4AAC-9062-1A833F4CFA15.jpeg

Copper pipe in to check, all I had to hand to try but clean plastic only in here from now on. The stop at the end just allows enough to stick out.

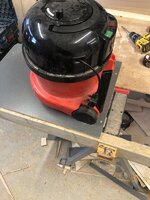
I need to house Henry somewhere to though of a way of holding him solid without straps etc. Came up with this:

Will probably add some holes at the front too where the castors are.

1622FAFF-0508-4746-9908-50860FEC40AA.jpeg

4AA4CD17-33DF-47B4-B49A-C6FD98FDF19C.jpeg

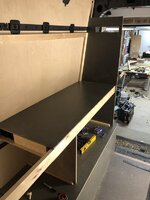
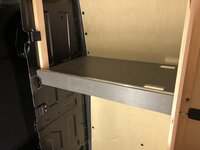
So shelf in position, with a trim piece in the front I have added a piece of aluminium box which should be more hard wearing than the ply. This sits just above the ply. Previous van have always worn with just ply. I will do this on most shelves with the aluminium also stopping things moving.

E7B38917-FEF6-4130-B9A7-43D8861E2647.jpeg

So a bit further. Need to start thinking about the floor and opposite side next.

3E2AADD4-50B7-40E3-B3D7-92FA36E8D917.jpeg

8F7B4E2B-E6FD-4C69-AF86-9143918CD40B.jpeg

159D4F09-62DC-459C-A848-6AE964EE4F6C.jpeg
 
Back
Top