I looked at this thread back in 2019 when I bought my van.
Much too technical for me so I purchased this.
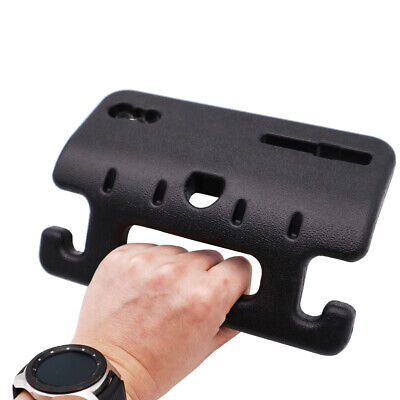
Still going strong, and safer than many of the other aftermarket hook solutions out there.
 
  • Like
Reactions: JOG
It’s a novel idea Trevor but I don’t think that’ll work for our campervan with its captains seats when they’re facing backwards which I guess will be mostly when we‘ll need access to the habitation area. It may help others though.
 
The strap measures 22cm overall length, has a loop size of 14cm and has a 11cm bolt hole for fixing. It comes in various colours and costs £4.50…
View attachment 155705
Do you know where I could pick up one of these?

I don’t have space on my B pillar due to the bulkhead, but I think it might work quite well on the existing threaded rivnut for the seatbelt:

A4CDD7C0-3AB8-42EF-969A-05F982073849.jpeg
 
That looks really good. A neat and inexpensive solution it seems. It‘s definitely what I’ll fit when I take delivery of my van, although I would like to fix it on the B pillar using the captive nut that’s used for one of the top bulkhead retaining screws.
 
That looks really good. A neat and inexpensive solution it seems. It‘s definitely what I’ll fit when I take delivery of my van, although I would like to fix it on the B pillar using the captive nut that’s used for one of the top bulkhead retaining screws.

I think that’ll be ideal. :thumbsup:

Thanks for suggesting this!
 
For the DIY’s interested in the addition, here a pictorial insight to the work required

The handle needs the end finishers (circled) removing from the handle body and the handle mounting points (circled) need reducing in height by 8mm. This allows the bracket to fit flush with the cover.
The mounting bracket is made of angle iron cut and shaped to fit. I used the original lower captive nut to secure the bracket but a rivnut on the higher fixing as the bracket needed to be further back for the faces to be parallel with the upper cover surface. I used epoxy putty to secure the “captive “ nuts to the back of the bracket at an angle that lined up with the handle / cover profiles so they’d be flush. Also putty on the surface to produce the same angle finish. You could tack the nut once you’ve got the angle right and make a profiled washer for the front if suits but it’s all out of sight so out of mind.
I used a multi tool to remove some of the insides of the pillar cover to allow for the mounting bracket as per pic. The removal of the fixing lugs don’t cause an issue as the handle holds it tight in place if you get it right.
Finally with the bracket securely in place and the cover lined up I carefully measured for a pilot hole in the cover for the handle. Little by little the holes expanded to the correct diameter.
Looks ok too

IMG_2422.jpeg

IMG_2428.jpeg

IMG_2425.jpeg

IMG_2423.jpeg

IMG_2419.jpeg
 
Back
Top