T6 Caravelle Electrical Install

moodsterT6

T6 Caravelle - Day Van - Occasional Camper
T6 Pro
Almost completed the electrical install in our Caravell. It’s been a lot of work, countless hours researching, solving problems and testing.

The install consists of:

110 AH AGM Leisure battery
CTEK D250SE
Victron Battery Protect
Victron Smart Shunt
Victron 250W Inverter
Victron 75/15 MPPT
Victron Smart Charger 15AMP
240V consumer unit plus sockets
8C954BD7-33C0-4C72-BD85-3EF2F0981F0E.jpeg
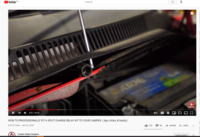
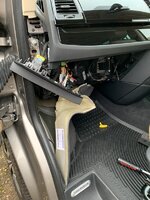
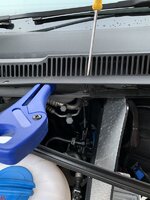
learnt this trick for removing the Plenum cover from Comb Valley Campers:
9C6EA808-F1B7-4AF2-B643-FBC93CB32627.jpeg

Although I discovered I could not use the grommet in the Plenum Chamber as it was used for the sunroof drain!

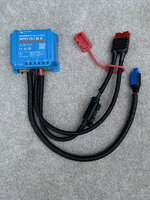
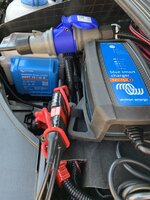
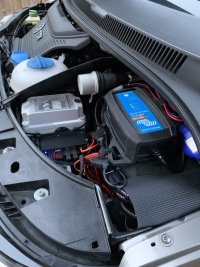
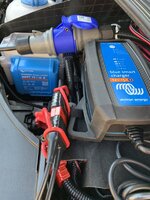
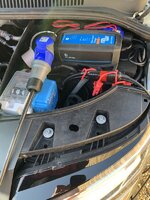
The MPPT controller is only attached to the CU via a Magnet so I can remove it. The Victron Smart Charger is also removable.
04F4C1A8-3723-4ED7-A3F7-9B2E5809E136.jpeg6317BB93-FE44-4E4F-AC9D-9A38C0379C0D.jpeg

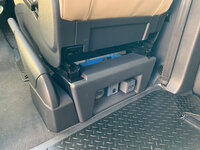
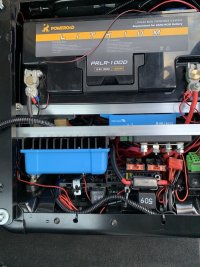
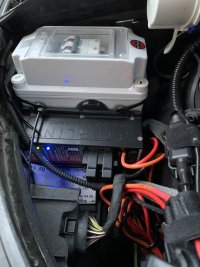
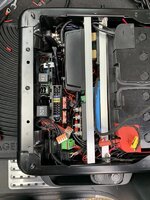
Under the passenger seat I managed to fit the CTEK / battery / Victron Smart battery protect and the Shunt as well as a 6 way fuse box and battery isolator:
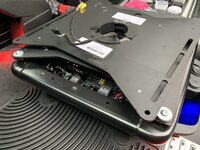
939D46C8-7992-42C8-B639-10C231D844F0.jpeg
2F91F0E2-A3DA-400F-A100-0F91AA1B01E7.jpegDBE3E54D-351C-4643-A020-DA62A8E0F7A7.jpeg9E0BEDBC-3D73-4603-A433-C286FA03531F.jpeg

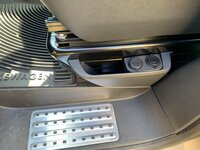
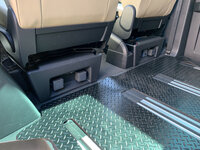
Fitted USB and 12V sockets to the seat bases. Also moved the original C and D pillar 12V sockets power supply to the leisure battery

039BAE70-322F-475E-9D2C-E848C2D74574.jpeg1D796901-F897-44E0-A1F2-D5FFAD13ABC3.jpegA81629CB-35C5-4217-87F5-E53BCA460146.jpeg

Under t(he drivers seat I managed to fit a Victron 250W inverter, 6 way fuse box, Victron Battery Monitor etc. It was a tight fit with the factory fitted Panasonic Power amp for the DynAudio setup

E81DF847-6C2B-462D-B892-5AAE065C3C50.jpegAD6607E0-49B6-4ADB-87DF-DAC97974B801.jpeg970ECED2-A1EA-41DB-B393-0EFA2C5F5C39.jpeg11C4FBCD-B934-4A28-84E6-03F00659CA31.jpeg

I‘m not fitting solar on the roof at this stage, I’m happy with the Lensun 200W Portable panels. I can connect them to either the CTEK MPPT Port or the Victron MPPT Which is connected to the starter battery. That gives me options.
7C36B814-4004-4948-BE95-053EF94D004A.jpeg64605C4D-B354-4D6F-AA24-FCD1220EAE19.jpegBE44F1F1-6D52-4B6B-9CF9-A46BA955ECC7.jpeg

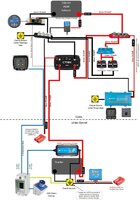
And finally a diagram

VW_T6_Wiring_Diagram.jpg
 
Last edited:
I did all the work so cost was for the components
Respect! Mine has factory leisure battery and 3rd party installed inverter and mains/USB sockets in the rear but needs the EHU adding plus, ideally, some solar. I might attempt a DIY job if it is clear enough what to do, and how to test it and be safe. Inspirational to see someone else do the lot! Do you have experience in this kind of work?
 
Respect! Mine has factory leisure battery and 3rd party installed inverter and mains/USB sockets in the rear but needs the EHU adding plus, ideally, some solar. I might attempt a DIY job if it is clear enough what to do, and how to test it and be safe. Inspirational to see someone else do the lot! Do you have experience in this kind of work?
I converted a van to a camper about 12 years ago so had some experience. I’ve always been enthusiastic about electrics which I enjoy working with. You have to be careful about information you get from the Internet, always check with professionals, some of which have there own YouTube channels.
 
Almost completed the electrical install in our Caravell. It’s been a lot of work, countless hours researching, solving problems and testing.

The install consists of:

110 AH AGM Leisure battery
CTEK D250SE
Victron Battery Protect
Victron Smart Shunt
Victron 250W Inverter
Victron 75/15 MPPT
Victron Smart Charger 15AMP
240V consumer unit plus sockets

View attachment 107474
learnt this trick for removing the Plenum cover from Comb Valley Campers:

View attachment 107476

Although I discovered I could not use the grommet in the Plenum Chamber as it was used for the sunroof drain!

The MPPT controller is only attached to the CU via a Magnet so I can remove it. The Victron Smart Charger is also removable.

View attachment 107478View attachment 107480

Under the passenger seat I managed to fit the CTEK / battery / Victron Smart battery protect and the Shunt as well as a 6 way fuse box and battery isolator:
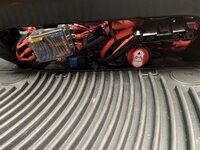
View attachment 107481
View attachment 107482View attachment 107483View attachment 107484

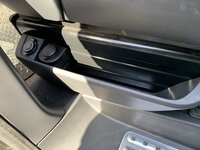
Fitted USB and 12V sockets to the seat bases. Also moved the original C and D pillar 12V sockets power supply to the leisure battery

View attachment 107486View attachment 107487View attachment 107488

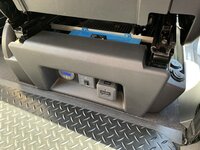
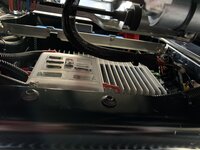
Under t(he drivers seat I managed to fit a Victron 250W inverter, 6 way fuse box, Victron Battery Monitor etc. It was a tight fit with the factory fitted Panasonic Power amp for the DynAudio setup

View attachment 107491View attachment 107492View attachment 107493View attachment 107494

I‘m not fitting solar on the roof at this stage, I’m happy with the Lensun 200W Portable panels. I can connect them to either the CTEK MPPT Port or the Victron MPPT Which is connected to the starter battery. That gives me options.
View attachment 107495View attachment 107496View attachment 107497

And finally a diagram

View attachment 107498
Do you have a link for the comb valley campers video please? That shows the trick?
 
Do you have a link for the comb valley campers video please? That shows the trick?
It’s about 8 minutes in. Vehicles with either a factory sunroof or a pop top will likely not be able to use the grommet shown in the video as it’s used by the drain. This I discovered on my Caravelle! Ended up using the 20mm grommet which is lower down and pops out behind the battery. Absolute pain to access though in a Caravelle as the carpet does not simply fold back, I had to remove the glove box.

 
Last edited:
Almost completed the electrical install in our Caravell. It’s been a lot of work, countless hours researching, solving problems and testing.

The install consists of:

110 AH AGM Leisure battery
CTEK D250SE
Victron Battery Protect
Victron Smart Shunt
Victron 250W Inverter
Victron 75/15 MPPT
Victron Smart Charger 15AMP
240V consumer unit plus sockets

View attachment 107474
learnt this trick for removing the Plenum cover from Comb Valley Campers:

View attachment 107476

Although I discovered I could not use the grommet in the Plenum Chamber as it was used for the sunroof drain!

The MPPT controller is only attached to the CU via a Magnet so I can remove it. The Victron Smart Charger is also removable.

View attachment 107478View attachment 107480

Under the passenger seat I managed to fit the CTEK / battery / Victron Smart battery protect and the Shunt as well as a 6 way fuse box and battery isolator:
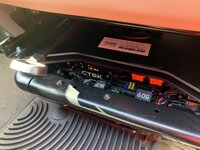
View attachment 107481
View attachment 107482View attachment 107483View attachment 107484

Fitted USB and 12V sockets to the seat bases. Also moved the original C and D pillar 12V sockets power supply to the leisure battery
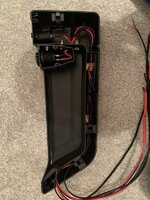
View attachment 107486View attachment 107487View attachment 107488

Under t(he drivers seat I managed to fit a Victron 250W inverter, 6 way fuse box, Victron Battery Monitor etc. It was a tight fit with the factory fitted Panasonic Power amp for the DynAudio setup
View attachment 107491View attachment 107492View attachment 107493View attachment 107494

I‘m not fitting solar on the roof at this stage, I’m happy with the Lensun 200W Portable panels. I can connect them to either the CTEK MPPT Port or the Victron MPPT Which is connected to the starter battery. That gives me options.
View attachment 107495View attachment 107496View attachment 107497

And finally a diagram

View attachment 108054
Great job. Is the consumer unit 4 way and the mains hook up the actual box style i need to fit as per your design ? thanks
 
Great job. Is the consumer unit 4 way and the mains hook up the actual box style i need to fit as per your design ? thanks
I don’t think you’d fit more than 2 of the breakers into the consumer unit housing I used. I also recommend consulting with a registered electrician as there are a few regulations regarding 240V electrics in a campervan.
 
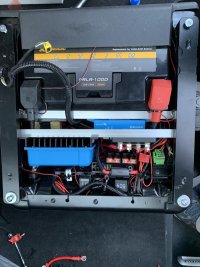
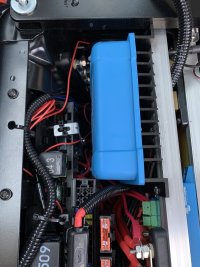
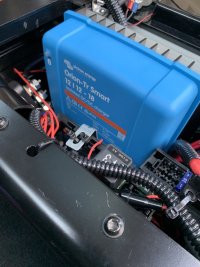
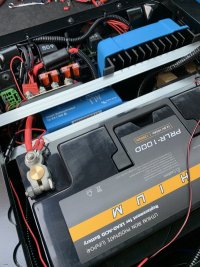
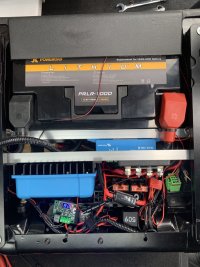
Changed the AGM battery for a Lithium and swapped out the CTEK for a Victron Orion. The CTEK has worked faultlessly for the last year but I wanted to be able to turn off DC-DC charging easily and thats possible via the Victron App.

was a tight fit but it’s all mounted well.

ECFD7F4B-1917-43EE-84C3-17DEA845C8BC.jpeg

6651EF3B-9DAB-4301-8DB8-91DFBB72C5C8.jpeg

09284303-881F-46AE-852F-0417B8D6E602.jpeg

26B3867D-0647-4B9F-ACA7-F31C619A3571.jpeg

FC544DFE-3784-4D88-8F31-5323F26A0CD0.jpeg
 
Victron Orion comes in a 30A version too...?

As well as the 18A version.

Just wondering as the CTEK was 20/25A that you had on the AGM.

Now you got lithium, it will suck all the DC-DC power it can get.

Thought you might have gone for the 30A version?

Just wondering your thoughts.
 
Victron Orion comes in a 30A version too...?

As well as the 18A version.

Just wondering as the CTEK was 20/25A that you had on the AGM.

Now you got lithium, it will suck all the DC-DC power it can get.

Thought you might have gone for the 30A version?

Just wondering your thoughts.
I went for for 18amp version due to its dimensions, the 30amp version is deeper and would not fit under my seat. I’m having a 200w solar panel installed in early April so that will be an additional charging source to the DC-DC charger.
 
I went for for 18amp version due to its dimensions, the 30amp version is deeper and would not fit under my seat. I’m having a 200w solar panel installed in early April so that will be an additional charging source to the DC-DC charger.
Gotcha. :thumbsup:
 
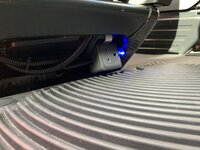
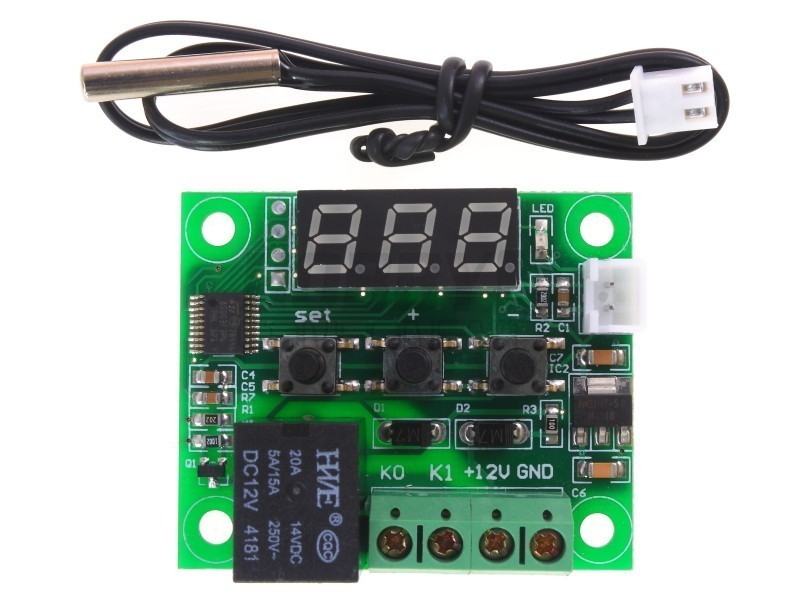
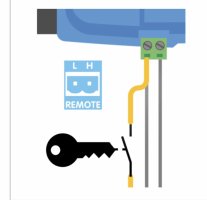
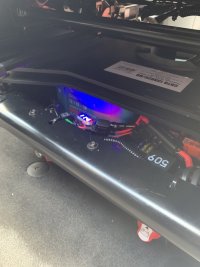
Installed one of these to disable the Victron Orion when the temp is less than 5 deg C:


fitted as per below, the grey wires go straight into the relay on the temp switch:

80C383F8-292B-4D30-9361-C50AFCDF5AF0.jpeg

1621FBE3-69C0-4242-825E-0DE12F9D936B.jpeg

332D9034-DB53-429E-9FFE-41D2F076F641.jpeg
 
Installed a Sterling battery maintainer to keep the starter battery topped up. I raised a new thread to discuss some findings about it always being active due to the Lithium leisure battery having a higher standing voltage:


it does seem to work well though so time will tell.

336D205C-FBEA-4966-8A28-BB063DDE1434.jpeg

31221EBF-93E0-4F42-9F3F-F8E3B9BB45C5.jpeg
 
Back
Top