Hey all! Thought I’d start a thread to share my self-build journey and hopefully pick up (and share) a few tips along the way.
I’m Peter, 34, from Hayling Island on the south coast of the UK. I’m half French, my wife is fully French, and we actually spent most of the last 20 years living in France before moving back to the UK just before Covid hit.
We’ve got two young daughters and I split my time between Property Development and IT work (don’t ask). My wife used to teach MFL but is now a Head of Year in a local school. We’re building this van not just for UK weekends away, but also to visit family in France and travel around Europe—because flying anywhere during school holidays is borderline robbery.
I went for a T6.1 because, as far as I know, they stopped making them last year—and I’m not keen on the styling of the T7. I figured I’d grab one while I still could, and I’m hoping they’ll hold their value well over time.

This will be a daily driver during the week and a family camper for weekends, holidays, and cross-Channel escapes. I really like the layout of the CamperKing Le Mans, so I’ll be building something similar. It’s my first camper conversion, but I’ve got a sailing boat so I’m hoping some of the space-saving and electrical knowledge will transfer nicely.
I’ve always loved trawling through other people’s build logs for ideas and inspiration, so I thought it was time I contributed one of my own. Let me know if there’s anything I’ve missed—I’m always open to advice or suggestions!
 About Me
I’m Peter, 34, from Hayling Island on the south coast of the UK. I’m half French, my wife is fully French, and we actually spent most of the last 20 years living in France before moving back to the UK just before Covid hit.We’ve got two young daughters and I split my time between Property Development and IT work (don’t ask). My wife used to teach MFL but is now a Head of Year in a local school. We’re building this van not just for UK weekends away, but also to visit family in France and travel around Europe—because flying anywhere during school holidays is borderline robbery.
 Why a T6.1?
I went for a T6.1 because, as far as I know, they stopped making them last year—and I’m not keen on the styling of the T7. I figured I’d grab one while I still could, and I’m hoping they’ll hold their value well over time. The Van
- Model: VW T6.1 Transporter T30 Highline 150ps
- Reg: 73 plate
- Age: About 18 months old when I bought it
- Mileage: 22,000 miles
- Spec: Silver, Tailgate, factory ply-lined
- Price: £33k from Breeze VW
- Condition: Good, clean slate—nothing modified before I got it

 The Plan
This will be a daily driver during the week and a family camper for weekends, holidays, and cross-Channel escapes. I really like the layout of the CamperKing Le Mans, so I’ll be building something similar. It’s my first camper conversion, but I’ve got a sailing boat so I’m hoping some of the space-saving and electrical knowledge will transfer nicely. Build Steps (so far and to come)
 Buy the van
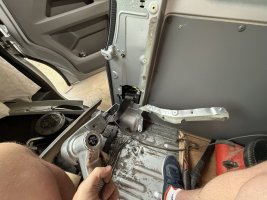
 Remove the bulkhead and strip down
 Install side and rear windows
 Install new head unit, speakers, reverse & dash cam
 Pop top fitted (just done!)
 Insulation & carpeting
 Flooring
 RIB bed installation
 Electrics – leisure battery, lighting, USB, etc.
 Kitchen pod install
 Final touches and first trip!
I’ve always loved trawling through other people’s build logs for ideas and inspiration, so I thought it was time I contributed one of my own. Let me know if there’s anything I’ve missed—I’m always open to advice or suggestions!


