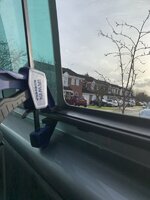
I have put the modified radio keys i used to clean the drains in the glove box. Will check they are clear every now and again as i plan to carpet line the van and dont want carpet to get wet, will only be a 2 min job now they are clear, probably as you say give the rubber a wipe too
Leaking Kombi Windows? How-to guide to resolve.
- Thread starter DaveyB
- Start date
what expensive stuff? Mine both leaking, it's a mare! Cleaned channels with grip tie but not tried anything else. Was wondering if the VW oil for eos convertible roof would work? It's £50 for a small bottle, is this what you are referring to?Both mine have now been leak free for months - the one I made a non-opener and silicon sealed...... and the other one I removed, cleaned, treated with that expensive stuff and re-installed. I can take the chance on the door, but can't risk water down the back of furniture and under the flooring. My Kombi rubber mat had litres of stale water in when removed, with rust starting on the floor.
Thanks
To be fair, is really small so I may just get Lacquer over it when I get a moment as you won’t see it unless you really look for it.Aww naw, hopefully that will be sorted easily enough.
plus it’s on the Bodyshop next month all be well so may ask if they can sort
Success at present with no dismantling - silicone grease on the seal and also an old favourite, Captain Tolley's Creeping Crack Cure applied to the bonding along the top edge at the body side and fixed glass side using a syringe. I have gone from Niagara Falls amount to not a trace of damp. I blasted everywhere dry with compressed air before starting. Had a fair bit of rain since so am hopeful it has done the trick for a while. I noticed that with the application of the cure to the top outside that some made its way to the base of the catch panel ( it is milky white until cured so is noticeable) so it was obvious that there was an easy route from outside at the top between the bonding and one of the surfaces to the interior.
Has anyone else noticed how flimsy the seal is? What i mean is, when the window is closed, it hardly puts pressure between the Two panes of Glass.
And with a seal that is hardly robust enough to fill the gap, it's hardly surprising you have Water ingress between the Glass.
Therefore, has anyone tried to thread some sort of cable type of material through the seal to bulk it out?
Am i barking up the wrong Tree with this?
You know what, i will give it a go...
It is another thought on the problem, I suppose it would take several tests with differing pliability of the insert - too hard and it would be difficult to close.
It would be interesting if others used my technique and it works which would imply that the bonding is not up to the job. Or maybe my cure is just a one off due to poor original preparation at the converters.
It would be interesting if others used my technique and it works which would imply that the bonding is not up to the job. Or maybe my cure is just a one off due to poor original preparation at the converters.
I have tried the silicon grease on the seal, but it doesn't take long for the Water to seep through again. When i wipe the seal you can see small grains of grit/sand. It means that the seal isn't sealing the Two panes of glass tight enough.
So, unless i am removing the sliding Window every Two weeks or so to give it a clean and re-grease the seal. I will either seal it up permanently or find a way to make the seal more robust.
I would like to see if anyone else has tried this approach.
So, unless i am removing the sliding Window every Two weeks or so to give it a clean and re-grease the seal. I will either seal it up permanently or find a way to make the seal more robust.
I would like to see if anyone else has tried this approach.
I didn't remove the window, just used a cotton bud to clean and one to do the silicone on the seal. I noticed the small pieces on the seal so agree that the seal can't be pressing hard enough if it cannot stop the grit getting in there when shut.
Normally leaks are best dealt with at source but IMO with the OE window seals there isn’t much that can be done other than keeping them clean and damage free.
There is probably a way to improve the OE drains; routing the drain out through a very small orifice under the outer window trim seems like an afterthought by VW. Perhaps a modification to route a larger bore drain vertically straight down through the floor / sliding door.
There is probably a way to improve the OE drains; routing the drain out through a very small orifice under the outer window trim seems like an afterthought by VW. Perhaps a modification to route a larger bore drain vertically straight down through the floor / sliding door.
Lucio
Member
Had mine both replaced last Jan , now leaking again but out of warranty will they still cover it?@mopardave ,I had both my side Windows changed at west Yorkshire van centre . mine were limo tinted and they re did mine foc
Had mine both replaced last Jan , now leaking again but out of warranty will they still cover it?
Would have thought so, VW parts have a 2 year warranty.
Hi guys, hope this is the right thread and someone will be able to help. In the process of converting my shuttle and have decided to do away with all the trim so took the sliding door cards off yesterday. Since then I've noticed a little bit of leakage. Am I right in thinking the OEM windows (in shuttles) need the door card in play as it also provides a lower part of the gutter tray\guide rail? Or have I just got a leaky window issue that I should take back to VW on warranty.
Yes the kombi just has a black plastic trim strip under that. Have you checked the main drains are clear?Here's some pics that hopefully explain where the leak is coming from. I'm assuming Kombi sliding windows have a full length guide rail trim that hides the underside? I wouldn't have thought water should escape from the drainage channel into this bit regardless
View attachment 102017
View attachment 102018
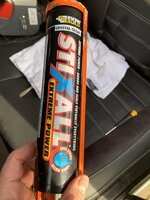
Mine also leaked in the same place yours did. The plastic tab to the right of your arrow isnt bonded very well, i superglued it then ran sealant under it and worked a treat. Plenty more info in posts above
Thanks it's not obvious in the shuttle door card that its built in there which is weird. I'm guessing this is the part. NEW GENUINE VW TRANSPORTER SIDE SLIDING WINDOW GUIDE RAIL TRIM 7H0847745B9B9 | eBay
Well, got water leaking from both my sliding windows FFS. Even after frequently cleaning and silicone treatment on the rubber seals which has kept them soft.
I’ve had my off-side window replaced just over 2yrs ago, now it’s leaking like a sieve.
Drivers side is also leaking.
Used a compressor and managed to get the drainage holes blown out nicely on the drivers side and hosed it down with water over that side proved a success. But the left side is still leaking and I can see there is water in between the two halves of the black trip under the window.
Based on some of the recent posts, it looks like I may need to split the plastic parts and inspect the water ‘deflector’ and seal the unit up to stop water passing over the drainage guide and into the van.

Take the trim off and test it with a syringe of water. Feel for you mate it is a pain in the backside, the 'deflector' bits were the main culprit in mine, seam vw use and adhesive no better than bluetack to join the deflector bit in place!
Similar threads
- Replies
- 2
- Views
- 382
- Replies
- 8
- Views
- 511
- Replies
- 14
- Views
- 2K


