Leaking Kombi Windows? How-to guide to resolve.

DaveyB

Living it up on the West Sussex coast.
VIP Member
T6 Legend
Like so many other folk, my factory kombi rear windows leak when it rains. Refusing to accept that the only way to resolve was to take it back to the stealer, I set about stripping the window out to figure out what was wrong.
This will have several posts in order to get it all in due to the number of pictures.

Stage 1 - Removal
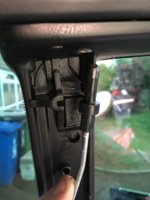
The top and bottom trims over the handle mechanism need to be removed.
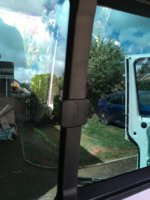
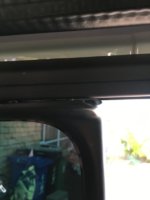
IMG_0498.JPG The top one needs to be prised from the top, and the bottom one; from the bottom. This is because there is a little tab in these locations.
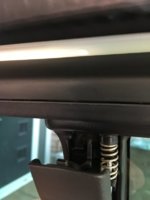
IMG_0499.JPG
This cover will then slide away from the window handle where it has a channel that secures to the handle locking pin (hence why it needs to be popped off from the other side).
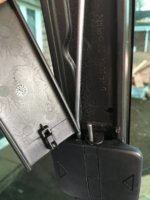
IMG_0500.JPG
Repeat this procedure for the other trim.
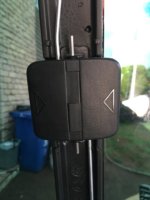
IMG_0501.JPG
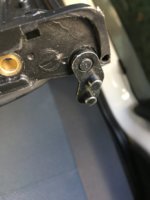
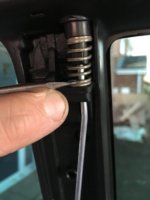
Next you will need to remove the handle. Whilst holding the handle flat, using one hand, with the other pull the thin securing pin out, keeping the handle in the flat position pull it away from the window.
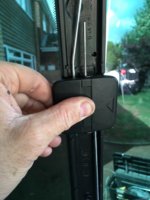
IMG_0502.JPG TIP: put the pin straight back in as the handle is spring loaded, putting the pin back in keeps everything where it should be!IMG_0503.JPG
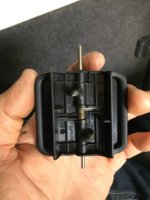
This will leave you with the locking mechanism exposed.
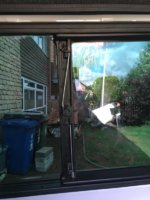
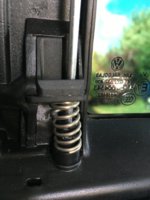
IMG_0504.JPG There are two plastic pieces that retain the springs.
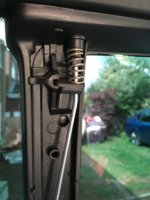
IMG_0505.JPG These just pop out using a trim tool. Remember which one came from where as they only go in one way.
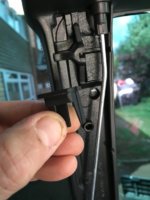
IMG_0506.JPG
With both of these out you can slide the centre piece off its peg which will enable you to manipulate the pins out of their channels.
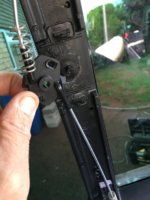
IMG_0507.JPG

IMG_0508.JPG

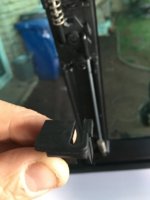
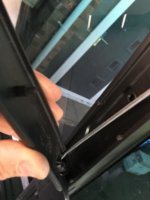
At this point you can slide the window open. On the leading edge you will see a little metal guide at the top and the bottom.
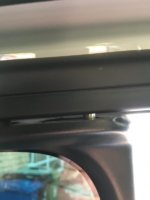
IMG_0510.JPG

IMG_0511.JPG
Pop the bottom one out of the track by using very light upwards pressure on the window, using a trim tool to prise it out, whilst pulling the bottom edge of the window towards you.
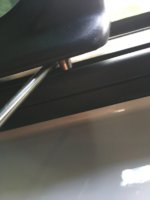
IMG_0512.JPG

IMG_0513.JPG
The top guide will now pop out simple by applying some downwards pressure to the window.
With these guides out, rotate the window 90 degrees so it is against the back seats. (Orange arrow).
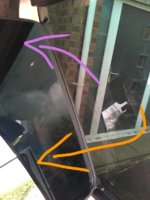
IMG_0516.JPG Now pull the bottom of the window towards you and push the top away (purple arrow). The window is now out.
Obviously this all needs to be done from inside the van with the side door closed. Probably should have mentioned that to start with!
 
Stage 2 - cleaning out the drain holes.
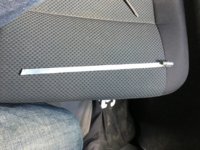
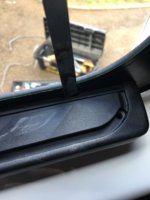
There are two guide holes, one at the front one at the back. The hole is very thin so finding something to use to slide into it is a challenge in itself. I opted for an open jubilee clip with the ribbed part cut off.
IMG_0517.JPG
Slide your chosen tool down the gap very gently working it from side to side.
IMG_0518.JPG
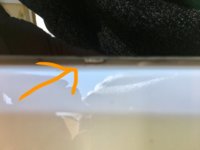
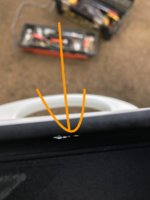
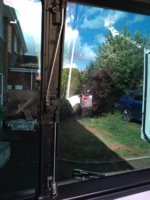
You need to do this slowly and carefully, whilst leaning out the window to keep a watch for it poking out the bottom, otherwise you'll scratch your paintwork in the window rebate (and that will be a dog to try and touch up). The orange arrow shows you the bottom of my chosen tool and proximity to the paint. GO REALLY STEADY!
IMG_0536.JPG
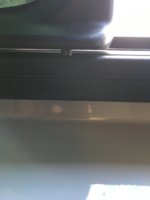
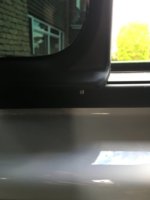
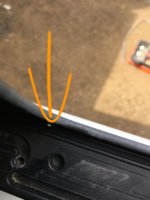
When they have been cleaned you'll see daylight through them, but the gap is minuscule. This is the front one.
IMG_0521.JPG
This is the rear one.
IMG_0522.JPG
 
Stage 3 - reinstallation of the window.
The easiest way to align the rear pivot guides to get the window back in is to rotate them perpendicular to the glass.
IMG_0523.JPG
In the opposite way to how you took it out, line it back up with the bottom of the window further forward than the rear, this will enable you to get both the top and bottom rear guides back in the track.
IMG_0524.JPG
Once lined up, straighten the window, and turn it back through 90 degrees so it is in the correct plane. Pop the top and bottom front guides, back into the track.
IMG_0525.JPG
Your window should now slide freely back and forth along the track. Best to check it does and that the seals are all in the correct place before putting the mechanism back into place.

The best way to put the mechanism in, is with the window fully closed (or the pins won't go in).
Take the mechanism and relocate the top and bottom pins, then slide the centre piece back onto its boss. It may take a little juggling to get the locking pins in, it's just a case of working them, hence why it is better to do this bit with the window closed.
IMG_0529.JPG
Next is the spring retaining clips. Compress the spring and pop these clips back into their seats.
IMG_0530.JPG

IMG_0531.JPG

IMG_0532.JPG
Next is the window handle. Carefully remove the pin, keeping the handle flat, place it back between its top and bottom retaining lugs, and slide the pin back into place through the retainers.
IMG_0533.JPG
Test that operating the handle withdraws the top and bottom pins and enables the window to be opened.
Slide the trim covers back into place over the handle retaining pin, bowing the plastic slightly in the centre to enable the top tab to go back into its locator.
IMG_0535.JPG

Hey presto, window is back in. Get a bottle of water douse the glass and you'll find none of it is now dripping down the inside of the door panel.

Whilst the window is off it is well worth rubbing a little silicone grease over the rubber seal of the window.

Hope this helps. Takes less than ten minutes to take it out, clean the drain hole, and reinstall it. It would take me over an hour to get it back to the stealer to get them to do it and then the hour to sit around and wait!
 
My finding as to why mine leaked; the rear drain channel had window bead silicone in it, clearly been over zealous when fitting the windows in!
 
Mine are both leaking but that looks too technical for me. Going to have to resort to getting the dealer to look at it when its due its service or before winter, whichever comes first. Great job though.
 
Mine are both leaking but that looks too technical for me. Going to have to resort to getting the dealer to look at it when its due its service or before winter, whichever comes first. Great job though.
The irony being is that I'm going to have to take it in anyway since I can't fix the water leak in the front door or the tailgate.
 
Mine are both leaking but that looks too technical for me. Going to have to resort to getting the dealer to look at it when its due its service or before winter, whichever comes first. Great job though.
I can do it in the middle of a field at busfest if you like?
 
Hi,
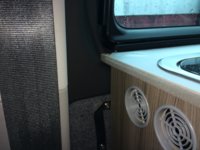
I am having a bit of a nightmare with my leaking Komi window. My Komi was converted to a full camper with sink hob fridge etc about a year ago. I have never noticed any form of water leak from the sliding windows, but a couple of weeks ago noticed that the worktop laminate was bubbling up behind the sink unit adjacent to the sliding window opening. We are pretty good at keeping everything dry and clean so it was a bit of a mystery. The converters soon diagnosed that the window was leaking not only at the sliding seal but also where the frame was bonded to the vehicle; water literally pouring in below the level of the worktop and fortunately draining down and out of the fridge floor vent.

Took it straight to VW dealer who agreed that the widow drains are rubbish and about 1 in every 200 leak badly. However because they have to video the point of water ingress and send it to VW, the kitchen had to be removed and the window exposed. Another trip to the converter to rip it all out, then back to the dealer.....

They leak tested again and confirmed that its literally pouring through where the window is bonded to the vehicle. I am having a new window fitted under warranty tomorrow and then the nightmare of having to get VW to pay for the damage caused ( they have already said they will foot the bill on the phone!). However it will probably take a couple of months to get it booked in and sorted with all the converter's other work.

So if you have a camper conversion or anything close to the window, please check to make sure yours is not leaking also!

IMG_3222.JPG

IMG_3223.JPG

IMG_2665.JPG
 
My front door and rear only seem to leak when parked sideways on an angle, both leaks are on the same side ?!?!
Mine too.......I've just noticed that my offside sliding window is leaking! I've lubed and cleaned everything but it's still coming in. It looks to be coming in under the trim that runs along the bottom of the window frame. I tried cleaning out the drain holes today.......they appear to be blocked as I couldn't push a wire through. I did shoot some wd40 into the drain holes from inside and it ran out of the bottom of the window on the outside so they're not completely blocked. I've looked at DaveyB's excellent how too guide but I'll settle for just clearing the front drain holes first.....I'm gonna try a cable tie first. If that doesn't work, it's off to the dealer! Incidentally, it's the non slider side.....and that's the side that has been carpeted up to the bottom of the window frame......just wondering if it's something the converters could have done??? Is that lower bottom window trim easily removed? :thumbsup:
 
FWIW.....further to DaveyB's excellent how to guide, I used a .2mm feeler gauge to clear my front drain holes out. Any bigger was too big. They didn't feel to be blocked when I fed the feeler gauge through so I'm not convinced I've improved the situation. Need to check the rear most drain holes......probably need to remove glass to do that as per DB's guide.
 
Hi, I now have the van back all watertight and lovely! After a very long chat with diagrams and a torch with my converter, I now think I understand the issue....

The bottom and top rails of the sliding window are bonded to the glass of the fixed window section. It about 1 in 10 windows, this bond begins to fail, water is then able to just bypass the very poor drain holes and pour into the van. In my case the water blistered the laminated worktop which had to be replaced... bit of a dockyard job...

In fairness to VW, I had a new window fitted within 3 days and their customer services wrote me a check to cover the cost of the initial investigation by my converter and the cost of the repair, which was not an insignificant sum! They have also paid for a night out with the Mrs to say sorry....

I am now checking the seals and drains regularly as well as keeping an eye on the bonding material on the bottom rail, hope this helps.
They’re taking your missus out, and you’re ok with that?:eek:;).
Glad you have got it fixed though and that the water damaged surface top has been paid for as well.
 
After hearing lots of bad things about VW, I really cannot fault them. The final bill was eye watering but VW never queried the invoice.
Even the Mrs is happy!
 
Back
Top