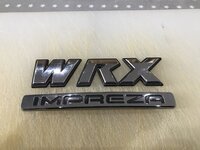
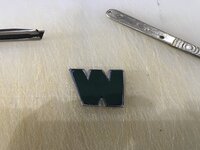
We all like to modify and customise our vans and badge removal is one of the simplest (apart from the sticky goo left behind!).
Anyway, come sale time we might want to revert some of the modifications so as not to put off potential buyers.
I wrote this on another forum following an attempt to put an alternate badge on my car, however, the old badge left a shadow so the old badge had to go back on. This is what I wrote....
On mine the back of the badge has a lip near the edge and the tape must be inside of this lip.
So, you will need….
Craft knife with new blade (I used a Swann Morton with 10a blade)
Trim Tape (25mm wide, green backed was what I had in stock)
Coloured sharpie pen (not black)
Soft pencil
Greaseproof Paper (SWMBO won’t mind you borrowing from the kitchen)
Nylon chopping board (see comment on previous item)
Process….
Firstly I did this in 4 pieces rather than one long run. In the Carrera script there are places to join easily.
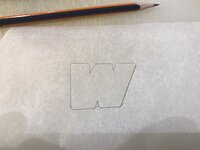
1) Place your badge back down onto a piece of greaseproof paper and trace neatly around it with the pencil. Place the badge carefully to one side.
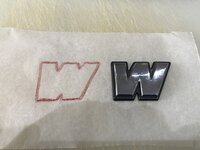
2) Use the sharpie to draw around the inside edge of the pencil outline. This should give an approximate 1.5 MM reduction all the way around and give you your cut lines.
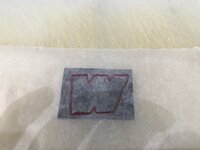
3) Flip the greaseproof paper over and stick on a piece of trim tape so it covers your outline. Just to be clear the tape needs to be stuck on the opposite side of the paper to the traced outline.
4) Flip the paper over again and place tape side down on the chopping board. With the knife carefully cut around the edge of the sharpie line, through the greaseproof paper and trim tape. Use one hand to hold down the paper / tape and pull knife towards you, away from your other hand. Keep moving the paper around so the cut is always away from the hand holding it (its safer and you can control the cutting better) Once complete, remove the ‘spoil’ from the edges, cutting any bits you missed with the initial cut. Try not to pull any un-cut bits as it could tear. Gentle and slow.
5) Check the tape fits the back of the badge and trim any bits as appropriate.
6) Peel greaseproof paper off and stick tape to rear of badge.
7) Once badge fully taped, reattach to the car
Hope its useful!!
Regards
Ian

