[GUIDE] How to remove a sliding door on a T6

Andysmee

Previously the last of the TSI's
Moderator
VIP Member
T6 Legend
I didn't set out to write so many guides but I did take photos when changing 4 out of 5 doors on my van this weekend o_O, so it would be rude not to post them up for others' benefit. I take photos so I know how to put it back together!

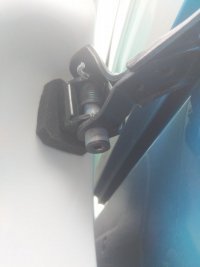
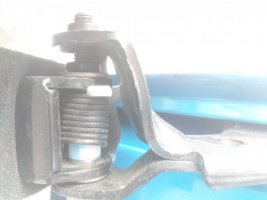
The sliding doors are attached to the van on three carriers; the top roller carrier, the middle/rear roller carrier and bottom roller carrier. Each carrier allows fine tuning of the shut gaps after you have fitted the door.

You will need to remove the door card first, but there's no loom to contend with as all connections to the sliding door are through the contact block on the front edge which connects when the door is closed.
PXL_20201024_154220817.jpg
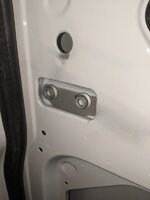
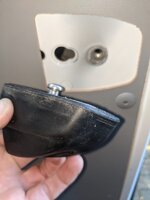
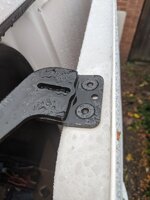
With a mate supporting the door, particularly to stop it falling into the side of the van, remove the two spline bolts from the top carrier (yes, we did this in the sodding rain :rolleyes:)
PXL_20201024_154210072.jpg
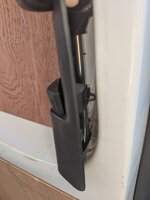
With your mate now really braced to take the weight of the rear of the door, remove the spline bolts in the middle of the door. Slide the middle roller carrier towards the rear of the van to remove it from the door.
PXL_20201024_154230526.jpg
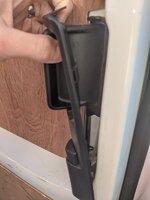
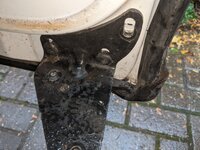
Now finally remove the spline bolts attaching the door to the bottom roller carrier. At this point you really have to also take the weight of the front half of the door, as your mate won't be very impressed if you don't (he didn't have a hood :)). I had removed one of the three bolts before started to make this step quicker.

The door is then free and you can walk it away from the van and get a cup of tea.

To refit the door, reverse the steps.
 
Once you have fitted the door, particularly a new door like we did, you can adjust the shut gaps using the three carriers. You don't need a mate for this bit as you can do one carrier at a time so the weight is always carried on the other two.

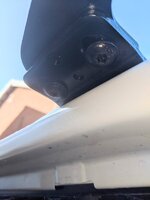
The top carrier is slotted to allow you to adjust the distance between the top of the door and the van:
PXL_20201025_121123615.jpg
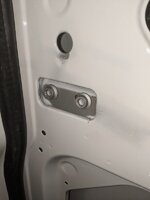
The middle carrier is slotted to allow you to adjust the position of the door front-to-back of the van:
PXL_20201024_154210072.jpg
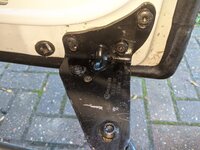
The lower carrier is slotted to allow you to adjust both the distance between the bottom of the door and the van and the vertical position of the leading edge of the door, which means the angle of the door along the top and bottom - rotation of the door, perhaps:
PXL_20201025_121803382.jpg
Just loosen the bolts and gently rock the door to move the position in the slots.
 
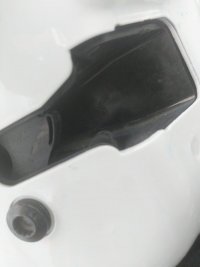
Finally, a random one, this is how the door stop on the door attaches, should you need to remove it: (with a spline bolt to secure it)
PXL_20201025_123850508.jpg
 
Do you know how to take off the interior door handle surround trim by any chance?
Yes, here you go @Bigsidavies :

How to remove the interior door handle trim on a sliding door

Push down the door locking button,
PXL_20201102_142902536.jpg
Pull out from the bottom of the trim to pop the clip from the pillar.
PXL_20201102_143014448.jpg
Then, while pulling back on the handle, pull the trim off from the top. Then pull off the trim on the door locking pin.

Reverse the steps to re-fit
 
Last edited:
Andy, I hope you don’t mind me jumping your thread
My T6 Kombi side sliding door is binding as though it’s dropped on its brackets. I can’t see how to adjust it - any ideas?
Billy
 
Andy, I hope you don’t mind me jumping your thread
My T6 Kombi side sliding door is binding as though it’s dropped on its brackets. I can’t see how to adjust it - any ideas?
Billy
Not an expert but might be worth taking it off and inspecting the rollers in both tracks
 
Not an expert but might be worth taking it off and inspecting the rollers in both tracks
I now have this problem and would appreciate some help. The rear of the door is lower than it should be and hitting the metal not the latch guide: (top right of picture)
16250402134061315903710754546528.jpg
When I slam the door it does get guided into the latch but it sticks when opening
 
I now have this problem and would appreciate some help. The rear of the door is lower than it should be and hitting the metal not the latch guide: (top right of picture)
View attachment 121716
When I slam the door it does get guided into the latch but it sticks when opening
16250524629191832022683494362938.jpg
Ah... there's a torx adjustment on the carrier and a nut (top) that locks it off. My painter must have not locked it off and it's slipped down:

16250525583086960683947107236384.jpg
 
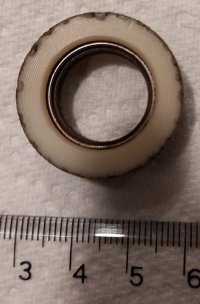
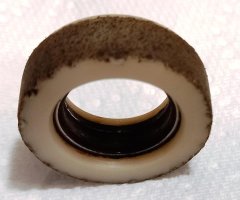
Hi Sliding Door Experts, would one of you help me? Sliding door on my 2017 Transporter Kombi LWB has suddenly become rather rough when opening/closing, especially at one point just before the door moves inwards when closing. Cleaning and lubricating didn't help - but I suddenly realised that at the front on the bottom track there was a loose plastic ring with metal insert, a roller presumably About 2.5 cm outer diameter. Not obvious where this has come from, or how to put it back!
sliding_door_ring_1.jpg sliding_door_ring_1.jpgsliding_door_ring_2.jpgsliding_door_ring_2.jpg
 
Hi Sliding Door Experts, would one of you help me? Sliding door on my 2017 Transporter Kombi LWB has suddenly become rather rough when opening/closing, especially at one point just before the door moves inwards when closing. Cleaning and lubricating didn't help - but I suddenly realised that at the front on the bottom track there was a loose plastic ring with metal insert, a roller presumably About 2.5 cm outer diameter. Not obvious where this has come from, or how to put it back!
View attachment 140512 View attachment 140512View attachment 140513View attachment 140513
That looks like an outer bearing race still in the plastic roller, is that the case?
 
I don't know, I'm hoping someone can tell me. Can such a bearing race come off without something breaking? I couldn't see anything obviously broken, or where the roller could have come from.
 
I don't know, I'm hoping someone can tell me. Can such a bearing race come off without something breaking? I couldn't see anything obviously broken, or where the roller could have come from.
If the bearing was knackered it can come apart, you’ll probably find the inner race is still attached on the van.
I’m not sure how the assembly is made but there are sellers on Ebay who make Delrin bushes to your spec’ and bearings are easily obtained online.
You need a diagram of this mechanism, not sure if that is available on the Forum.
 
I looked again and I could see the inner race, it's at the back of the assembly.

I was hoping that the T6 version of this would last better than my old T4, as the design has been improved so that the bottom runner doesn't trap mud so easily, and I am also able to pressure wash it regularly, and grease it, but still it has failed.

Thanks for your help.
Whatever you choose as a solution please update.
I suggest that if you replace with a OEM part and the bearing is not fully rubber shielded you replace the bearing with one that is. Suffix -2RS
A steel shield won’t keep the water out.
If you want to get a roller made i’ve bought from this Ebay seller before, makes items to order at a very reasonable price.
 
I am also able to pressure wash it regularly,

I wonder if this is the root cause of your problem........ You can not re-grease an assembled ball race.

I don't let pressure washers near any of my vehicles.
 
  • Like
Reactions: DXX
I wonder if this is the root cause of your problem........ You can not re-grease an assembled ball race.

I don't let pressure washers near any of my vehicles.
Thanks for your comment. However my experience with my previous Transporters (T4) for which I didn't have the facility to pressure wash, was that soil and grit accumulated in the recess where the bottom of the sliding door runs, despite my best efforts to keep it clear. I drive regularly on muddy tracks, (with the sliding door closed), and my huskies sometimes jump in through the side door with wet and muddy feet. The result was that the assembly attached to the bottom of the door had to be replaced several times, and eventually the bodywork corroded so that the door nearly fell off the bottom runner
The pressure washer jet is mainly aimed away from the assembly, though I can't be sure that it didn't remove some grease from the ball race. However, replacing the ball race is preferable to bodywork corrosion. So far the T6 assembly has lasted longer than the T4, but the T6 seems to have a better design which doesn't trap soil so easily, so it may be that rather than pressure washing that has prolonged its life.
 
Mu advice is don’t put grease on the lower roller if you visit the beach, it just turns into grinding paste.
 
I suggest that if you replace with a OEM part and the bearing is not fully rubber shielded you replace the bearing with one that is. Suffix -2RS
Thanks for the suggestion. Local VW commercial place denied any knowledge of -SR part. But anyway I have decided that the VW price of £146 (inc VAT) for the part was just too much. There are lots of non-OEM parts prices ranging from Amazon's £8.99 including delivery (might or might not be the correct part!) to

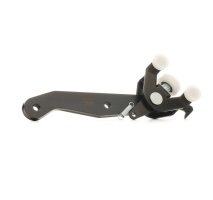
TOPRAN Roller Guide, sliding door for VW TRANSPORTER Lower Left, without holderTopran roller guide 115 532.jpg

Article number: 115 532 £19.12 inc VAT but total of £27,57 including delivery.

All of these parts look identical in the seller's pictures, like this (from Topran).

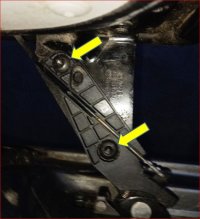
My question is, what do I need to undo the two bolts (spline bolts?) marked by yellow arrows? I don't have any tool to fit these. Thanks, Roger

sliding door. bolts.jpg
 
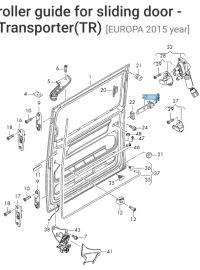
I now need to sort out my sliding door, so this is a note to self but hopefully helpful to others :
Screenshot_20220502-145730.png

Middle roller: (left) 7E0 843 335A (hinge (complete) for sliding door
for models with manually operated sliding door
D - 27.10.2014>>)

[336A is right]

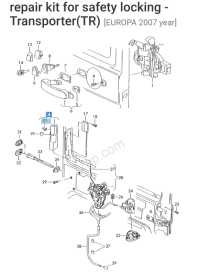
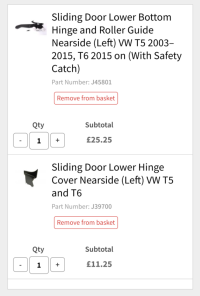
I need the bottom roller and I have the bowden cable safety catch, as my replacement door was a caravelle /multivan one: 7E0 843 397 E
And cover: 7H0 868 639 C


And clips for my handle cover, which was from the original panel van door: 7H0 843 213 panel clip [20]

Screenshot_20220502-154100.png

Ended up at JustKampers:
Screenshot_20220502-161045.png
 
Last edited:
Back
Top