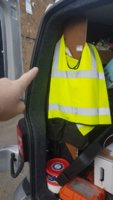
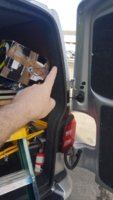
Carpeting 4way stretch in the rear - How i done it.
So a few have asked, so i though i would just list it here as a post so i could refer back to it in the future.
we got two different lots of carpet, some dark grey for the sides and one light grey for the roof areas.... we also got the heavy duty spray adhesive . . .

Next was to remove all the roof lining panels and all the wooden ply lining panels from the rear barn doors. . . . we left the large side panels as they were all silicon-ed in anyway.. . . . each panel was layed out on the floor and sprayed with glue as per the instructions . . . . the carpet was then layed over the top, then edges trimmed down . . . once the glue was dried we felt around the edge for the existing mounting holes and used a small screwdriver to push through the carpet and make holes for the fixings when the panels were offered back up to the van.
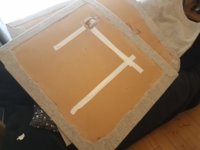
the rear doors were done the same way . . . .
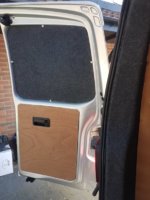
To do the rear metal areas we layed out the carpet and made a rough template.... we then used a piece of cardboard to mask off the rubber surround seal and applied the spray glue . . . we used a trim tool to push the carpet into the edges and once dry . . . . . used a Stanley knife or scissors to trim off the excess .
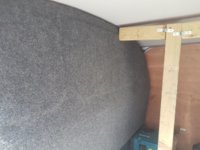
The bulk head was done in a similar manor, a rough cut of carpet. . . . . spray glue from the top section first. Using cardboard as a shield to stop over spray. we then moved down bit buy bit towards the bottom. again trim tools were used to push the carpet into the corner.
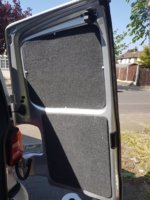
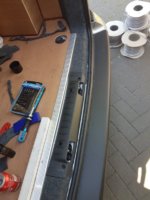
the lower threshold plastic was removed to enable the lower metal work to be covered . . . then replaced afterwards......
The lights were added (see the other thread) and then the panels were refitted . . . .
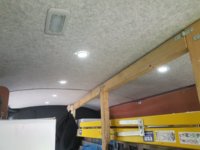
we were very happy with the end result . . . .
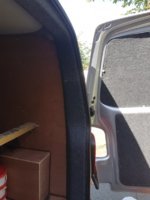
Hope that answers some question . . . . =]
More info:
******************************
absolute new | VW T5/T6 Specialists
T6 carpet lining
******************************
HOW TO PROFESSIONALLY LINE YOUR CAMPER VAN WITH 4-WAY STRETCH CARPET
Learn how to prepare the inside your van ready to professionally apply 4-way stretch carpet to your camper and what products to use. Learn how to prepare the inside your van ready to professionally apply 4-way stretch carpet to your camper and what products to use.
Combe Valley Campers
https://www.youtube.com/watch?v=TON7xuJkQs8&t
.
More info over here > Dellmassive`s -- "how I Done It" -- Thread
.
So a few have asked, so i though i would just list it here as a post so i could refer back to it in the future.
we got two different lots of carpet, some dark grey for the sides and one light grey for the roof areas.... we also got the heavy duty spray adhesive . . .

Next was to remove all the roof lining panels and all the wooden ply lining panels from the rear barn doors. . . . we left the large side panels as they were all silicon-ed in anyway.. . . . each panel was layed out on the floor and sprayed with glue as per the instructions . . . . the carpet was then layed over the top, then edges trimmed down . . . once the glue was dried we felt around the edge for the existing mounting holes and used a small screwdriver to push through the carpet and make holes for the fixings when the panels were offered back up to the van.

the rear doors were done the same way . . . .

To do the rear metal areas we layed out the carpet and made a rough template.... we then used a piece of cardboard to mask off the rubber surround seal and applied the spray glue . . . we used a trim tool to push the carpet into the edges and once dry . . . . . used a Stanley knife or scissors to trim off the excess .

The bulk head was done in a similar manor, a rough cut of carpet. . . . . spray glue from the top section first. Using cardboard as a shield to stop over spray. we then moved down bit buy bit towards the bottom. again trim tools were used to push the carpet into the corner.

the lower threshold plastic was removed to enable the lower metal work to be covered . . . then replaced afterwards......

The lights were added (see the other thread) and then the panels were refitted . . . .

we were very happy with the end result . . . .

Hope that answers some question . . . . =]
More info:
******************************
absolute new | VW T5/T6 Specialists
T6 carpet lining
******************************
HOW TO PROFESSIONALLY LINE YOUR CAMPER VAN WITH 4-WAY STRETCH CARPET
Learn how to prepare the inside your van ready to professionally apply 4-way stretch carpet to your camper and what products to use. Learn how to prepare the inside your van ready to professionally apply 4-way stretch carpet to your camper and what products to use.
Combe Valley Campers
https://www.youtube.com/watch?v=TON7xuJkQs8&t
.
More info over here > Dellmassive`s -- "how I Done It" -- Thread
.
Last edited:


