Best location for consumer unit (renogy gear , advice needed)

sipep

Senior Member
VIP Member
T6 Guru
Hi all.


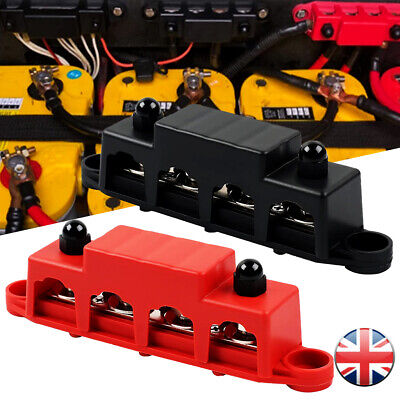
I was going to put my leasure battery under the driver seat. That was the plan until I purchased a second lithium battery. Now it looks like all my electrics are going to my rear quarter.

But there isn't enough space for a consumer unit...

Any thoughts on putting the consumer unit under the driver seat? Any issues with this?


Any experts on the Renogy stuff? Know if I need to run a black cable back to my starter battery?

Also what cable do I need for the Renogy hub (ethernet?)

PXL_20231204_211008248.jpg

PXL_20231204_211001461.jpg

PXL_20231204_210951969.jpg

PXL_20231204_210556211.jpg
 
Where are you going to mount your EHU inlet?

Ideally keep the run between the inlet and CU (with the protection) as short as possible.

If you are going rear quarter can you find space and do an under the bumper inlet or similar? You don't have to use something marketed as a CU, so long as you have an enclosure with space for a dual pole switch and sufficient MCB - should be able to do that in 3 units width in a small enclosure with either an RCD main switch or an RCBO instead of an MCB.

For grounds in a T6 you should be fine using a common ground via the body. Just make sure you use a good factory ground point and put the high current connectors on first.
I could do the inlet under the bonnet and put the consumer unit under the seat, then I'd need to run from the cable from the consumer unit to the rear quarter.

I was going to leave the consumer unit a portable mains adaptor like the image but Ryane advised against this as they are not earthed?

Just not much space for a consumer unit in the rear quarter, otherwise I'd be happy to mount it under the bumper

Screenshot_20231203-163817.png
 
I could do the inlet under the bonnet and put the consumer unit under the seat, then I'd need to run from the cable from the consumer unit to the rear quarter.

I was going to leave the consumer unit a portable mains adaptor like the image but Ryane advised against this as they are not earthed?

Just not much space for a consumer unit in the rear quarter, otherwise I'd be happy to mount it under the bumper

View attachment 221770
If your hookup is under the bonnet, you can put the consumer unit there too. That’s how I set mine up.
 
You don't need double MCBs if your needs are simple. Having more than one MCB allows some discrimination so for instance if someone trips the sockets MCB with a kettle it doesn't trip out a mains fridge on a different MCB. If you have simple needs in a small van you should be fine with one.

What is advised is to ensure you have some double pole isolation. It's rare in fixed wiring to get neutral and line reversed but it is a bit more likely with a large number of EHU points and a variety of cables. If you only switch line (which the majority of MCB/RCBO do) then there is a risk you have an apparently off circuit which is still live.

Generally a dual pole device will be two units wide so the common arrangement is a double pole RCD as a main switch - which gives double pole isolation and RCD protection and then regular MCBs which give overload protection. Theoretically you could use a double pole switch and an RCBO but that will usually still take up 3 units width but the RCBO is bulky and expensive.
 
Last edited:
Don't forget 2 fuses for the 100aH batteries and a fuse on cable from alternator to dcdc. You might also want to add battery isolator switches to make it easier to work on the batteries.
And maybe a victron bp-100?
have you tried connecting the dcdc RJ45 port to the RJ45 on one of the batteries? You may not need the communication hub. I have the non-smart batteries so I use the bt-2 and daisy chain it with the dcdc and batteries. That way I get the dcdc and 2 batteries in the renogy app and don't need the communication hub.
 
The RCBO I have are double pole - they were more expensive than many other options but allowed me to use a small enclosure and fit it under the bonnet.
 
The RCBO I have are double pole - they were more expensive than many other options but allowed me to use a small enclosure and fit it under the bonnet.
Are you 100% sure they are double pole, and single pole with a switched neutral?

 
Don't forget 2 fuses for the 100aH batteries and a fuse on cable from alternator to dcdc. You might also want to add battery isolator switches to make it easier to work on the batteries.
And maybe a victron bp-100?
have you tried connecting the dcdc RJ45 port to the RJ45 on one of the batteries? You may not need the communication hub. I have the non-smart batteries so I use the bt-2 and daisy chain it with the dcdc and batteries. That way I get the dcdc and 2 batteries in the renogy app and don't need the communication hub.
Hi, thanks for the reply, i have the Renogy Comms hub (in photos) is it just normal ethernet cable? Cat 5e?

Any chance you can link/ screen shot the fuses and isolaters from somewhere link simply split charge.
 
Hi, thanks for the reply, i have the Renogy Comms hub (in photos) is it just normal ethernet cable? Cat 5e?

Any chance you can link/ screen shot the fuses and isolaters from somewhere link simply split charge.
This is a good reference:
Thread 'My wiring diagram - I would be very grateful for any feedback' My wiring diagram - I would be very grateful for any feedback

You should have the ethernet cables supplied with the dcdc and batteries.

Something like these for isolator switch:
Battery Isolator Switch 12V-48V 300A, 2Pcs Gekufa Battery Disconnect Isolator Switch Waterproof Master Switch Cut Off Switch Kit for Car Marine RV ATV Boat https://amzn.eu/d/e8ROL4N

And something like this for fuses with correct amp fuse:
All Trade Direct 2 X Strip Link & Midi Fuse Holder For Striplink & Midi Fuses Fuseholder Fits All ***qty2*** https://amzn.eu/d/7d3e5wm
 
I could do the inlet under the bonnet and put the consumer unit under the seat, then I'd need to run from the cable from the consumer unit to the rear quarter.

I was going to leave the consumer unit a portable mains adaptor like the image but Ryane advised against this as they are not earthed?

Just not much space for a consumer unit in the rear quarter, otherwise I'd be happy to mount it under the bumper

View attachment 221770
Hi @sipep I have the same as the above and it as an earth back to the socket, I have opened my portable consumer unit up and drilled a small hole and bought another earth wire from inside and attached it to one of the tie down points.
My van is a Kombi not a camper and I’ve built a box covered with stretch carpet that I've fitted behind the seats and I’ve put my twin 100ah lithium batteries, a 1500watt remote controlled Inverter, a Victron smart charger inside the box.
I've fitted a battery isolation switch and 2 3 pin sockets off the inverter, also put the camping consumer unit on the outside of the box.

John.


IMG_1301.jpeg
 
Last edited:
I could do the inlet under the bonnet and put the consumer unit under the seat, then I'd need to run from the cable from the consumer unit to the rear quarter.

I was going to leave the consumer unit a portable mains adaptor like the image but Ryane advised against this as they are not earthed?

Just not much space for a consumer unit in the rear quarter, otherwise I'd be happy to mount it under the bumper

View attachment 221770
Hi @sipep I have the same as the above and it as an earth back to the socket, I have opened my portable consumer unit up and drilled a small hole and bought another earth wire from inside and attached it to one of the tie down points.
My van is a Kombi not a camper and I’ve built a box covered with stretch carpet that I've fitted behind the seats and I’ve put my twin 100ah lithium batteries, a 1500watt remote controlled Inverter, a Victron smart charger inside the box.
I've fitted a battery isolation switch and 2 3 pin sockets of inverter, also put the camping consumer unit on the outside of the box.

John.


View attachment 221816
So I could just get a portable mains unit and add an earth. These bus bars look decent, do you have a link
 
So I could just get a portable mains unit and add an earth. These bus bars look decent, do you have a link
Yes if you just have EHU mains.

You may need to be careful if you also have mains from an inverter.

Generally small generation sources (like inverters and small frame generators) have no earth and grounding. They are regarded as inherently safe in this configuration as there is no path for current unless you are foolish enough to grasp both the line and neutral output

If you start mixing that design with an EHU, that should be grounded to earth for the RCD, things can get more complicated. A common error is to ground the inverter, this means that now it is dangerous to touch either line or neutral output as there is now a potential path back through you and the van body. Thus you need an RCD on the inverter output.

This is the reason it's generally found that inverter output sockets and EHU sockets are kept separate - then each system can do the right thing with grounding.

@Dellmassive recently reminded me of the very useful Victron document, section 7.5 is an important read. https://www.victronenergy.com/uploa...imited_book/43562-Wiring_Unlimited-pdf-en.pdf

(Thankfully the system we have on the narrowboat is a combined inverter charger EHU and changeover system so all the earthing is handled internally - those systems are a bit big for vans though)
 
Back
Top