You are using an out of date browser. It may not display this or other websites correctly.
You should upgrade or use an alternative browser.
You should upgrade or use an alternative browser.
Veltrim Or Easy Liner
- Thread starter lucas3232
- Start date
-
- Tags
- carpet lining
Me too just about to order my liner but after careful consideration i think the light pale blue rather than going dark what im looking at ( ocean Blue ) seems to have a lot of black fibre in it there's only one go at this is has to be right.
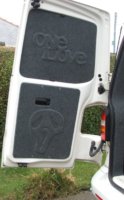
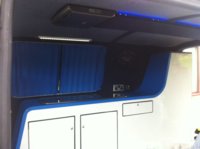
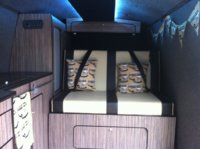
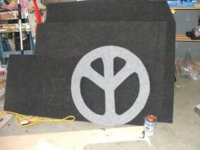
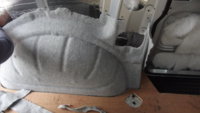
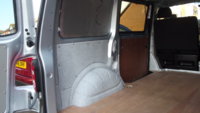
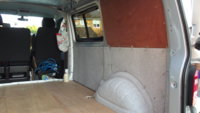
HI I have just done my van 1st attempt , I used easy 4 way stretch & the color silver to keep the intera light , I wanted to do it as removable panels , the wheel arch is a bit more tricky & around the window , & its not quite as easy as they show you ,they have the advantage of doing many ??? It gives you great satisfaction when you do it your self , Here's a few shots how I done it & work in progress 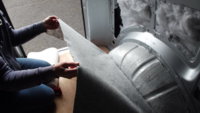
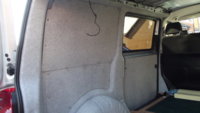
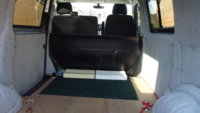


Great job your doing there JE. looks great well done and a nice neat finish. And Cheers Spook been looking at Megavanmats for the dark blue but there Glue is 100 degree melt against the 120 degree but they are very helpful and friendly i contacted them about some off cuts . i just cant make up my mind for what colour ... ocean, pacific, or dark against my acapulco van .. not having windows but a lot of lighting.
looks like Megavanmats have more color selection to choose from or The Metalhouse company look ok
There's a lot of companies all selling the same supplies and clips it seems . But as im a loyal Dog, i would go with who's recommended in here.
oh i also mentioned being a member f T6F to Megavanmats as they give discount to T4 and 3 other groups i said what a shame we don't get discount for the T6 forum.
hi i use it all the time never had a problemGreat job your doing there JE. looks great well done and a nice neat finish. And Cheers Spook been looking at Megavanmats for the dark blue but there Glue is 100 degree melt against the 120 degree but they are very helpful and friendly i contacted them about some off cuts . i just cant make up my mind for what colour ... ocean, pacific, or dark against my acapulco van .. not having windows but a lot of lighting.
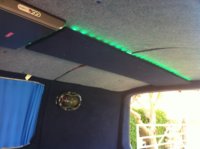
HI I have just done my van 1st attempt , I used easy 4 way stretch & the color silver to keep the intera light , I wanted to do it as removable panels , the wheel arch is a bit more tricky & around the window , & its not quite as easy as they show you ,they have the advantage of doing many ??? It gives you great satisfaction when you do it your self , Here's a few shots how I done it & work in progress View attachment 64188 View attachment 64189 View attachment 64190 View attachment 64191 View attachment 64192 View attachment 64193
Good evening,
I am just finishing of the silent coat and insulation and will be ordering some carpet as soon as I get a sample card through and decide on a colour!!
I noticed that you carpeted around the wheel arches with smaller pieces of carpet but then later pictures show the same areas carpeted to the ceiling. How did you join the pieces as it looks quite a clean join from here!!
Cheers.
Thanks again Spook for the pics i like the dark walls... but now you got me thinking 2 tone with the roof lol
Hi TB most people like a smooth full panel finish without showing the fixingsGood evening,
I am just finishing of the silent coat and insulation and will be ordering some carpet as soon as I get a sample card through and decide on a colour!!
I noticed that you carpeted around the wheel arches with smaller pieces of carpet but then later pictures show the same areas carpeted to the ceiling. How did you join the pieces as it looks quite a clean join from here!!
Cheers.
, but I wanted separate panels & fill the in between bits separate, so I can gain access at a later date if needed . Here is progress so far with all the button fixings now pushed fully & the start of the wiring
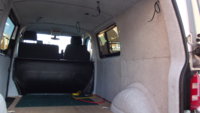 in which I Am more that please with For my 1st attempt ,
sorry good luck with your conversionHi TB most people like a smooth full panel finish without showing the fixings
, but I wanted separate panels & fill the in between bits separate, so I can gain access at a later date if needed . Here is progress so far with all the button fixings now pushed fully & the start of the wiringView attachment 64561 in which I Am more that please with For my 1st attempt ,
Thank you.Hi TB most people like a smooth full panel finish without showing the fixings
, but I wanted separate panels & fill the in between bits separate, so I can gain access at a later date if needed . Here is progress so far with all the button fixings now pushed fully & the start of the wiringView attachment 64561 in which I Am more that please with For my 1st attempt ,
I intend to keep things accessible too. There is no way I'm going to guess everything I'll need on the first attempt!
I was actually referring to the carpet joint lower down on the C pillar, just in front of the wheel arch. I hope to at least do the metalwork on each side in one piece but if I have to join pieces of carpet I'd be interested to see other people's attempts!
Hi TB when doing the wheel arches gave myself enough material to go around the corners , the only piece I used as a larger piece was a panel to cover from the top ceiling line down to the cross rail to where it comes under where the panel covers the window drivers side , then cut out the middle piece to fix around the window trim , all the rest was done with strips of carpet & butt joined If that all makes sense & of help to you ,I have taken a few snaps of the joints up close so they are exaggerated in your face , these joint have not yet been fluffed up with a small brass wire brush which should make them even less on show ??




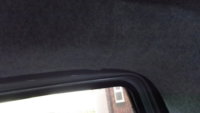


invisible seams .... just like joining a carpet...but with out the backing tape .. leave enough to over lap, then with 1 cut the 2 pieces together with a Stanley blade so both halves match the same cut. it don't need to be a dead straight line either just so the 2 half's match . Then glue down squeezing both half's close together then once dried . blend the 2 half's together with a semi stiff brush Don't over work it or it'll go over fluffy on the seam / join .
Thank you both.
Similar threads
- Replies
- 3
- Views
- 339
- Replies
- 9
- Views
- 866
- Replies
- 5
- Views
- 524
- Replies
- 0
- Views
- 236

