Planning out our first campervan

jonesynick

New Member
Hi all. After months and months of day dreaming about converting my first T6, watching countless You Tube videos and reading the forums, I'm now at the planning stage. Don't have a base van yet - still waiting for the right one but would appreciate your thoughts on the different stages of a van build (and as importantly the best order to do stuff). I may need to change audio, alloys but not thinking too much about that until I buy the van. I may also retrofit solar at a later date if I find it will be worth the cost. We will be mainly using it on-grid with the occasional night off-grid) in the UK and Europe.

These are my thoughts (in order) after getting the van:
  1. Strip, clean and sort any rust/damage to internal of van
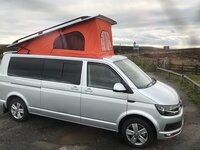
  2. Fit windows (if needed) and pop-top roof and bed. Will get done professionally as too scared to do myself
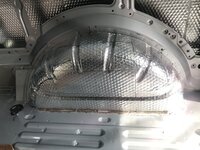
  3. Sound proofing/insulation
  4. Fit diesel heater and vent
  5. Fit swivel to passenger seat
  6. Fit leisure battery under passenger seat with split charger/B2B charger
  7. Run electrical wiring for fuse box, lights, 12v sockets, fridge etc
  8. Fit EHU, consumer unit and 12v battery charger, wiring for on-grid sockets
  9. Flooring and wall covering (haven't decided what this will be)
  10. Fit RIB bed
  11. Cupboard build including fridge and removable table
  12. Sink and water (cold only with removable water containers and submersible pump)
  13. Gas hob
  14. Fit 12v items and on-grid sockets
So my main questions are:
Have I forgotten any major steps for the build?
Have I got the sequence right or is it recommended to do it a different way?

Any advice will be greatly appreciated!
 
I’d advise running the van for a few thousand miles to make sure it’s a ‘keeper’ before you spend hard earner £ and time on the conversion. Possibly done alongside bullet point #1.
IMO solar is a must for a camper van; you may plan on being on-grid but it doesn’t always go to plan and it is generally easier to do most installations from the start rather than retrofit.
I’ve not installed windows myself but I believe the best result is to carpet line the area around apertures before fitting the windows.
An underslung water tank will increase storage space inside the van.
Thanks DXX. When to do the carpet lining is one of the areas I'm not sure about especially in relation to wiring. Is it best to do the lining early and pull cables through or wiring first and then carpet line? I agree about the underslung water tanks - I may well go down that route as when we've hired campervans previously lack of storage has been a big issue.
 
Looks about right to me.
Put wiring in first, then line, and put spare wires in for inside lights etc (and record where they are) for future changes.

Pete
 
Thanks DXX. When to do the carpet lining is one of the areas I'm not sure about especially in relation to wiring. Is it best to do the lining early and pull cables through or wiring first and then carpet line? I agree about the underslung water tanks - I may well go down that route as when we've hired campervans previously lack of storage has been a big issue.
As @Pete C said, emphasis on the extra cables......and label both ends!
 
Advice is usually furniture before bed, so that you can get bed centred between van side and units. I had to put the RIB in first though and there's no space on either side, so all good.
If fitting the heater under the van, drill and fit the RIB fixing kit while the van's raised and some covers are off.
Wall covering will probably come earlier, depending what you mean. The panels hold the insulation in place.
You missed:
15. tear your hair out trying to locate and eliminate rattles and squeaks.
 
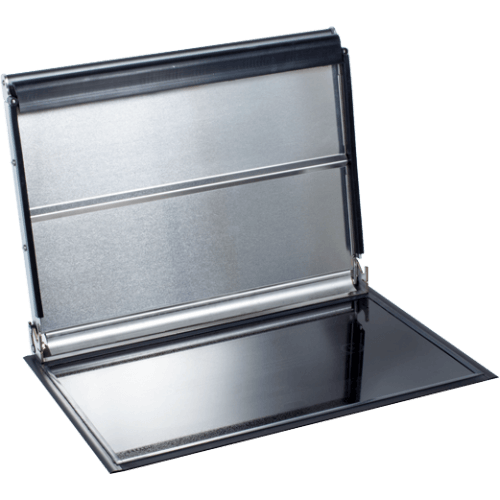
What may be a worthwhile purchase for some folk. Is that the Diesel Walas Cooker, can be plumbed into the vehicles fuel system. That fumes from its combustion are led away via an exhaust that vents out side. These days they have smart ceramic glass appearance That they can also be used as a very vehicle space heater blower. I had one for years, in fact I still have it somewhere, though mine ran from paraffin/kerosene. They use very little fuel even on full heat and very little current except at start up. It works in a similar way to most eberspacher type heaters, except it heats two cooking rings, one large, one small. The ingenious part is the function provided by the lid. One may after cooking, just pull the lid down and a thermoelectric switch within the lid, allows a small but effective fan to blow hot air around the vehicle. Alternatively the cooker may be started from rest with the lid down and the cooker just functions as a space heater. I have used them in some exceptionally cold weather and the easily kept my vehicle cosy. Mine had two heat settings.

The Cookers available today, are far more attractive and domestic looking than mine, which was intended for a boat. Walas have several models and also have ovens too. Walas also have space heaters. All these are very well made and use a lot of SS. they are mad in Finland. They are not cheap, but because of the duel function, frugal fuel and battery use, I believe that hey are excellent value for money.


Last edited:
  • Like
Reactions: DXX
16. Write down your budget, date it and seal it in an envelope now! When you think you’ve finished, crack open a beer and the envelope to give yourself a good giggle!

Leg-pulling aside, good list and running order. Maybe leave yourself a few “pull lines” in strong/builders string so you can always pull a cable through in future
 
Advice is usually furniture before bed, so that you can get bed centred between van side and units. I had to put the RIB in first though and there's no space on either side, so all good.
If fitting the heater under the van, drill and fit the RIB fixing kit while the van's raised and some covers are off.
Wall covering will probably come earlier, depending what you mean. The panels hold the insulation in place.
You missed:
15. tear your hair out trying to locate and eliminate rattles and squeaks.
Great tips, thanks boxelder. Item 15 will definitely happen.
 
16. Write down your budget, date it and seal it in an envelope now! When you think you’ve finished, crack open a beer and the envelope to give yourself a good giggle!

Leg-pulling aside, good list and running order. Maybe leave yourself a few “pull lines” in strong/builders string so you can always pull a cable through in future
Thanks JOG - great tip with the pull lines. Not sure I dare write down the budget - my wife might find it ;)
 
Oops, I forgot an important one! Upgrade to VIP on the forum and get access to a wealth of “How to...” guides, diagrams and discounts and experts lurking about!
 
Thanks JOG - great tip with the pull lines. Not sure I dare write down the budget - my wife might find it ;)
I was going to add that, for an addition element of excitement, you could ask your wife to keep the envelope safe!!!
 
I’ll second @Kind of Blue recommendation on the Wallas XC Duo. Best bit of kit in my van without a doubt.
I believe yours may have a balanced flue? Mine was the older type which is still available. Perhaps if asked or you may want to volunteer, you may let people know a little about it and how you use it. It is a number of years since I last used mine which was in a Landrover 101 Forward Control Radio Body.
 
I believe yours may have a balanced flue? Mine was the older type which is still available. Perhaps if asked or you may want to volunteer, you may let people know a little about it and how you use it. It is a number of years since I last used mine which was in a Landrover 101 Forward Control Radio Body.
There’s plenty already on the Forum, it is the balanced flue type.
 
I’ve not finished yet. But I bought sound deadening, b2b charger and EHU (for under bonnet inlet) and swivel base for double passenger seat.
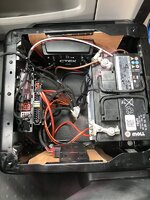
First job was strip out the cab and then install sound deadening and fit all cables and battery and CTEK. Then refit with the swivel base installed.
Next was the windows. I fitted them myself, pretty easy, used a nibbler attachment. The main dilemma was carpeting the interior and having that carpet edge over the window frame and fitting the windows which sort of all need doing together but isn’t possible when you’re doing it outside the house. So I used pieces of the window u-channel as spacers when I fitted the windows, then removed those afterwards leaving enough space to tuck the carpet between the panel and the glass at a later stage using a trim tool. Worked well.
Then sound deadening inside panels, then thermal liner over that.
I then ran all my lighting cables.
Then it went for the pop top.
I gave the pop top man two 6m solar cables to install in the roof trim and finish at the bottom of the b-pillar ready to hook up to the ctek. Should make solar installation plug and play at a later date.
Back from pop top I sound deadened and thermal insulated the floor then made and fitted my ply floor. Then put down some Altro floor-not stuck down yet, just thrown down at the moment.
Just made a panel for the rear quarter with a blind fixed behind it (see what have you done today) and I’m waiting for my furniture to be made. We are going for a u-shaped seating layout.
Just booked it in for a planar diesel heater after the furniture has gone in because I want to decide where to put the air inlet once the furniture is in.
Hope that helps a little bit.
That order has worked for me so far.
I have bought all the electrical stuff like mains charger and 12v control panel and sockets and switches and the spare lounge looks like a vw dumping ground.
Oh yeah and bigger step and rear valance trim etc etc.
Write a list and just keep adding to it.
 
I’ve not finished yet. But I bought sound deadening, b2b charger and EHU (for under bonnet inlet) and swivel base for double passenger seat.
First job was strip out the cab and then install sound deadening and fit all cables and battery and CTEK. Then refit with the swivel base installed.
Next was the windows. I fitted them myself, pretty easy, used a nibbler attachment. The main dilemma was carpeting the interior and having that carpet edge over the window frame and fitting the windows which sort of all need doing together but isn’t possible when you’re doing it outside the house. So I used pieces of the window u-channel as spacers when I fitted the windows, then removed those afterwards leaving enough space to tuck the carpet between the panel and the glass at a later stage using a trim tool. Worked well.
Then sound deadening inside panels, then thermal liner over that.
I then ran all my lighting cables.
Then it went for the pop top.
I gave the pop top man two 6m solar cables to install in the roof trim and finish at the bottom of the b-pillar ready to hook up to the ctek. Should make solar installation plug and play at a later date.
Back from pop top I sound deadened and thermal insulated the floor then made and fitted my ply floor. Then put down some Altro floor-not stuck down yet, just thrown down at the moment.
Just made a panel for the rear quarter with a blind fixed behind it (see what have you done today) and I’m waiting for my furniture to be made. We are going for a u-shaped seating layout.
Just booked it in for a planar diesel heater after the furniture has gone in because I want to decide where to put the air inlet once the furniture is in.
Hope that helps a little bit.
That order has worked for me so far.
I have bought all the electrical stuff like mains charger and 12v control panel and sockets and switches and the spare lounge looks like a vw dumping ground.
Oh yeah and bigger step and rear balance trim etc etc.
Write a list and just keep adding to it
Cheers @Bigsidavies. Appreciate you taking the time to reply. Converting a van seems pretty scary until you break it down into the individual tasks. Really need to buy the van so I can start doing rather than just planning!!
 
Cheers @Bigsidavies. Appreciate you taking the time to reply. Converting a van seems pretty scary until you break it down into the individual tasks. Really need to buy the van so I can start doing rather than just planning!!
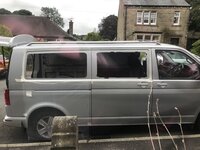
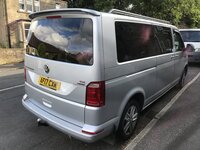
Yeah. I started looking last October and bought a van in July. More difficult than I thought. Wanted a 150 and ended up with a 204 Highline 4 motion. Blew the budget but I was getting impatient and prices were going up. Very happy with my purchase so far though. Glad I got this spec tbh.
 
Nice. Is it LWB or SWB? Couldn't tell from the photos. Where did you get the van from? I plan to properly start looking in the New Year assuming lockdown 3 hasn't kicked in by then!
 
Back
Top