OEM Front & Rear Mud Flaps -- How I Did It --

Dellmassive

T32 204 DSG LWB SLN PV MY18 & T30 SWB KMB MY67
VCDS User
Moderator
VIP Member
T6 Master
OEM Front & Rear Mud Flaps -- How I Did It --

I was going to do a whole video with all the bells and whistles . . . . . . but after going through it all it wasn't worth a video.

so we have a write up instead.

The task was simple - to Procure and install a full set of VW OEM T6 mudflaps... simples.

Some may say they are useless, some may say they are essential for preventing stone chips on side rails and body work etc. . . I say i just like the look of them.

I had them on our MY08 T5 and paid a fortune for them to be dealer fitted . . . . . . only to have the smashed off within 3mnths due working on many a building site and rough ground . . . . . nower days its more tarmac than mud so i thought i would give it another go.

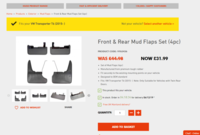
First stop was a google search . . . . . which lead me happily to ebay and these...


Something i wasn't aware of was that the mudflaps were tailgate/barn door specific . . . .

The details read:


BRAND NEW GENUINE VW TRANSPORTER T6 BARN REAR DOOR FRONT & REAR MUD FLAPS SET


These specifically designed mud flaps protect your vehicle from debris, loose chippings, mud, dirt and minimise the road spray.


Brand: Volkswagen (Genuine OEM)

Condition: Brand new

Manufacturer Part Numbers: Front: 7H0 075 111

Rear: 7H0 075 101

Fit models: VW Transporter T6 BARN REAR DOOR 2015, 2016, 2017, 2018

not suitable for tailgate models

Set contains: 2 x front mud flaps

2 x rear mud flaps


No problems there, so i ordered a set.
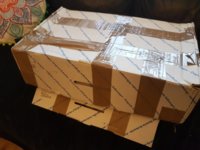
20181008_161142.jpg

.

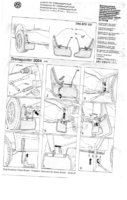
The supplied instruction were simple enough . . . .
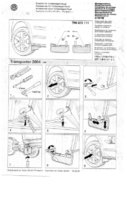
Image (169).jpg

.

Image (170).jpg

.

so much so that i didnt even bother Jacking up the van or even removing the wheels like the fitting instructions implied.

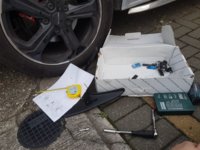
This is what was in the box . . . .
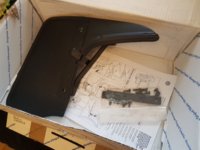
20181008_161157.jpg

.

Not a lot right . . . . so over to the van.

The fronts were simplicity itself . . .
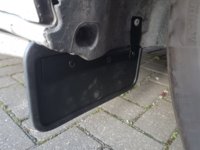

20181008_160932.jpg

just unscrew the torx screw holding the wheel arch liner in . . . . . and then pull out the rubber bung blocking the whole at the bottom of the arch.
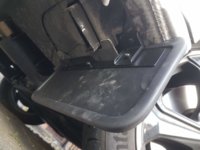
20181008_160941.jpg

.

The supplied rubber compression bung slipped in the hole with the help of a bit of organic lube . . .(i licked it) then threaded in the supplied bolt . . .
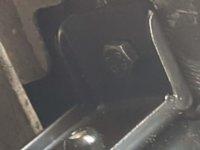
20181008_160945.jpg


More info over here > Dellmassive`s -- "how I Done It" -- Thread

.


.
 
Last edited:
So that was the fronts . . .

The rears were slightly more involved . . . . .The guide required a 7mm drill bit to drill some holes in the lower edge of the plastic bumper...

Now at this point you may want to put the van up on ramps or jack it up with axle stands . . . . so you get the clearance to get under there with a battery drill. . . . . . luckily i have a 90deg angled drill which is great for getting into tight spaces . . . . . so i used that. . . . the instruction also called for a tape measure to measure out 44mm from the wheel arch for the first mounting hole.....

20181008_164526.jpg

.

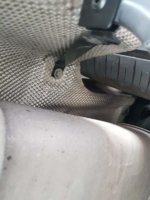
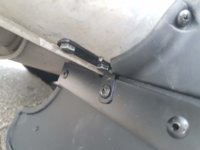
The first step was to get underneath and remove the bolt up on the heatsheild (i done the drivers side first), that was easy to get out. . . . . .and then bolted in the long bracket.


20181008_164537.jpg

next was to line up the lower brackets which had six holes that needed drilling, using the tape measure for the 44mm and holing the mudflap in place i market the holes with a sharpie the bent the mudflap out the way.

The holes were easy to drill as it only goes through the very soft plastic of the rear bumper outer cover. Pushing the mudflap back down enabled the first bolt to pushed through... The tricky bit was to now get the supplied back plate up on the backside of the bumper cover so the new bolt would sandwich the lot together.


20181008_164532.jpg

.

moving allong untill all 6 bolts were snug . . . .

20181008_164544.jpg

.

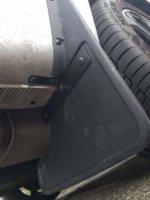
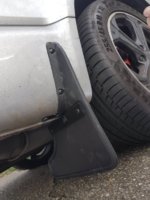
last up was the two supplied self-drill black screws that hold the side pieces on the bumper . . . . . making sure the bumper side peices were perpendicular to the ground the screws were drive in with the screw-gun.

20181008_164541.jpg

.

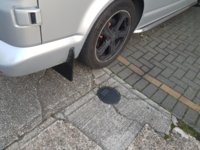
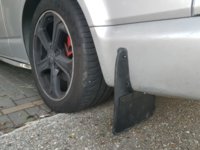
The final result looks like this . . . .

20181008_181856.jpg

.

The passenger side was basically . . . exactly the same procedure . . . . .

end result:

20181008_181909.jpg

.

All in it took about and hour and a few cups of tea . . . . .

Im happy with the look and just about got the fitted before the onslaught of the British winter time . . . .

And yes before you say it i should have washed the van first . . . . . . .but as always time was an issue.

Simple basic tools were required, the rears may need a ramp/jack.

Hope that helps out anyone that was wondering. . . . . or planing the same job.

Much Love & Stay Happy =]
 
Last edited:
I’ve fell in love with this forum again. I bought some months ago but never fitted them. I’m on it. Cheers
 
Strange why it's not suitable for a tailgate. Is there tailgate specific ones then?

Cheers
Paul
 
Strange why it's not suitable for a tailgate. Is there tailgate specific ones then?

Cheers
Paul

The tailgate bumper profile is different to the barndoor bumper profile. Have a look at your arch liner and you’ll see what I mean (looking towards the rear of the vehicle)
 
The tailgate bumper profile is different to the barndoor bumper profile. Have a look at your arch liner and you’ll see what I mean (looking towards the rear of the vehicle)

Interesting, didn't know that thanks
 
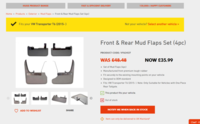
Front & Rear 4pc Mud Flaps Set for VW Transporter T6 (2015 on) [Tailgate] - Van Demon

Fits your VW Transporter T6 (2015- )

Front & Rear Mud Flaps Set (4pc)
PRODUCT CODE: VY63437
WAS £48.48
NOW £35.99

  • Set of Mud Flaps (4pc)
  • Manufactured from premium tough rubber
  • Fit securely to the existing mounting points on your vehicle
  • Designed to OEM standard
  • Fits: VW Transporter T6 (2015- ). Note: Only Suitable for Vehicles with One Piece Rear Tailgate.


upload_2019-12-3_9-43-56.png
 
I purchased a set for my T5 from the same seller, unfortunately I can’t fit my fronts as my aftermarket side bars are to long. Bloody nuisance.
 
So that was the fronts . . .

The rears were slightly more involved . . . . .The guide required a 7mm drill bit to drill some holes in the lower edge of the plastic bumper...

Now at this point you may want to put the van up on ramps or jack it up with axle stands . . . . so you get the clearance to get under there with a battery drill. . . . . . luckily i have a 90deg angled drill which is great for getting into tight spaces . . . . . so i used that. . . . the instruction also called for a tape measure to measure out 44mm from the wheel arch for the first mounting hole.....

View attachment 30055

.

The first step was to get underneath and remove the bolt up on the heatsheild (i done the drivers side first), that was easy to get out. . . . . .and then bolted in the long bracket.


View attachment 30056

next was to line up the lower brackets which had six holes that needed drilling, using the tape measure for the 44mm and holing the mudflap in place i market the holes with a sharpie the bent the mudflap out the way.

The holes were easy to drill as it only goes through the very soft plastic of the rear bumper outer cover. Pushing the mudflap back down enabled the first bolt to pushed through... The tricky bit was to now get the supplied back plate up on the backside of the bumper cover so the new bolt would sandwich the lot together.


View attachment 30057

.

moving allong untill all 6 bolts were snug . . . .

View attachment 30058

.

last up was the two supplied self-drill black screws that hold the side pieces on the bumper . . . . . making sure the bumper side peices were perpendicular to the ground the screws were drive in with the screw-gun.

View attachment 30059

.

The final result looks like this . . . .

View attachment 30060

.

The passenger side was basically . . . exactly the same procedure . . . . .

end result:

View attachment 30061

.

All in it took about and hour and a few cups of tea . . . . .

Im happy with the look and just about got the fitted before the onslaught of the British winter time . . . .

And yes before you say it i should have washed the van first . . . . . . .but as always time was an issue.

Simple basic tools were required, the rears may need a ramp/jack.

Hope that helps out anyone that was wondering. . . . . or planing the same job.

Much Love & Stay Happy =]
Awsome, just purchased same set for my Caravelle, the tailgate version, thought the supplied instructions were a bit vague but you clear instruction make it look like a very simple job, I know what i'm doing Saturday morning, cheers buddy
 
Just had to look this thread up again for todays contract! Bought some aftermarket ones with no instructions ¯\_(ツ)_/¯

In fairness they look better than the previous ones I had
 
Dellmassive, thanks for posting this thread. I have bought a set of front and rear OEM as in your thread. They have arrived without any fitting instructions in either set, just wanted to say thanks for posting the details of how to fit them. I know it's not complex but the information that you provided gave me the will to carry on.
 
@Creamytash glad the thread helped out.

Post some pictures of your fitting and final results, plus any extra tips you may have to help others.
 
Back
Top