Over two years later and I’ve finally done it! @drooke has a tidy solution, too. @Dougie2100, @Cwillt6, @j.y.ashman had asked for updates about a year ago. Sorry this is coming only now!
Essentially, I just followed through with the plan.
Obstacles and notes?
1. I’m bad at soldering. Luckily, I have a mate that came round today to show me how to tin each end and use flux properly. And four hands is very useful.
2. I was scared to cut the hole. I put my big boy pants on and bought a 22mm hole saw which made light work of the job. Also needed some small self-tappers, which didn’t come with my plugs.
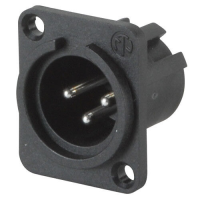
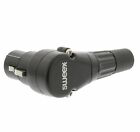
3. I used XLR plugs in the end. I used this socket (below and on eBay) and this plug (below and no longer available where I bought it on eBay).
4. I used some hot glue on the socket (inside of the seat) to protect the wires and prevent shorts. I used fabric tape inside the plug end to ensure no shorts.
5. Then I just used some fabric tape, zip ties and cable conduit to protect the wires.
6. Like @drooke, I mounted my plug to the side. At the front it would be kicked and damaged. At the side it has to be low enough to not interfere with hand break usage.
I’m incredibly pleased. My previous solution for preserving the heated seats was a very long cable from under the driver’s seat (I previously ran this long cable from under the passenger seat when I fitted the swivel base) which reached around to the back of the swivel so it could enter the based without pinching wires. This was awkward and annoying. My wife and children kept pinching the wires in the seat, a wire pulled out of the hardness from rough packing and we ultimately went 6 months with it unplugged to spare the effort.
This is super tidy. I hope you’ll agree. All told, less than £30 I think.
Minimum parts list:
- 8 pin connections x 2 (both ends, part numbers above)
- a socket and plug of your choice
- wire
Here’s some photos.
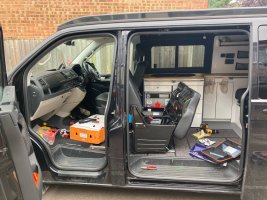
1. Messy job. Ended up using loads of different tools.
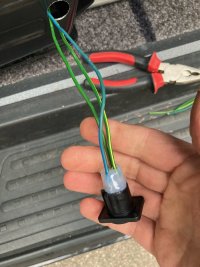
2. Showing my socket, soldered in, with hot glue to protect and insulate.
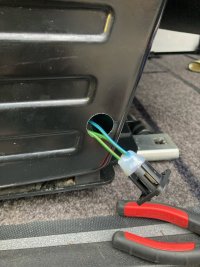
3. Showing hole and mounting position. (Hole cut pre-soldering.)
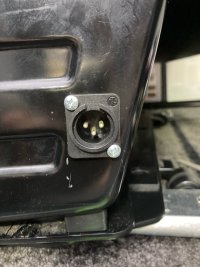
4. Self tapping screws. Socket is very secure. Recommend small pilot hole.
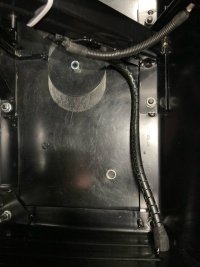
5. Tidy wires inside the base, with conduit, fabric tape and zip tie.
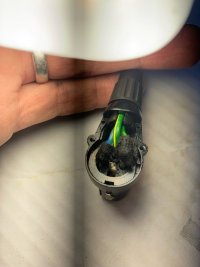
6. Fabric tape to protect wires within plug.
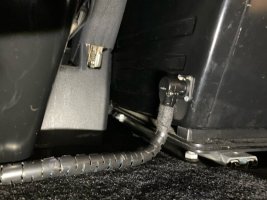
7. Final product. Wire runs from under driver seat the short distance under the hand break. When not in use, wire tucks neatly under driver’s seat.
Wife can now have a warm bottom this winter!
Essentially, I just followed through with the plan.
Obstacles and notes?
1. I’m bad at soldering. Luckily, I have a mate that came round today to show me how to tin each end and use flux properly. And four hands is very useful.
2. I was scared to cut the hole. I put my big boy pants on and bought a 22mm hole saw which made light work of the job. Also needed some small self-tappers, which didn’t come with my plugs.
3. I used XLR plugs in the end. I used this socket (below and on eBay) and this plug (below and no longer available where I bought it on eBay).


4. I used some hot glue on the socket (inside of the seat) to protect the wires and prevent shorts. I used fabric tape inside the plug end to ensure no shorts.
5. Then I just used some fabric tape, zip ties and cable conduit to protect the wires.
6. Like @drooke, I mounted my plug to the side. At the front it would be kicked and damaged. At the side it has to be low enough to not interfere with hand break usage.
I’m incredibly pleased. My previous solution for preserving the heated seats was a very long cable from under the driver’s seat (I previously ran this long cable from under the passenger seat when I fitted the swivel base) which reached around to the back of the swivel so it could enter the based without pinching wires. This was awkward and annoying. My wife and children kept pinching the wires in the seat, a wire pulled out of the hardness from rough packing and we ultimately went 6 months with it unplugged to spare the effort.
This is super tidy. I hope you’ll agree. All told, less than £30 I think.
Minimum parts list:
- 8 pin connections x 2 (both ends, part numbers above)
- a socket and plug of your choice
- wire
Here’s some photos.
1. Messy job. Ended up using loads of different tools.
2. Showing my socket, soldered in, with hot glue to protect and insulate.
3. Showing hole and mounting position. (Hole cut pre-soldering.)
4. Self tapping screws. Socket is very secure. Recommend small pilot hole.
5. Tidy wires inside the base, with conduit, fabric tape and zip tie.
6. Fabric tape to protect wires within plug.
7. Final product. Wire runs from under driver seat the short distance under the hand break. When not in use, wire tucks neatly under driver’s seat.
Wife can now have a warm bottom this winter!


