Rob's T6 Overland Camper Build Thread

T6NOMAD

Member
VIP Member
T6 Pro
Creating this thread to share photos on progress of the build and to share ideas. Been reading this thread and learning all I can as well as incorporating my experience of remote Overlanding around the African continent over the past 15 years. The build is leaning towards an offroad capable, offgrid ready yet comfortable daily driver. I am originally from South Africa and living/ working in Europe (My parents are from Poland).

The Planned Build:
  • Swamper Alloys + AT Tyres (Summer wheels) - These will likely be 17"... Maybe an 18" depending if they will fit.
  • 18" Winterwheels (Kumho WinterCraft 235/55/18) checkmark-16.png Fitted
  • Bravo Snorkel
  • 45mm Lift
  • Digital Instrument Cluster
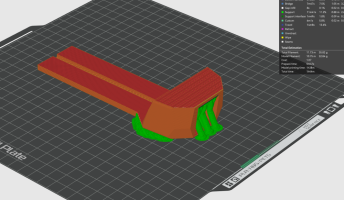
  • Smart Rear view mirror (I will 3D print a holder for the rear camera and will stick it to the top of the Tailgate) checkmark-16.png Fitted
  • Pop Top tent (Undecided on brand at the moment)
  • 2 x 120W Semi-flex Solar Panels on the roof
  • Kitchen Unit + Domentic Sink/ Gas hob + Fridge
  • Safari Style popup windows on both sides
  • Glass install on rear quarter windows, Fake window on the back
  • Vamoose Awning Rail + Frontrunner Pull out awning with sides
  • 3/4 Rock n Roll bed
  • Bonnet mount Solar Panel
  • Underbody Water tank
  • Underbody Fuel Tank
  • Underbody Protection
  • Spotlights / Lazer lamps
  • Spare wheel carrier
  • Change all engine bay piping to silicone
I will be driving the VAN to the UK around March 2025 to have the roof and kitchen fitted so I am open to suggestions, tips, etc

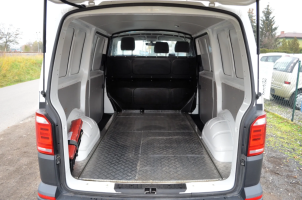
The Van itself is a LHD, 2019 T6 2.0 TDI 4Motion, Manual, Dual Door, Tailgate, Nordic kit, ACC, MSFW, Heated Seats. 175,000km on the odo.

This is the van when I picked it up. It was purchased on 18 November 2024.
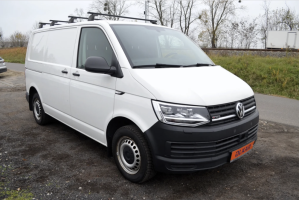
Screenshot 2024-11-18 151051.png

The first mod done: I then fitted some nice 18" Alloys + Winter tyres and removed the roof rack as I don't use it. I have sent it in for a complete service; all the oils and fluids have been changed, gearbox oil flushed, all filters changed, new Brembo discs and pads and new battery.

IMG_3911.jpeg

I will continue to update this thread on my build as I go.
 
Last edited:
For overlanding outside Europe I would tend towards Steel Rims because they would be easier to repair in 3rd World countries. Inside Europe so long wheels are readily available less of a problem. One or two spare tyres or wheels puncture repair etc, jack etc. Insulate the body.

Alu Cab make tough well thought out roof tents there are one or two others.

I would tend towards a Wallis stainless steel Diesel Hob with fan operated lid. Use the same fuel that is in your tank, it simplifies things. They are contained so no naked flame, fumes vent though chimney pipe. Finish cooking, pull down the lid and a therm o switch will pump warm air around the vehicle. Very reliable and cheep to run uses little amp-age and little fuel very efficient. Used in boats and campers they come in various forms take your pick. Probably not cheep these days but what is. I used one for years though mine was paraffin fuel absolutely brilliant kept my Landrover 101 Forward Control radio Body well warm even at -17degC outside temperature could run it all day or all night. Want a cuppa, no problem just lift up the lid and put on the kettle. No not on you on the hot plates.

For a back up on a walk a Primus Multi Fuel. Will run on small gas bottles, diesel, paraffin, petrol, practically anything sensible. Old fashioned but small reliable, fuel it with what you want, needs a wind screen.

The best coms, very, very important, so you can communicate with us!!:p

Thanks for this info, its definitely useful info. What you mention is basically my setup in Southern Africa - Very reliable. Europe, I see as far more developed so getting parts couriered is quick, easy and affordable.

Tent wise I am doing a cutout in the existing roof, 'a-la-california style' so it offers internal living space and the ability to stand.

I've considered a diesel cook top - will look into this as it will certainly make things a lot easier.

Wheels wise - I'm not a fan of steelies, so its purely aesthetic and I am happy to live and work with the consequences if things go wrong. Fixing punctures is easy.

What sort of comms are used in Europe? In Africa we all have VHF radios and you buy a 4x4 club license which all the clubs share and comms are easy. I will have a Starlink mini for remote work reasons

I don’t understand the change to alloys either

As above, its personal choice - I am not a fan of Steelies.
 
  • Like
Reactions: CAB
First interior mod took place over the weekend :cool:

Removed the rear view mirror only to discover that I have a rain sensor and that the bracket is completely different to that of a normal mirror.

The creative side immediately kicked in and I started designing a simple bracket to replicate the factory mirror; this proved a bit more tricky than I had planned but in the end I came right.

IMG_8152.JPG

Screenshot 2024-12-09 081325.png

The next was to fabricate a bracket on the rear tailgate door to house the camera.

Screenshot 2024-12-05 165052.png

And the mirror is fitted and works a treat!


Screenshot 2024-12-09 081908.png
 
Holy cow! When I worked my computer skills only extended as far as using the pooter to prop open the office door in hot weather, and then there's you fellers casually designing and making stuff like this!
 
My skills are still very basic when it comes to designing in 3D for 3D printing; but its enough to get by and make/ fix things around the house and car. Definitely a useful tool
 
As your van has a Nordic kit fitted, can I ask Does it have an engine pre heater fitted?
I’m trying to find out exactly where on a T6 this would be mounted, we are prepping our van for a winter Sweden/Finland trip next year
Cheers
Following you build
 
As your van has a Nordic kit fitted, can I ask Does it have an engine pre heater fitted?
I’m trying to find out exactly where on a T6 this would be mounted, we are prepping our van for a winter Sweden/Finland trip next year
Cheers
Following you build

I will be back home on 20 Jan and will take some photos for you. Currently road-tripping around Thailand for the December holidays :-)
 
Firstly compliments of the season to everyone, may 2025 be the best year yet!!!

So after a long 7 week holiday through Thailand I have had ample time to plan my build; after getting back I couldn't wait to get started.

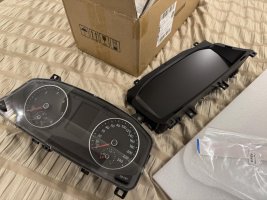
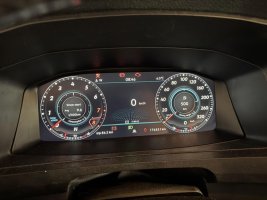
First order of the day was to upgrade the instrument cluster, a pretty straight forward job to do and absolutely LOVE the end result!

IMG_1566 (Resized).jpg

IMG_1568 (Resized).jpg

IMG_1623 (Resized).jpg

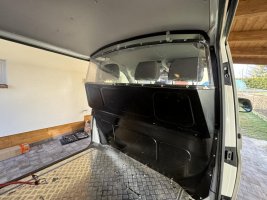
Then the next mod was to remove the bulkhead so that we can get the front seats out.

IMG_1570 (Resized).jpg

IMG_1571 (Resized).jpg

IMG_1573 (Resized).jpg

IMG_1576 (Resized).jpg

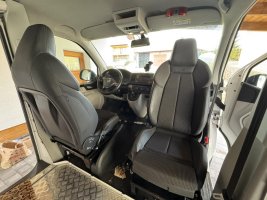
Once that was done we took all the seats out and fit the combined seat and swivel base to the passenger seat.

IMG_1581 (Resized).jpg

IMG_1582 (Resized).jpg

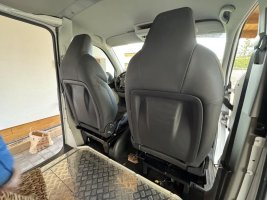
Having realised that my new Audi seats arent just going to be a direct fit to the bases (I thought the base was already wider but wasn't) we went to the shop, bought on 80mm x 6mm flat bar and got to work making brackets to get the seats to fit... took some time but we finally got them fitted - unfortunately we didn't take progress photos of the brackets but here are some fo the seats fitted. Arent they just beautiful?!??!

IMG_1628 (Resized).jpg

IMG_1633 (Resized).jpg

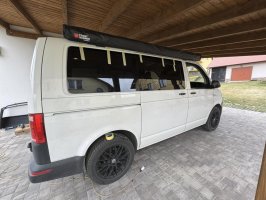
Then the big exercise was next, the scary one, cutting into our new van to fit windows... there's something scary about doing this

IMG_1612 (Resized).jpg

We then drew lines, used a sabre saw and cut the holes out for the left side of the windows. I had to use my angle grinder to fit up those cuts to put the beading in.
For record, We decided to do one side first so that we could line them up.

IMG_1614 (Resized).jpg

IMG_1625 (Resized).jpg

Next was fitting of the awning, I bought the Thule brackets that require me to drill into the roof, fit rivnuts and attach that way without the rail. I don't like the look of the awning rail and couldn't use the rail on top because the Austops tent will use those gutters to attach.

Went for the FrontRunner awning because I like the add-a-room sides for it, have the net options for mosquitos in the summer and closed sides for the winter. It also fits with the Swamper Offroad Tourer look Im working towards.

IMG_1635 (Resized).jpg

And then for sh!ts and giggles I 3D printed the tow bar ball cover :)

IMG_1638 (Resized).jpg

That's it for today's update.

This coming weekend we will fit the windows to the other side of the van
 
Continuing with the build, the next weekend we continued installing windows on the other side. didnt take photos, only did videos so these few photos are screenshots from the video.

attachment.jpg

attachment.jpg

attachment.jpg

attachment.jpg

Here is the video of the window work, oh and feel free to follow to see more upcoming videos --> https://www.tiktok.com/@xpeditionafr...07704732896518

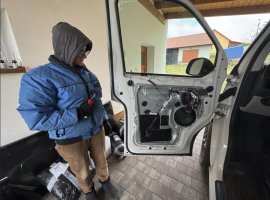
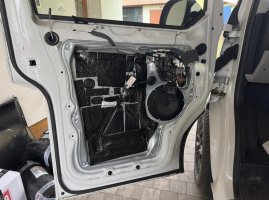
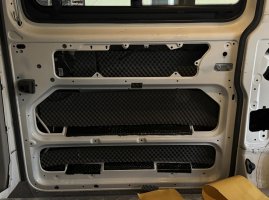
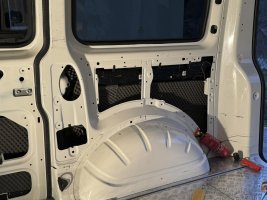
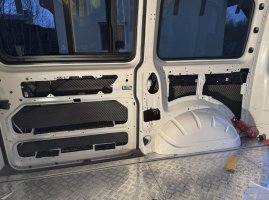
After driving the van around for a while I realised that its echo on wheels so decided to do a complete sound dampening and insulation.

attachment.jpg

attachment.jpg

attachment.jpg

attachment.jpg

attachment.jpg

So far from just doing the one side and cabin doors on both sides I can hear the difference!!!

Next we need to do the other side, floors cabin and rear, engine bay scuttle and wheel arches.

For reference, before we did any insulation and sound deadening I went for a 5 minute drive around the countryside, speeds ranging between 45km/h - 120km/h and below is a DB report as a benchmark. Will post same report when all is done as a comparisson.

attachment.png
 
This weekend we got the van back from Homologation, its now officially registered as an 8 seater passenger van! WOO! the next step is to register it as a "Campervan" with 4 seats! Almost there through the bureaucracy of EU laws. *Sigh*.

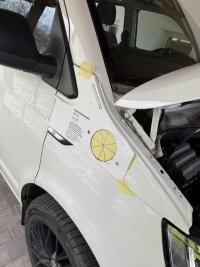
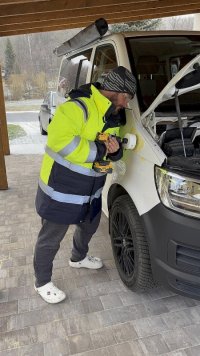
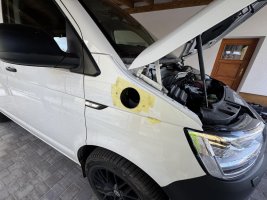
I've now been itching to get back into working on the van, all these ideas and not enough time! haha. First step was to fit that Snorkel whilst the Mrs cleans the silicone from the floor on the inside. It seems the company we used siliconed a floor under their seats to make the installation look permanent; they left these blobs of silicone that have semi dried but still soft. What a messs!

attachment.jpg

attachment.jpg

attachment.jpg

It changes the look of the van completely! don't you think?

attachment.jpg

I then started working on getting the piping to the airbox, man oh man that was a new experience for me. I completely forgot how the cold affects rubber pipes and a struggle ensued! Then it dawned upon me to put the pipes on the central heating inside the house! It was round -7 yesterday and today is a bit colder! Its real different to working on a car in South Africa with the warmth!

attachment.jpg

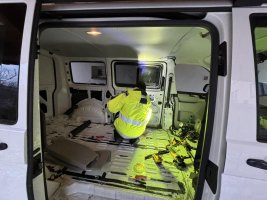
Whilst waiting for the pipes to warm up and soften up, I went to work on the inside removing the side panels, seat belts etc so that I can grind off the remains of the bulk head. This went rather quickly, sadly we didn't take any photos of this step. This will help greatly when we install the sound deadening on the floor as we can run long lengths from the front to the back. For those wondering, here in Europe the matt comes as a roll 50cm wide and 12m long... Much better than the 35cm x 35cm squares I am used to.

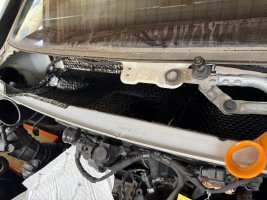
Once that was done and while I had the wipers and cover off I finished off the sound deadening on the scuttle tray, many have said this helps a little to quieten the inside from engine noise so I figured why not.

attachment.jpg

I first gave it a good proper clean with some acetone to remove any residue oil and dirt, then started to lay the mat.

attachment.jpg

Sound deadening complete!

attachment.jpg

Tried to fit the pipes again and what a difference, they all slipped right on, clamps tightened and the job was done! I didn't take a photo of the engine bay, will take today and post for reference.

It was starting to get dark so I decided to get inside and help with the sound deadening and insulation foam as we had the tailgate, left rear quarter panel and left door to complete. The Mrs was working with the sound deadening mat and I trailed behind with the insulation.

attachment.jpg

attachment.jpg

Foam installed in the Tailgate and rear quarter panel

attachment.jpg

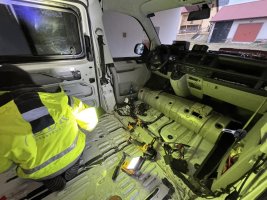
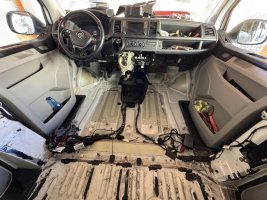
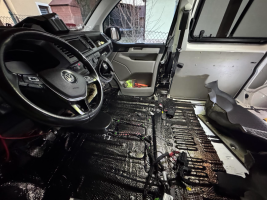
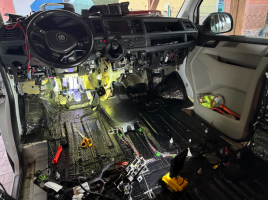
Then Sunday morning when the inlaws and all the neighbours went to church I quickly and quietly stripped the lower part of the dash and removed the cabin floor. Sunday in this part of the world is a day of rest! Thou shall not make any noise! So this is how the car stands.

Today while I am working away, the Mrs will start cleaning the cabin floor and laying the sound deadening mat. The Wheel arches will get a double layer of 2mm mat.

attachment.jpg

While I have the dash apart I will neaten up some of the wiring, run an additional USB charging plug.

Next on the list for this week is:
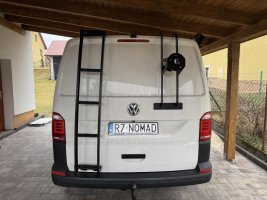
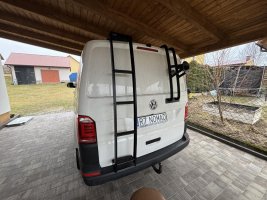
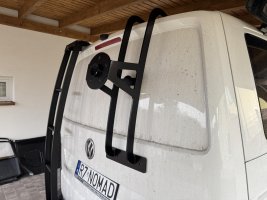
  • Modify the FrontRunner ladder to house my rear view mirror camera for a slightly off center and discreet installation. On the right side of the tailgate will install the spare wheel carrier along with stronger gas struts to lift the tailgate.
  • Install rock sliders
  • Install wheel arch trim
  • Install Larger radio up front
  • Install new 8" door speaker upgrade
On the 14th of March we will making our way to England to have the pop top tent installed, walls carpetted, Altro flooring installed and pick up our new kitchen... so time is slowly running away from us.
 
Nice work so far :thumbsup: .
I like the 'safety shoes' , working with hot metal drillings and crocs ...perfect combination :D.
You need to get something for kneeling on in the back of the van , those ribs in the floor really hurt after a while ;).
Carry on the good work and it's good to see you have the wife helping , my missus really enjoyed getting involved in building our van .

Yeah, the 'Safety Shoes' are not the most ideal but they're the only outside shoes i have at the inlaws... lol

We bought some flooring knee pads today, the foam kind as we were battling with the ribs yesterday. They certainly do hurt after a while. Im trying to involve the missus as much as I can, that way she understands the pride when showing the car off and people are admiring the end product.

Great to see a detailed build and nice one for doing the work yourself!

Thank you - we are enjoying the build! Its something different to what I am used to.

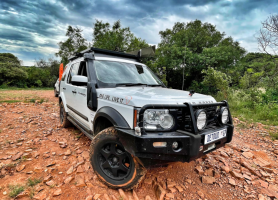
My first ever build that I did myself was this Disco 4. It went through several iterations of kit before it ended up like the photos. After 10 years of travel through Southern Africa spending 80% on dirt roads problem free it was time to trade it up for something different. Along came the Hilux

Screenshot 2025-02-17 125749.png

Screenshot 2025-02-17 125757.png

81744.jpg
 
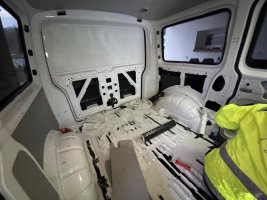
Today the missus got stuck into doing the Sound deadening inside the cabin while I was working... (Someone has to pay the bills cheesy.gifcheesy.gifcheesy.gif)

A nice double coat on the wheel arches! I think she did an outstanding job!!!!

I'm looking forward to fitting everything back tomorrow and going for a test drive with the DB meter running.

attachment.png

attachment.png

attachment.png
 
Today is a tiny little update, this past weekend we did a 1000km round trip on Saturday to pick up the inlaws' new car so didnt work on the van.. Decided that today I will fit the tailgate goodies...

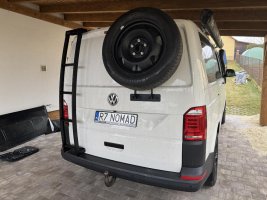
So fitted the Spare wheel carrier and the FrontRunner ladder. Next is to make a bracket for the Maxtrax mini that sit on the ladder.

(Excuse the wheels, they are winter wheels and spare is an all season spare... the BFGs are on their way!)

First up is the test/loose fit..... Struggled finding the sweet spot for that ladder hence it looking a bit wonky

attachment.jpg

attachment.jpg

attachment.jpg

All done, bolted up and fitted. Next is to adjust the heavy duty gas struts for the tailgate to hold all that weight.

attachment.jpg

attachment.jpg
 
Back
Top