Reflex Silver T28.....First van build

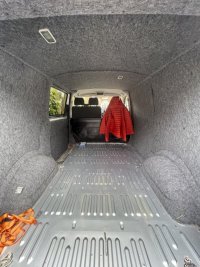
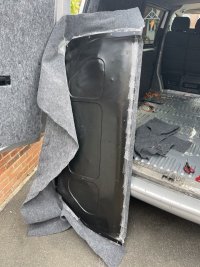
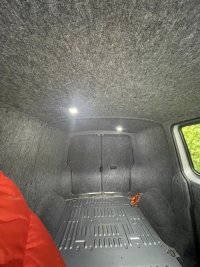
Yesterday was a good day! Re-carpeted the roof panels that I managed to do the wrong side of a few weeks back and developed a (genius if I say so myself) solution for a 3rd set of hands using a bike maintenance stand with the head removed! Went in like an absolute dream and mega happy with the result! BE2729C0-EB87-46C9-B894-5E037F54A62D.jpeg6C8A9012-1FA6-4971-9A50-497F0F3517EB.jpeg34E4670E-953A-4D46-836F-C1AFBDD4FF8E.jpeg
 
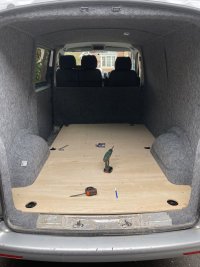
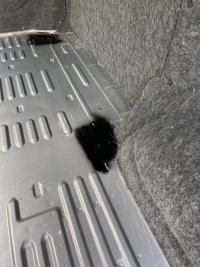
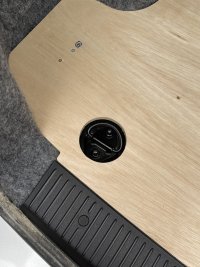
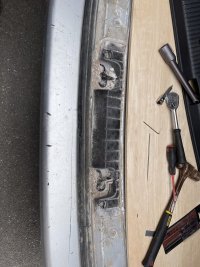
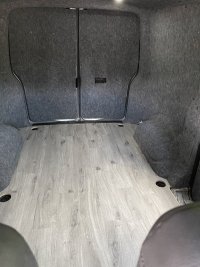
Been a busy weekend getting the floor in but super happy with how it’s turned out! Painted the tie down points and areas of the floor that are visible through the cut outs in the ply. Just need the vinyl to put down now! Fitted full width threshold and bumper cover also.

67CC6A5B-E604-47E7-854D-5E81AB60BFA9.jpeg79D77377-C02E-4039-9B61-3EB22C935EDF.jpeg6A0714E0-C27E-4DC7-83C4-A47377B5FCFC.jpegC855C7E0-E9A6-44C1-9AAF-15F14152A064.jpegDDDFE71D-44F0-47D5-8AEB-B85720EB0FD2.jpeg

A68B7BD3-BCF1-4524-B8A9-467499F17A4B.jpeg38D8E60C-E61A-42F9-9BCF-34B5B14C2046.jpeg21576882-24E7-471E-AF3D-58A2E181D902.jpeg

D684BB03-8910-4DB6-B57D-5C758BA2482E.jpeg
 
Cheers guys. It’s coming together ok

Need to start getting parts together for the comfort dash and also looking at air-con retrofit at some point.
 
Last edited:
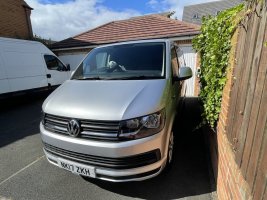
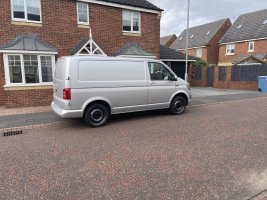
Van has been a little tired and abused last few weeks so was time for a clean, no before pictures unfortunately but I did get some nice reflections
Decided to try Megs Hybrid Ceramic Liquid Wax as didn’t have time to do a full Dodo Juice job and fair to say I’m happy with the finish, just need some rain now to see how hydrophobic it is! Time will tell!
Anyhow now for some pictures……feels like a lot of effort for a stock panel van but that will change eventually.

B975A9FC-7775-49C5-B5F8-A707EEFBC0EA.jpeg9BFA94BD-7D8B-479B-BFA5-CDC436ED20E3.jpegFD18926E-826E-44CD-9003-3781E70A6FD1.jpeg83C0A31E-9BEC-4EFD-8963-8179D167F6CA.jpegB3FB173E-4CA4-43C1-9E48-1754392C34AC.jpegF7C6EADF-301C-405C-8780-B55F77D2F325.jpeg
 
Landed a set of bargain Range Rover wheels last week so looks like it’s fine for some serious work to begin and coilovers to order!
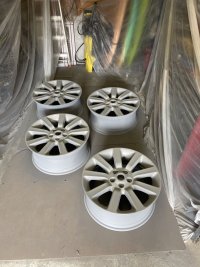
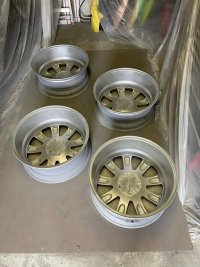
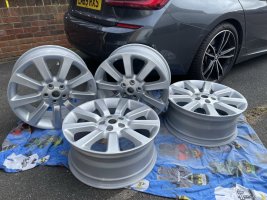
Wheels are rough as toast so need a refurb (good project for me and Finn) so had them to the blaster to get cleaned up ready for paint!

78DF42F7-D974-499A-B700-21AF2494733B.jpegF3A78166-2CF1-4872-8D11-AA5C84A8F092.jpeg8665B0F8-1491-4BAE-B5F3-504DBF5BA258.jpegBF147F7F-AF74-41C5-9C51-CC146C96C05D.jpeg9AD2BBC6-3559-4EA6-B213-83CBB125944F.jpeg
 
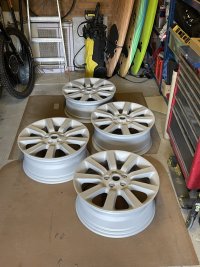
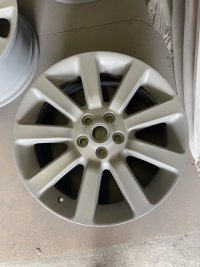
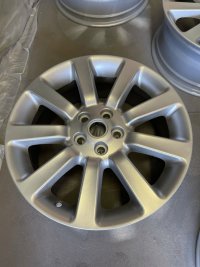
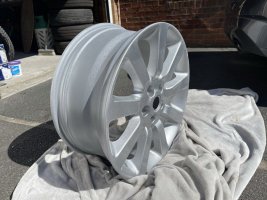
Wheels completed finally!! been a bit of an endurance task but have to say I'm happy enough with the outcome! Only thing I'm not sure of is the colour I have gone for as it has way more fleck than I expected but the dust and mess will sharp dull that down I'm sure! Not sure i have seen a T5/T6 on this style of RR wheel so be good to get some tyres on them and test fit!

First few coats of base colour onto the inner rims. Looks like the paint has shadowed here however its just the paint drying back. The end finish actually turned out really well.

IMG_1753.JPEG

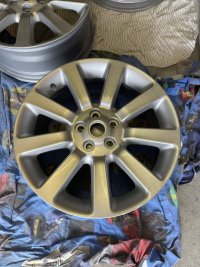
Base colour onto the face of the wheel. These are a super easy wheel to paint given the spokes taper so simple to get good coverage everywhere. I'm also dusting in the outer rim as I go here and did the same with the inner.

IMG_1760.JPEG

First couple of coats of clear. Did the inner rim one day then flipped to so the face of the wheel. Again a nice simple job and the clear takes really nicely.

IMG_2130.JPEG

Few final coats of clear. You can see the gloss starting to build now over the face of the wheel! i keep forgetting to get images of the inner and outer rim as its not as much fun ha ha!#

IMG_2136.JPEG

Outside all 4 wheels polished to remove any clear coat dusting and give the final finish. The sun came out for 3 seconds so the last image really shows how much fleck is in the paint finish!!
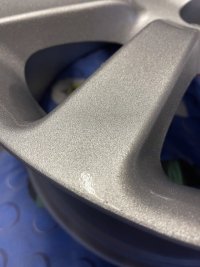
If you look closely you will see some curb rash and light damage to the rims of the bolt holes. These wheels have had a tough life and this was a light refurb so I have not used any wheel filler on the rash etc just a simple paint to get an acceptable finish. My van is no show stopper so just wanted something presentable!

IMG_2307.JPEGIMG_2312.JPEGIMG_2142.JPEG
 
Wheels completed finally!! been a bit of an endurance task but have to say I'm happy enough with the outcome! Only thing I'm not sure of is the colour I have gone for as it has way more fleck than I expected but the dust and mess will sharp dull that down I'm sure! Not sure i have seen a T5/T6 on this style of RR wheel so be good to get some tyres on them and test fit!

First few coats of base colour onto the inner rims. Looks like the paint has shadowed here however its just the paint drying back. The end finish actually turned out really well.

View attachment 170538

Base colour onto the face of the wheel. These are a super easy wheel to paint given the spokes taper so simple to get good coverage everywhere. I'm also dusting in the outer rim as I go here and did the same with the inner.

View attachment 170539

First couple of coats of clear. Did the inner rim one day then flipped to so the face of the wheel. Again a nice simple job and the clear takes really nicely.

View attachment 170540

Few final coats of clear. You can see the gloss starting to build now over the face of the wheel! i keep forgetting to get images of the inner and outer rim as its not as much fun ha ha!#

View attachment 170541

Outside all 4 wheels polished to remove any clear coat dusting and give the final finish. The sun came out for 3 seconds so the last image really shows how much fleck is in the paint finish!!
If you look closely you will see some curb rash and light damage to the rims of the bolt holes. These wheels have had a tough life and this was a light refurb so I have not used any wheel filler on the rash etc just a simple paint to get an acceptable finish. My van is no show stopper so just wanted something presentable!

View attachment 170542View attachment 170543View attachment 170545
When is it convenient for me to drop a set of Canteras off for you to do the same with. They look great.
 
When is it convenient for me to drop a set of Canteras off for you to do the same with. They look great.
Cheers mate they are far from perfect but for sure will do the job and been fun doing them with Finn........If I'm honest by the time all the paint etc is bought and you factor in the time its less money to have them coated but where is the fun in that.
 
Cheers mate they are far from perfect but for sure will do the job and been fun doing them with Finn........If I'm honest by the time all the paint etc is bought and you factor in the time its less money to have them coated but where is the fun in that.
Agreed, it was said tongue in cheek, but they they look great, including the fleck.
 
Decided the RR wheels were not what I was looking for so that’s them sold and on with the next wheel project….first few coats of high build on…..love painting wheels me!

BB468E5E-D4C5-4762-8B62-EAD0D2533A79.jpegD4306FF0-6CE1-4F3F-A349-0042A5ED3EB4.jpeg
 
  • Like
Reactions: CAB
Been a while since the last update here!

So I finished the wheels in anthracite grey to keep it subtle.

6D52B9B2-BAA6-426B-A45D-E894F5E5B143.jpeg

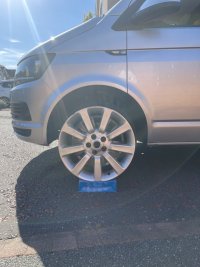
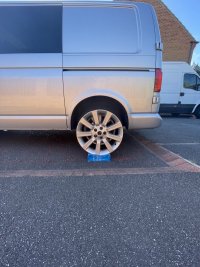
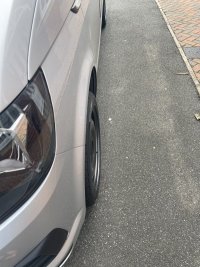
Then finally today got some rubber fitted then the wheels on the van.

A7517F36-F0C7-4715-909E-519EC48EC977.jpeg
54F99DB4-1C48-41E5-8569-34FB34F3A746.jpeg

Pretty happy with the way the front wheel sits.

A6E40F5B-7436-42DF-B0F5-2764C604A88C.jpeg

Likely going to need a 5mm spacer on the back.

E0364499-91A2-4234-8A33-2781D195C0B5.jpeg

Next it’s making a decision on lowering.
 
  • Like
Reactions: CAB
Chapeau sir!
I have nothing but admiration for someone who can undertake a project like this.
I have neither the technical ability, patience or the understanding other half to start a refurb/conversion, hence why we went for an oven ready van.

Cracking thread. :thumbsup:
 
Thanks @Cuffy

To be honest its nothing too complicate if you watch enough youtube and read advice on here. Its a long road though especially when things don't go perfectly to plan. I would always advise people to take the plunge and try something they haven't before though.....what's the worst that can happen.....
Very true. I watched YouTube when I decided that I would be a plumbing guru during the 1st lockdown and managed to replace the downstairs bathroom suite and tile it.
Still no leaks and no sliding off the pan....yet!
The only trouble with YT is they make it look to simple, what would have taken a competent individual around 2hrs, took me nearly all day.

I keep going back to the THQ headlight conversion video thinking it looks relatively easy but it scares the bejesus out of me haha!
 
Back
Top